Month: September 2026

  • The Tomato Product I Use Most: Canning Tomato Juice for Winter

    The Tomato Product I Use Most: Canning Tomato Juice for Winter

    By the end of tomato season, there is always a moment when I look at the kitchen counter and wonder how we got here.

    At first, the ripe tomatoes feel like a reward. The first few become BLTs, tomato sandwiches, chopped tomatoes beside eggs, and slices eaten straight over the sink with salt.

    Then the bowls begin filling.

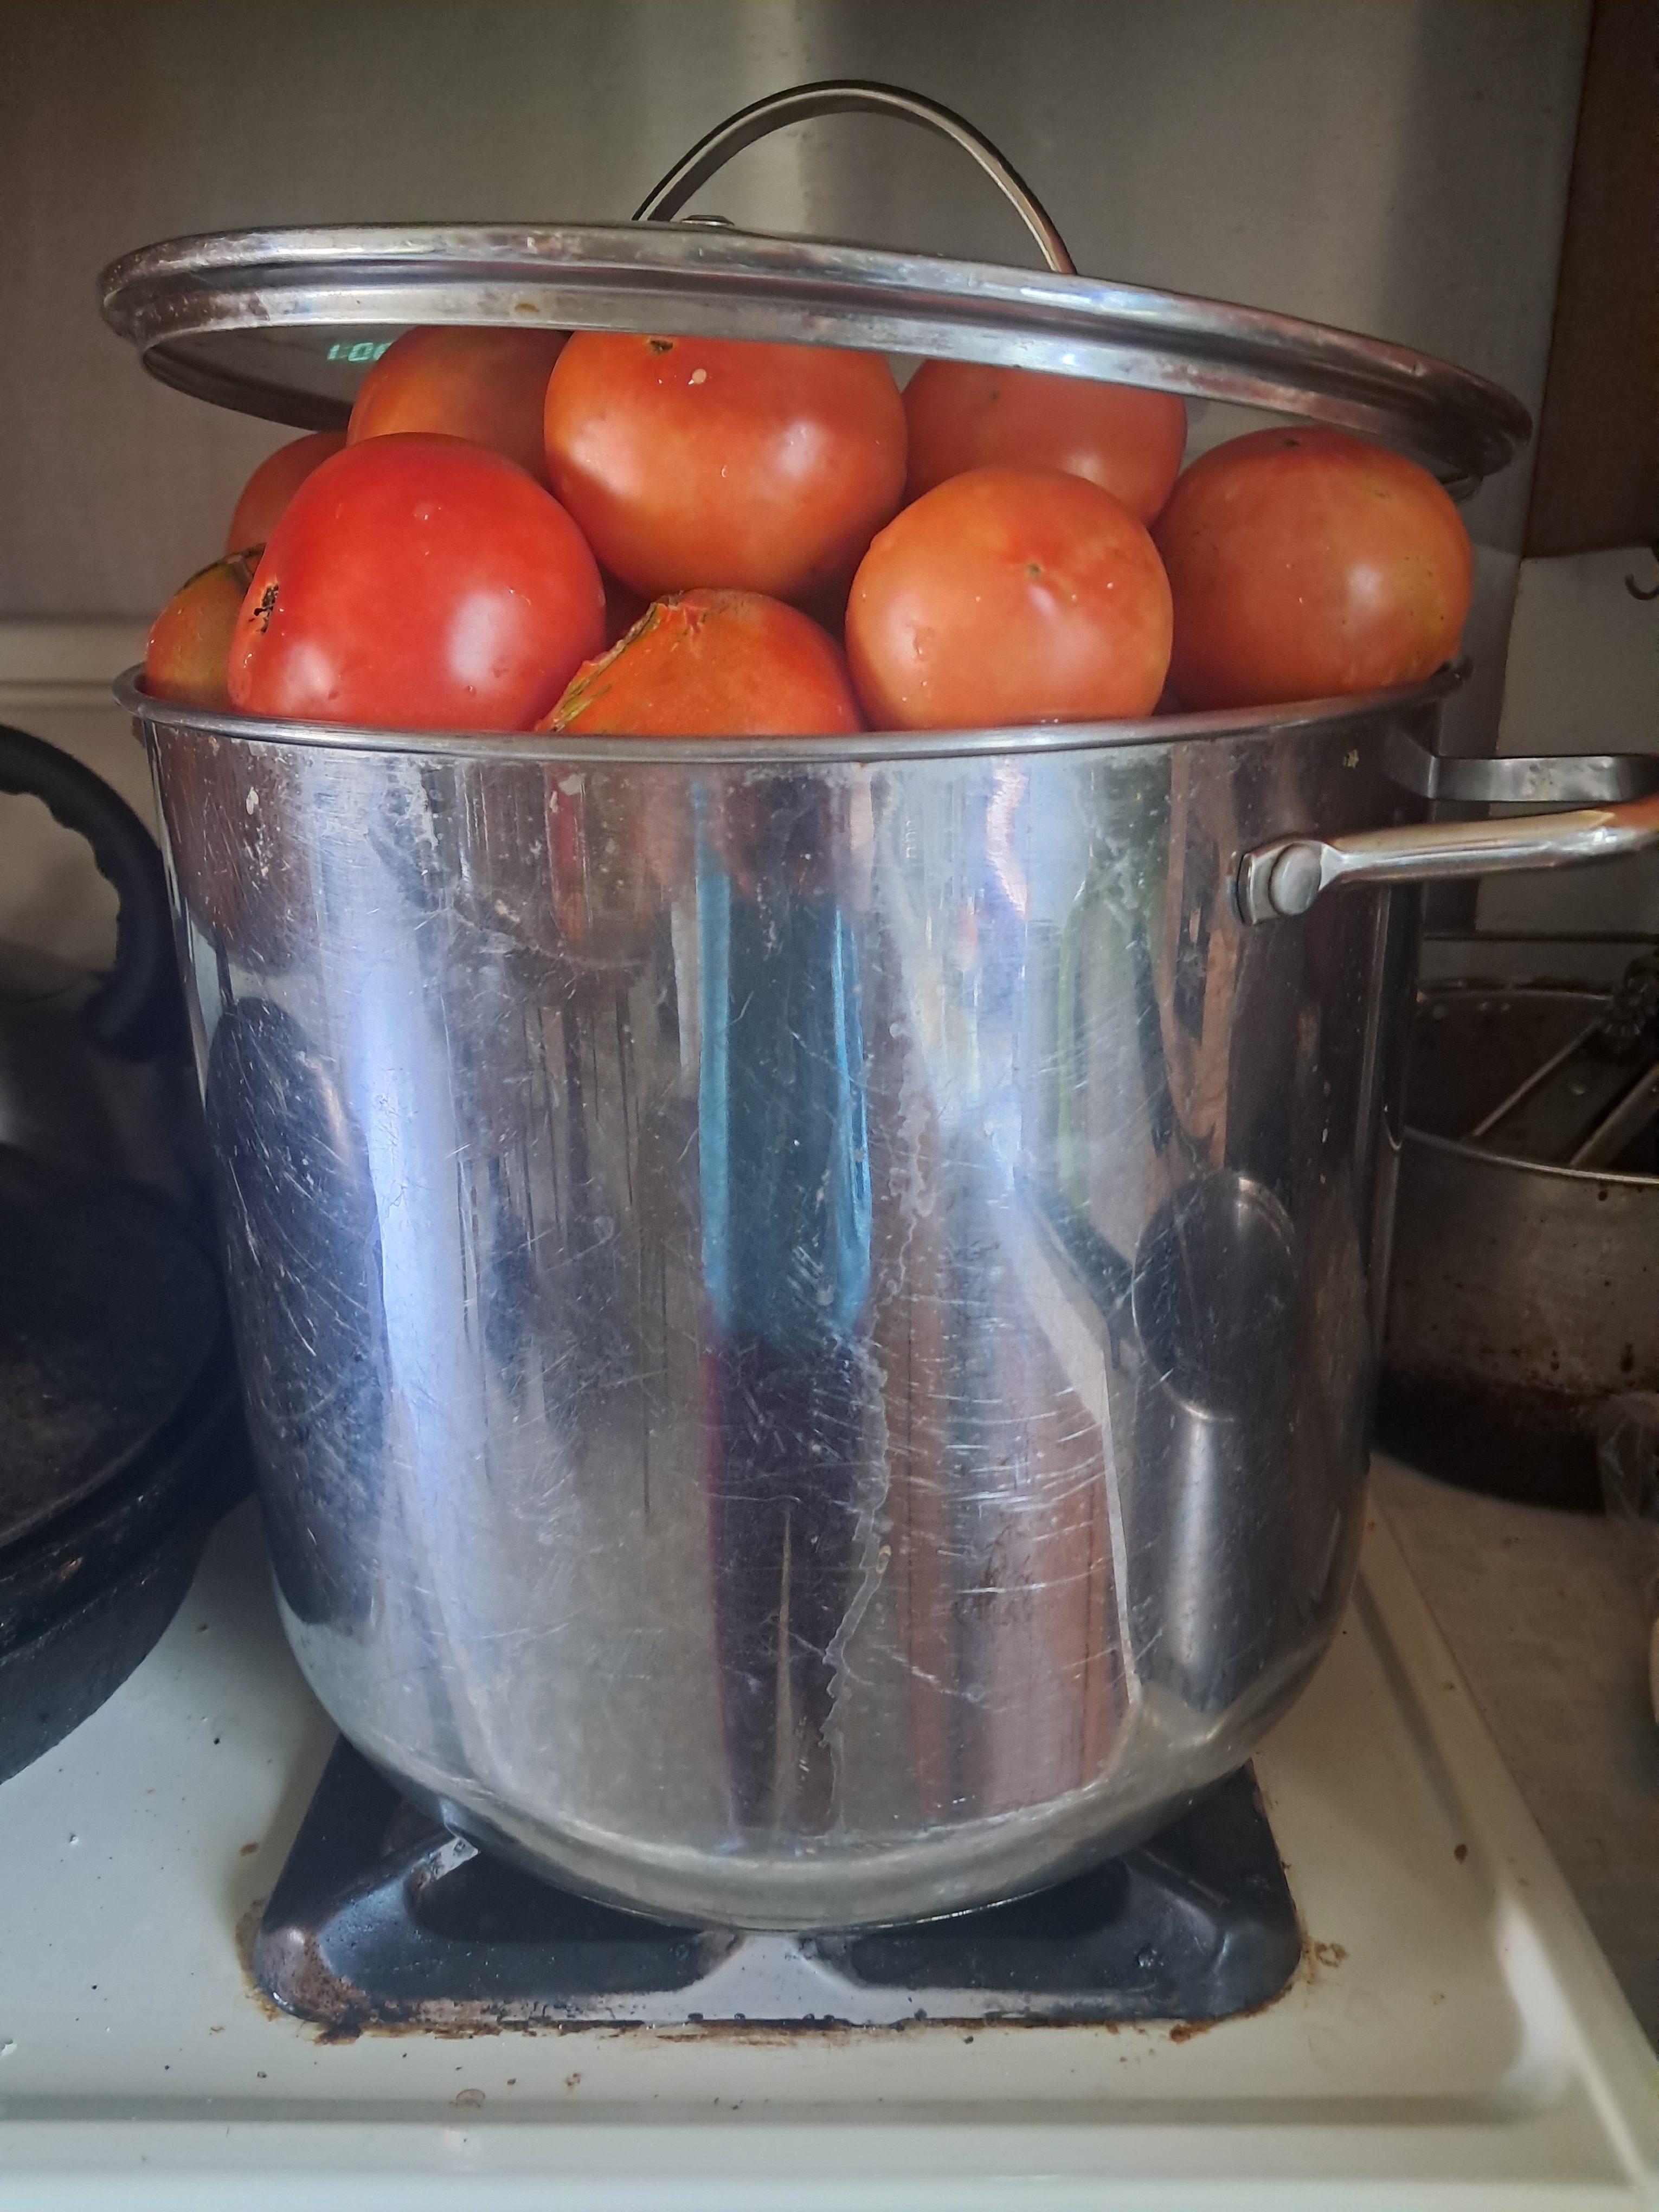
    There are tomatoes on the counter, tomatoes waiting in the garden, tomatoes that need to be picked before the weather turns, and tomatoes ripening faster than we can possibly eat them fresh.

    Sooooo many tomatoes!

    It is a good problem to have. But a tomato glut still asks the same practical question: what will you do with all of them before they go soft?

    For our family, the answer is often tomato juice. This is how I preserve tomato juice from our garden each year.

    Why I can tomato juice every year

    I make sauce too, but tomato juice may be the single most useful thing I preserve from our garden.

    We use it for:

    • Bloody Mary mix, which we make alcoholic or nonalcoholic
    • Tomato juice gently warmed with a little salt
    • Chili
    • Soups and stews
    • A base for sauce when I want to cook it down later
    • Any meal that needs a little garden-grown tomato flavor

    A shelf of tomato juice may not look as exciting as jars of salsa or thick spaghetti sauce, but it earns its space in our pantry. It is useful, flexible, and easy to turn into a meal when the garden feels very far away.

    How I make tomato juice

    I start with ripe tomatoes from the garden, picking through them carefully and setting aside any that are damaged, overly soft, or not worth preserving.

    After washing and trimming them, I heat the tomatoes until they are soft enough to run through my screw press juicer, which separates the juice from the seeds and skins.

    I have had this press for 10 years, and while I have my complaints—it is annoyingly hard to clean, and it leaks—I have not found a better setup yet. If you have a better system, tell me in the comments.

    My kids absolutely love to help: my daughter stamps down the tomato mush, and my son turns the screw-press crank.

    Here’s our setup for making tomato juice with our hand crank screw press juicer. I tend to make tomato juice outside, weather permitting, because of the messy nature of the project. My son is helping here, my daughter is nearby, fighting to use the red stamper.

    I send the pulp through twice because I want to get as much juice as is practical before moving on to the next step. Then I heat the juice, ladle it into jars, and preserve it for the pantry.

    My tomato juice canning notes
    I add 1/2 teaspoon citric acid powder to each quart jar. I also add 1 teaspoon of salt per quart for flavor. Then I fill the jars with hot tomato juice and process quart jars in a boiling-water canner for 40 minutes. This is the process I use in my southeastern Wisconsin kitchen, at roughly 900 feet above sea level. Processing time depends on altitude, so always consult a current tested preservation source for your location.

    Water bath canning, I plan to post more about the process of water bath canning in the future!

    The National Center for Home Food Preservation and Wisconsin Extension recommend acidifying tomatoes because their natural acidity can vary. Their guidance specifies 1/2 teaspoon of citric acid per quart for acidification. For tomato juice, use current tested processing directions that match your jar size, product, and altitude.

    Food-preservation note
    This post shares my household process and the ways we use our tomatoes. It is not a substitute for an up-to-date tested canning recipe. Use sound, ripe tomatoes, follow current Extension or National Center for Home Food Preservation guidance, and adjust processing time for your altitude.

    When I want a thicker sauce

    I also make and preserve tomato sauce, especially when I know I want something ready for pasta, pizza, or another meal that benefits from a thicker base.

    This year, I have been experimenting with a small shortcut before I press the tomatoes. After heating them until they are soft and mushy, I use my soup ladle almost like a little weir, collecting some of the clear tomato water that rises around the cooked pulp.

    I set that watery liquid aside rather than adding it to the sauce, leaving me with a thicker tomato base before I even begin pressing. That means less time simmering sauce on the stove and less heat filling the kitchen during an already warm stretch of late summer.

    It is not a fancy tool or a perfectly measured process. It is simply a small kitchen experiment that helps me work with the harvest more efficiently.

    Because tomato sauce is thicker than juice, I follow a current tested tomato-sauce recipe when I can it rather than using the processing directions for tomato juice.

    Turning leftover pulp into tomato powder

    After I have run the tomatoes through the screw press twice, I am left with pulp.

    I hate to waste anything that still has flavor after the work of growing, harvesting, washing, heating, and pressing all those tomatoes. So I spread the remaining pulp in my dehydrator and dry it until it is thoroughly dry and crisp.

    Tomato pulp from the screw press, which I dry in the dehydrator and grind into tomato powder.

    Once it is dry, I grind it into tomato powder.

    Tomato powder is one of those pantry ingredients that does not look like much but makes all kinds of food better. It adds concentrated tomato flavor and umami without adding the liquid that tomato juice or sauce would bring.

    I especially like it in jambalaya, but it is useful anywhere I want tomato flavor without thinning out the dish. I also add it to soups, rice dishes, seasoning blends, and sauces when something needs a little more depth.

    The garden gives me tomatoes. The press gives me juice. The dehydrator gives me powder. By the end, I have used nearly every useful part of the harvest.

    For a kitchen-friendly reference with preparation, temperature, drying time, storage, and rehydration charts, see my Garden Drying Guide. Thank you for supporting my mission to help aspiring homesteaders gain the knowledge they need.

    When freezing is an option

    Sometimes, especially toward the end of the season, I have too many other kitchen projects happening at once. Yesterday, for instance, I was making pumpkin muffins for the kids to take to school, venison jerky, fruit leather, and another batch of hot sauce. I did not have the bandwidth for one more preservation project.

    So I cleaned the tomatoes I harvested and placed them in a gallon-size freezer bag to handle later. They will be softer when they thaw, but they will still be perfect for cooked sauces, soups, and juice. I talk more about freezing tomatoes here: How to Freeze Peppers, Tomatoes, Zucchini, and Berries for Later.

    Freezing tomatoes for a future winter project.

    This winter, when I have more time, I will pull them out and turn that frozen harvest into juice, sauce, or soup.

    Too much garden produce arriving at once?
    My free Grow What You’ll Use planner helps you decide what to eat fresh, freeze, dehydrate, store, share, or use up this week—before the harvest gets ahead of you.

    What I preserve most

    I have tried other tomato projects too, including ketchup. But most years, I come back to the things our family actually reaches for: juice, sauce, and powder.

    The work is still significant. Tomato season means sticky counters, splatters on the stove, jars cooling on towels, and the smell of cooked tomatoes settling into the kitchen.

    But when snow is on the ground, I can open a jar for chili, warm some for my husband with salt, or reach for tomato powder when a pot of jambalaya needs more depth. Those are the things that make the work feel worth it.

    The best preservation project is not always the most impressive one. It is the one your household will actually use.


    A question for readers

    What tomato product does your household use most in winter? Do you can sauce, make juice, dry tomato powder, freeze tomatoes, or preserve something else entirely?

    If this post helped you think through your own tomato glut, I would be grateful if you would like and share it with another gardener, homesteader, or friend whose kitchen counters are overflowing right now.

    Read More Here: How to Make Lacto-Fermented Dill Pickles in a Crock
  • From Garden to Market: Bringing Garden Heat to Kekoskee River Day

    From Garden to Market: Bringing Garden Heat to Kekoskee River Day

    A bottle of hot sauce does not look like much on its own.

    It is glass, a label, a bright red-orange sauce, and a small collection of ingredients. But when that sauce began as peppers growing in our garden, then became an idea, then a batch fermenting on my counter, then something I tested, bottled, labeled, and set out on a table for strangers to taste—it felt like more than a bottle of hot sauce.

    It felt like the beginning of something.

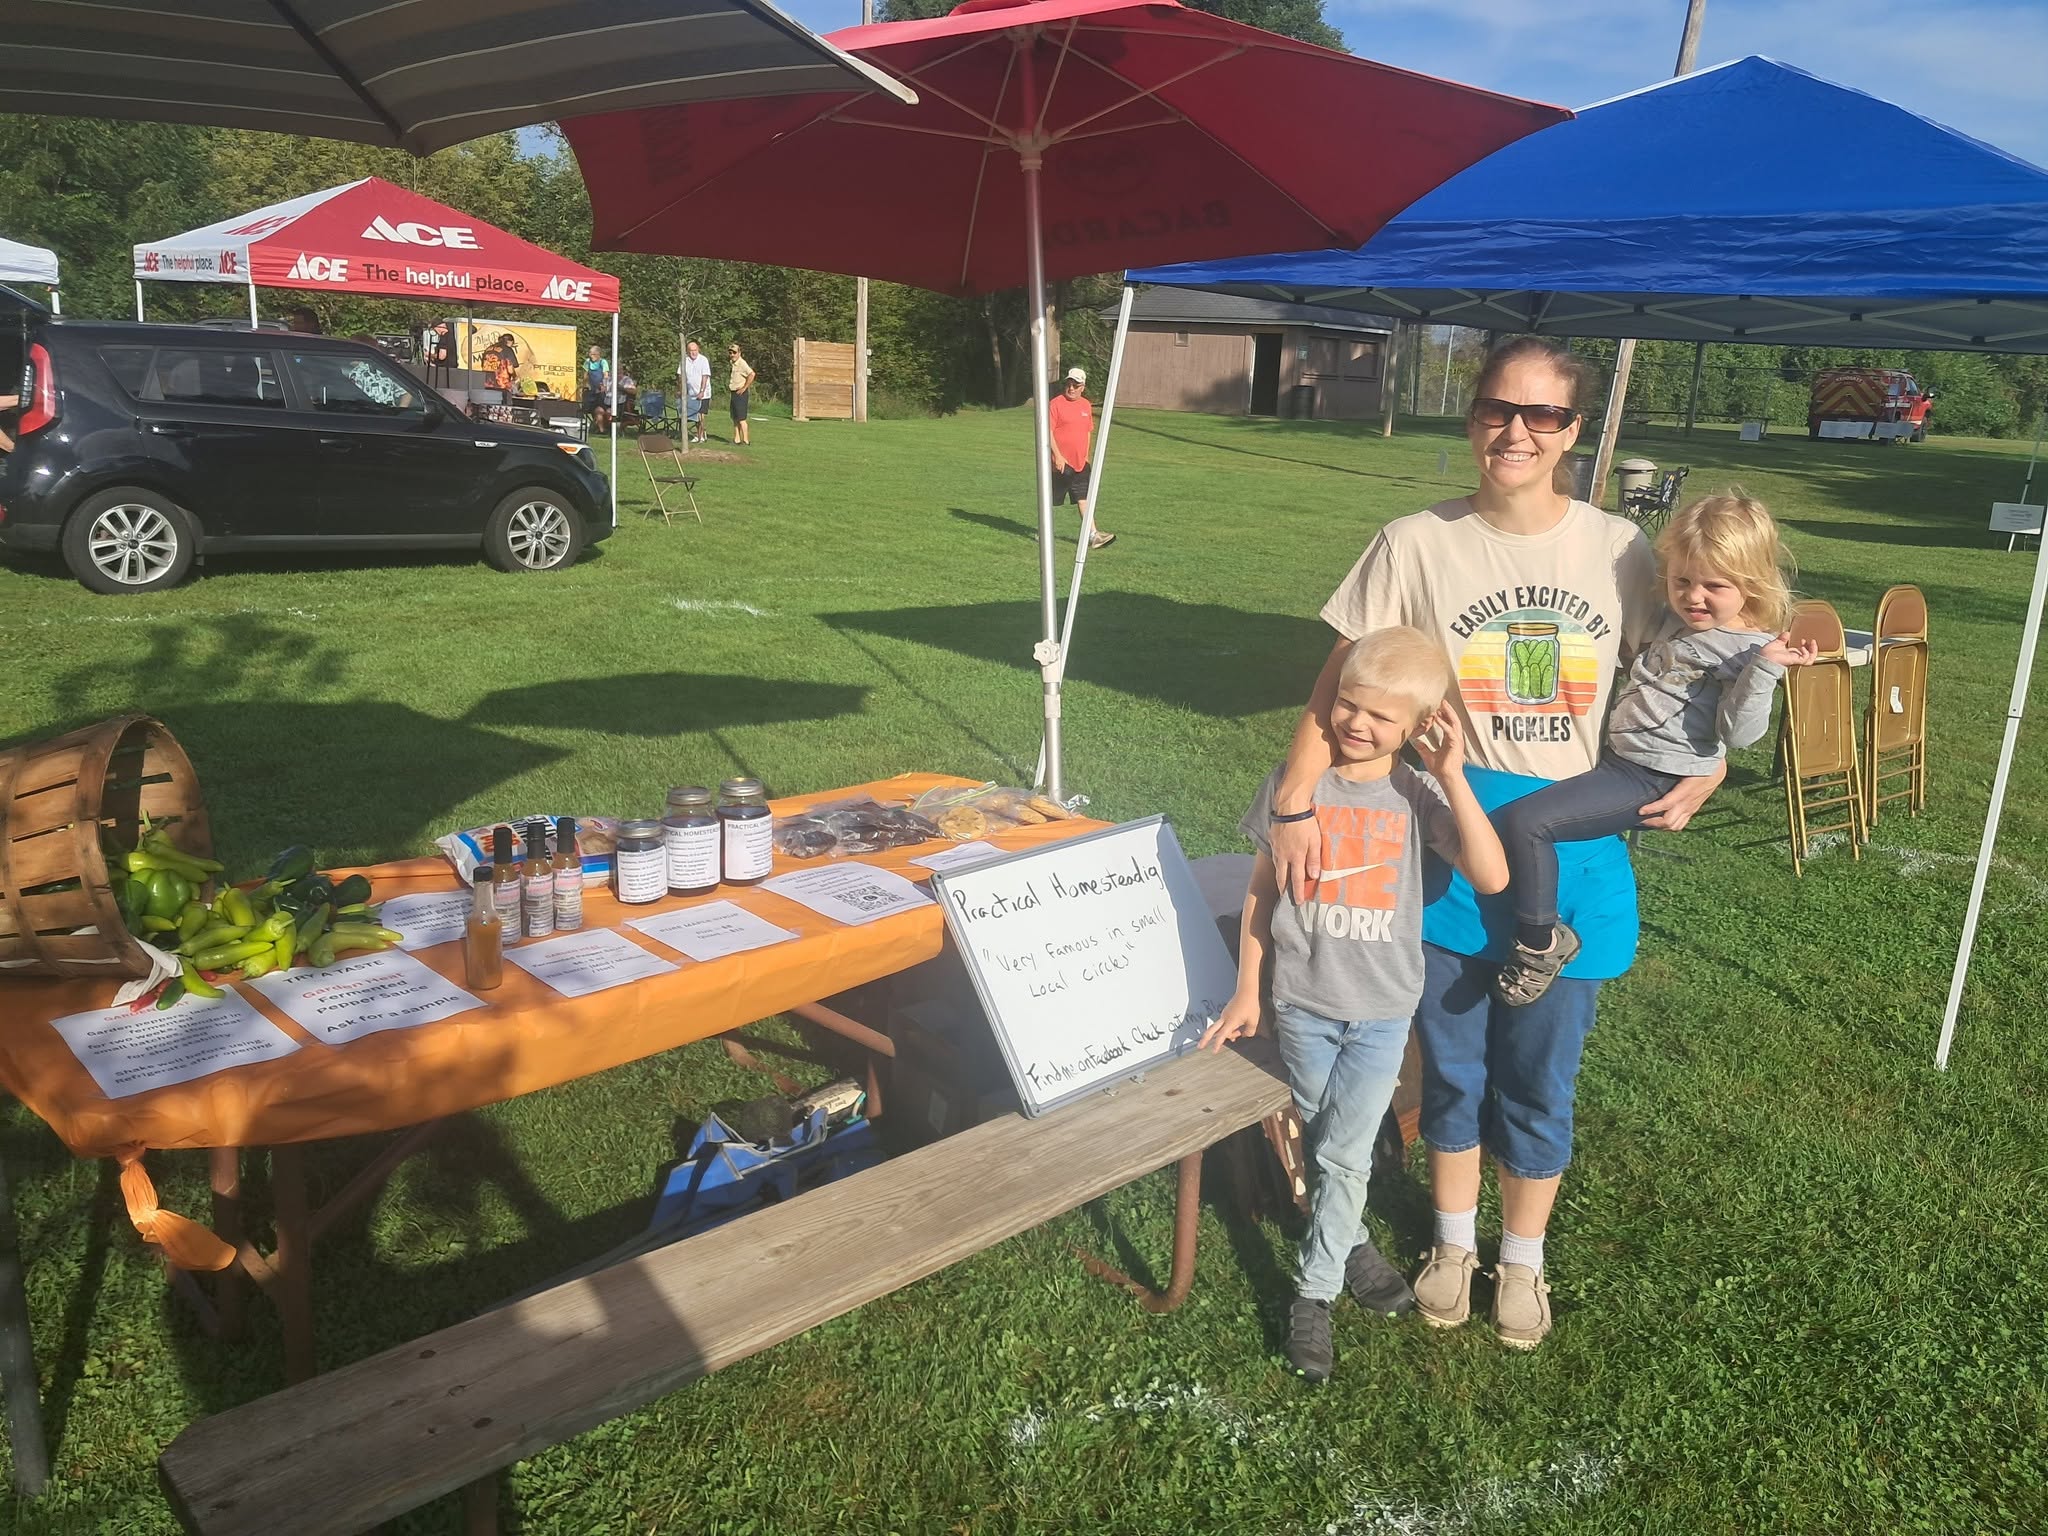
    Last weekend, we brought Garden Heat hot sauce, maple syrup, and homemade baked goods to Kekoskee River Day, a small community event in Kekoskee, Wisconsin. It was the kind of day built around food, conversation, familiar faces, and the pleasure of being outside near the river.

    I was nervous. I was excited. I was not sure what people would think.

    But I packed up the table, arranged the bottles, set out the maple syrup and baked goods, and waited to see whether anyone would stop.

    They did.

    A small-town market day

    Kekoskee River Day was the kind of event that reminds me why local gatherings matter.

    People walked through River Park, visited with neighbors, watched the activity around the river, and enjoyed a little piece of community life. I met people who wanted to talk food, gardens, cooking, hot sauce, maple syrup, tomato preservation, and all the practical questions that come up when we are trying to make the most of what grows around us. I also caught up with neighbors, friends, and everyone in between.

    There is something different about handing someone a product you made yourself.

    They can see the label. They can ask how it tastes. They can ask what is in it. They can tell you whether they like it. They can take it home and make it part of their own meals.

    That kind of feedback is more valuable than a guess made from my own kitchen table.

    Bringing Garden Heat into the world

    Garden Heat began with peppers from our homestead and a desire to make something useful from what we grow.

    It is a lacto-fermented hot sauce, made in small batches and tested before bottling. The flavor is bright and garden-forward, with a slow-building kick that tends to arrive at the end.

    One of the funniest lessons from the event was realizing that “mild” is relative.

    A few people said Garden Heat was mostly mild, with a pleasant little kick at the end. Others found it far too spicy. Living in Wisconsin, I have learned that a person’s definition of spicy can vary wildly from one table to the next.

    That is not a bad thing. It is useful information.

    It tells me that Garden Heat may be approachable for people who enjoy a little warmth in their food while still offering enough of a kick for people who want to know they are eating hot sauce. It also gives me better language for describing it to future customers: a garden-fresh sauce with a slow-building kick.

    People asked what they could put it on, too. My answer is almost anything that could use a little bright, garden-grown heat: eggs, tacos, grilled meat, chili, soup, breakfast potatoes, or a sandwich that needs waking up.

    An unexpected visitor

    Kekoskee River Day was especially memorable because an episode of Mad Dog & Merrill’s Midwest Grill’n was filmed nearby. The event itself included local vendors, food, entertainment, and the show’s taping in River Park.

    I was set up near the activity, which added a little extra excitement to the day. Then Mad Dog stopped by my table and purchased a bottle of Garden Heat.

    I am not pretending that one sale makes a business. But after all the growing, chopping, fermenting, testing, bottling, labeling, worrying, and hoping, it was a small moment that meant a great deal.

    Someone known for food and grilling saw my little bottles on the table and decided one was worth taking home.

    That is the kind of encouragement I will remember.

    During filming, Mad Dog & Merrill mentioned several times that the Kekoskee episode is expected to premiere on Sunday, October 11. If you watch local Wisconsin television, you may see me in my “Easily Excited by Pickles” shirt, acting a little too enthusiastic in the audience.

    What the day taught me

    I did not sell out, and that is okay. I did make sales, including seven bottles of Garden Heat and several jars of maple syrup. But the most valuable part of the day was watching people stop, ask questions, taste the sauce, share their opinions, and talk about what they were growing and preserving at home.

    The event reminded me that a first local market is not only about whether every product disappears from the table. It is about paying attention.

    I learned what people are curious about.

    I learned how people describe the heat level.

    I learned which products draw people over.

    I learned that baked goods can make a table feel welcoming.

    And I heard a question more than once that has stayed with me: What do you do when you have too many tomatoes?

    That question became the inspiration for another post, because this is how I hope this little project grows. A conversation at a local event becomes a useful idea. A useful idea becomes a blog post. A blog post may help another gardener or cook facing the same problem.

    That is community, too.

    I came home with less product on the table and something more useful than a perfect sellout: proof that people were willing to stop, taste, ask questions, and take a small piece of our homestead home with them.

    Garden Heat is still a small experiment. But it is becoming a real one.

    It is part of a larger hope we have for this place: to grow food, make useful things, share what we learn, and build something our family can keep developing over time.

    For now, that looks like peppers in the garden, maple trees tapped in the spring, bottles of sauce on a table beside a river, and the people who pause long enough to say, “Tell me about this.”

    That is a beginning worth celebrating.


    Local availability: Garden Heat is a small-batch, lacto-fermented hot sauce made from peppers grown on our homestead. If you are local and interested in trying a bottle—or purchasing our maple syrup—please send me a message.

  • More Than My Scars: A Story of Burn Recovery and Healing

    More Than My Scars: A Story of Burn Recovery and Healing

    Content note: This post includes a personal account of a severe burn injury, hospitalization, grief, and trauma recovery.

    To protect the privacy of people I love, some identifying details and timelines have been softened or omitted. The emotional truth of this story remains unchanged.


    This story has been sitting unfinished for a long time. Watching people I love face an unimaginably difficult season with courage has reminded me that sharing hard-won hope can matter. This is mine.


    The Moment Everything Changed

    One afternoon, when I was seventeen, an ordinary day turned into a nightmare.

    One second, I was near a smoldering fire. The next, there was a blinding flash: heat, light, and instinct all at once. I threw my arms in an “X” to shield my face.

    At seventeen, life is supposed to be about beginnings—graduations, friendships, summer plans, and dreams for the future. Instead, I was on fire.

    The flames crawled up my arms and clung to my skin. I stumbled, frantic to get away from them, but there was no way to run from something that was already on my body.

    A voice cut through the chaos: “Stop! Drop! Roll!”

    I hit the ground and rolled from cool grass onto rough asphalt until the flames sputtered out. When I stood, I tore off my smoldering shirt. The skin on my arms and chest was already changing before my eyes.

    In the moments that followed, I did not yet understand the extent of my injuries. I did not think I needed to go to the hospital. I was far more worried about a school assignment due the next day that I had not yet started.

    The people around me insisted that I get medical care.  I complied.

    As we drove toward the emergency room, the pain started to feel as though thousands of needles were pressing into my skin at once, stealing my breath. Cold towels were the only relief anyone could offer, and even they barely touched it.

    My vision blurred. A high ringing filled my ears. I apologized repeatedly for being careless, but my voice sounded far away, as though it belonged to someone else. My body shook uncontrollably. The burns were only part of what was happening; shock, fear, and pain were beginning to take over.

    When I Understood

    At the emergency room, I learned that I had second- and third-degree burns on my arms and chest. I was given morphine for the pain, then told I would be transferred to a specialized burn unit about an hour away.

    Until that moment, I had not fully understood how serious this was. I had about two weeks left in my junior year of high school, and I was still thinking in the small, ordinary terms of the life I had been living only hours earlier. I was thinking about the unstarted assignment due the next day. I was thinking about school.

    But a transfer to a specialized burn unit meant this was bigger than an emergency-room visit. I understood, all at once, that I was not going to school the next day. I was not going to finish my junior year the way I had expected. The school assignment did not matter anymore.

    I was badly hurt, and my life had just changed.

    Morphine softened the sharpest edge of the pain, but it also pulled me away from myself. The burn unit blurred at the edges. Colors faded. Sounds turned to echoes. For a while, the terror receded enough that I laughed deliriously as I drifted in and out of sleep.

    The next morning, I decided I did not want more morphine. Within hours, I fully understood what that meant. The pain returned unfiltered. My skin felt stretched and inflamed, and every movement sent a fresh wave through the burned tissue. My stomach rebelled. I shook, retched, and fixated on the memory of relief.

    The days that followed became a blur of treatments, visitors, pain, and urgency. With my skin so badly damaged, infection was a constant concern. Real flowers and stuffed animals were not allowed because of the dust and pollen they could carry, so loved ones brought cards and artificial flowers that could safely brighten my room.

    While my friends prepared for finals and summer break, they visited and brought well wishes. My teachers gave me the small comfort of knowing I had passed my junior year of high school, so the unstarted assignment really did not matter anymore. Friends and family visited, bringing laughter and a little sense of normalcy when I felt anything but normal.

    A few days later, doctors recommended skin grafts. They would take paper-thin skin from my thighs and use it to cover the deepest injuries on my arms. The donor sites would become new wounds—wide areas of raw skin that required their own painful care.

    I was given meaningful choices in my treatment, including how to manage the burns on my chest and torso. I chose a slower healing process there because it was expected to result in softer scars.

    During my hospital stay, my family also experienced another loss. I had to make a difficult decision about whether to delay surgery to attend a family funeral. In the end, I chose surgery. Sometimes, I still wonder whether it was the right call.

    After surgery, I was weak enough to need a blood transfusion. The grafts required cleaning, dressings, monitoring, and physical therapy almost immediately. Healing skin tightens as it closes. If I did not stretch through the pain, my arms and chest could stiffen and lose movement.

    Bit by bit, I regained small pieces of freedom. One day, desperate for fresh air and sunshine after nearly two weeks inside, I slipped outside to a nearby beach in my hospital clothes. I probably was not very inconspicuous, but for a little while, I felt something like myself again.

    Leaving the Hospital

    The night before I left the hospital, I wandered the halls as I often did. I entered a visitor room and sat on a hard-backed vinyl chair.

    The room was silent except for the distant hum of fluorescent lights and muffled footsteps in the hallway. I could smell the faint antiseptic tang that seemed to cling to every hospital surface. Outside the window, the world moved forward.

    Inside, a swirl of emotions threatened to overtake me as I stared at my bandaged arms.

    The hospital had become the place where my body was kept safe. Leaving it meant carrying the evidence of what had happened into the rest of my life.

    What if the scars never faded? What if no one could look past them? What if I could not look past them?

    My mind replayed the accident on a loop. If only I had been more careful. I cried quietly in that vinyl chair, terrified not only of pain, but of the person I thought I might become.

    After 18 days in the hospital, I was finally allowed to go home. My family went to great lengths to help me readjust to a familiar but newly changed environment.

    On my first night home, my family planned a quiet movie night. We laughed together and created a memory I still treasure. The people around me made sure our home was stocked with the high-protein food and supplies I needed to rebuild my skin. People in my community also found ways to welcome me home and remind me that I was not alone.

    Learning to Heal

    Coming home introduced a series of new obstacles. Open wounds made cleanliness a constant concern. To reduce bacteria near my unhealed chest injuries, I meticulously cleaned the shower before I cleaned myself.

    The itch of healing skin became a deep, maddening crawl beneath the surface. The urge to scratch was overwhelming, but I knew that giving in could tear fragile new skin and set me back weeks. Even with prescribed antihistamines, it could become all-consuming.

    This, too, subsided over time.

    About a month after returning home, I had my high school senior pictures taken. Not wanting to change my personal style for that important event, I wore a lower-cut shirt that exposed the ruby-red scars on my chest.

    A casual conversation about injuries unexpectedly opened the psychological wounds again. I began to cry, and all I wanted was to disappear into the floor. In that moment, I wondered whether I should have hidden my scars—not for my own comfort, but to spare someone else from discomfort.

    I struggled to reacclimate to my former life throughout the summer. I would otherwise have spent that time working on the family farm, hanging out with friends at the local pool, and attending bonfire parties. Now, I was either unable or uncomfortable participating in those activities.

    Even simple tasks that had once been automatic required emotional support. Thankfully, my friends showed up with comfort and patience. They planned movie nights, sat with me by the pool, and helped me navigate the ordinary things that no longer felt ordinary.

    Living With My Scars

    At seventeen, self-image is fragile. I returned to school that fall with a custom compression top and sleeves that I wore daily, even during the heat of early fall. I applied scar-reduction oil and lotion almost obsessively.

    As the school year continued, though, there were moments when I was so engrossed in schoolwork and friends that I briefly forgot about my scars. There were even a few times when I went out in public without my compression armor.

    I told myself that my friends accepted me because they knew me before the accident. They knew my scars were not my defining feature.

    The first anniversary of the accident approached, and I remained fixated on the event, making sure I was not home at the exact time it happened. Shortly afterward, I celebrated my high school graduation.

    I started college that fall, wondering how my scars would affect my ability to make friends or find a significant other. I worried they would be the first thing people noticed about me, overshadowing everything else.

    Instead, new friendships brought an unexpected sense of perspective. I met people with many different experiences, hardships, and emotional wounds. I even connected with other burn survivors, and they helped me understand that I could support others while they supported me.

    Eventually, I met someone who approached my scars with quiet acceptance. He never made me feel as though I needed to cover up, explain myself, or apologize for my appearance. He later became my husband.

    My high school friends, college friends, and the people who loved me helped me realize that what truly matters is the connections we build and the courage we show in being ourselves.

    What Healing Looks Like Now

    As each anniversary passed, I came to understand that the accident affected more than just me. The people who loved me were carrying their own memories of that day, too.

    Over time, the anniversaries became easier. I have now lived with my scars longer than I lived without them. Time has a way of healing things, smoothing out the bumps and fading the intensely red scars.

    I recently passed another anniversary of the accident and thought about it only once in passing.

    At times, I am still reminded of the trauma. Certain movies, television shows, or someone acting carelessly around a fire can trigger an involuntary reaction where I am no longer fully in the present. Panic sets in, and only the comfort of a loved one or my own deep breathing can calm me down.

    These moments have become less frequent as time moves forward.

    What I’d Tell My Younger Self

    I wish I could sit with my overwhelmed seventeen-year-old self, crying in the visitor room of the hospital that night.

    If I could, I would tell her that she was still loved. Her family and friends would still accept her and want to spend time with her. She would make new friends who would see past her scars and remain in her life many years later.

    She would find a life partner who would care for her in ways beyond her imagination. Together, they would build a beautiful family.

    The scars would fade, never fully disappearing, but the healing process would fundamentally change her for the better. The experience would force her to confront pain, vulnerability, and uncertainty directly. She would emerge from despair more patient, empathetic, and resilient—full of strength she never knew she had.

    The People Who Carried Me

    I share this story to thank the people who carried me through it.

    Family, friends, teachers, medical professionals, and loved ones showed up for me in ways I will never forget. Their kindness gave me room to heal, and their steady presence reminded me that I was still worthy of love and belonging.

    Now, years later, I run my fingers over faded scars and smile at my children playing in the yard. The memory of pain is still there, a quiet echo, but it no longer rules my life.

    My scars are part of my story, but they are not the whole story. I am more than what happened to me. I am who I have become.

    A Note to Readers

    Stories are one way we remind one another that we are not alone. If this one resonates with you, you are welcome to share a thought in the comments—or pass it along to someone who may need it.

    For Anyone Still Healing

    If you are reading this and facing your own battle, please know that you are not alone. Healing is not a straight line, but it is possible. There is life, and even joy, on the other side of pain. Time has a way of healing even the most painful things.

    Read More Here: Wooden Cross Necklace Survived Fire, Lost at Super 8

  • Garden Heat at Kekoskee River Day 2026

    Garden Heat at Kekoskee River Day 2026

    I am excited to bring Garden Heat to Kekoskee River Day on Saturday, September 12, 2026!

    I plan to be set up and ready to start selling by about 9:00 a.m. at Kekoskee Village Park. I will be there while supplies last.

    What’s Happening at River Day

    Kekoskee River Day will have plenty going on throughout the day. Mad Dog & Merrill will be filming their Midwest Grillin’ show on site beginning around 10:00 a.m. The event will also include a display of Native American artifacts, local crafts and vendors, and live music following the filming.

    It is a fun opportunity to spend the day in the park, enjoy the activities, and support local vendors.

    What I’ll Have for Sale

    I will have a small selection of homemade goods available, including:

    • Garden Heat, my small-batch lacto-fermented hot sauce
    • Maple syrup, produced in small batches on our property
    • Fresh baked goods

    I will have limited quantities of Garden Heat available, so if you have been wanting to try it, I encourage you to stop by early.

    If you are interested in how we make our maple syrup, you can also read Homestead Maple Syrup Making: Sugar Shack to 66° Brix Gold.

    About Garden Heat

    Garden Heat starts with garden-grown peppers and a lacto-fermentation process that develops its tangy flavor before the sauce is bottled.

    If you would like a closer look at the general process behind lacto-fermenting vegetables, you can also read my recent post, How to Make Lacto-Fermented Dill Pickles in a Crock. While the finished product is different, the same basic fermentation principles are at work.

    An Invitation

    I will be offering hot-sauce samples, so please feel free to stop by and say hello—even if you are simply curious to taste Garden Heat or learn more about what I am making. Your support and encouragement mean a lot as I take this next step.

    I am excited to keep building a business around the food we grow, preserve, and make at home. If you are coming to Kekoskee River Day, I would love to see you there!


    If you are planning to attend Kekoskee River Day, what are you most looking forward to seeing or doing?

    If you know someone who will be at Kekoskee River Day, I would be grateful if you shared this post and helped them find my booth.

    Read More Here: Buying Meat from a Farmer: A Complete Guide to Bulk Meat, Freezers, and Butchers

  • How to Make Lacto-Fermented Dill Pickles in a Crock

    How to Make Lacto-Fermented Dill Pickles in a Crock

    Jump to Recipe

    Every summer, there comes a point when the cucumber patch stops being charming and starts producing faster than we can reasonably eat.

    At first, the cucumbers become snacks, salads—because, Midwesterner at heart, I still think they are excellent dipped in ranch dressing—and something to slice alongside dinner. Then the counter begins to fill up. A few cucumbers become a pile, and suddenly it is time to decide what to do with them before they grow too large, soften in the refrigerator, or get lost behind the milk.

    That is when I make crock pickles.

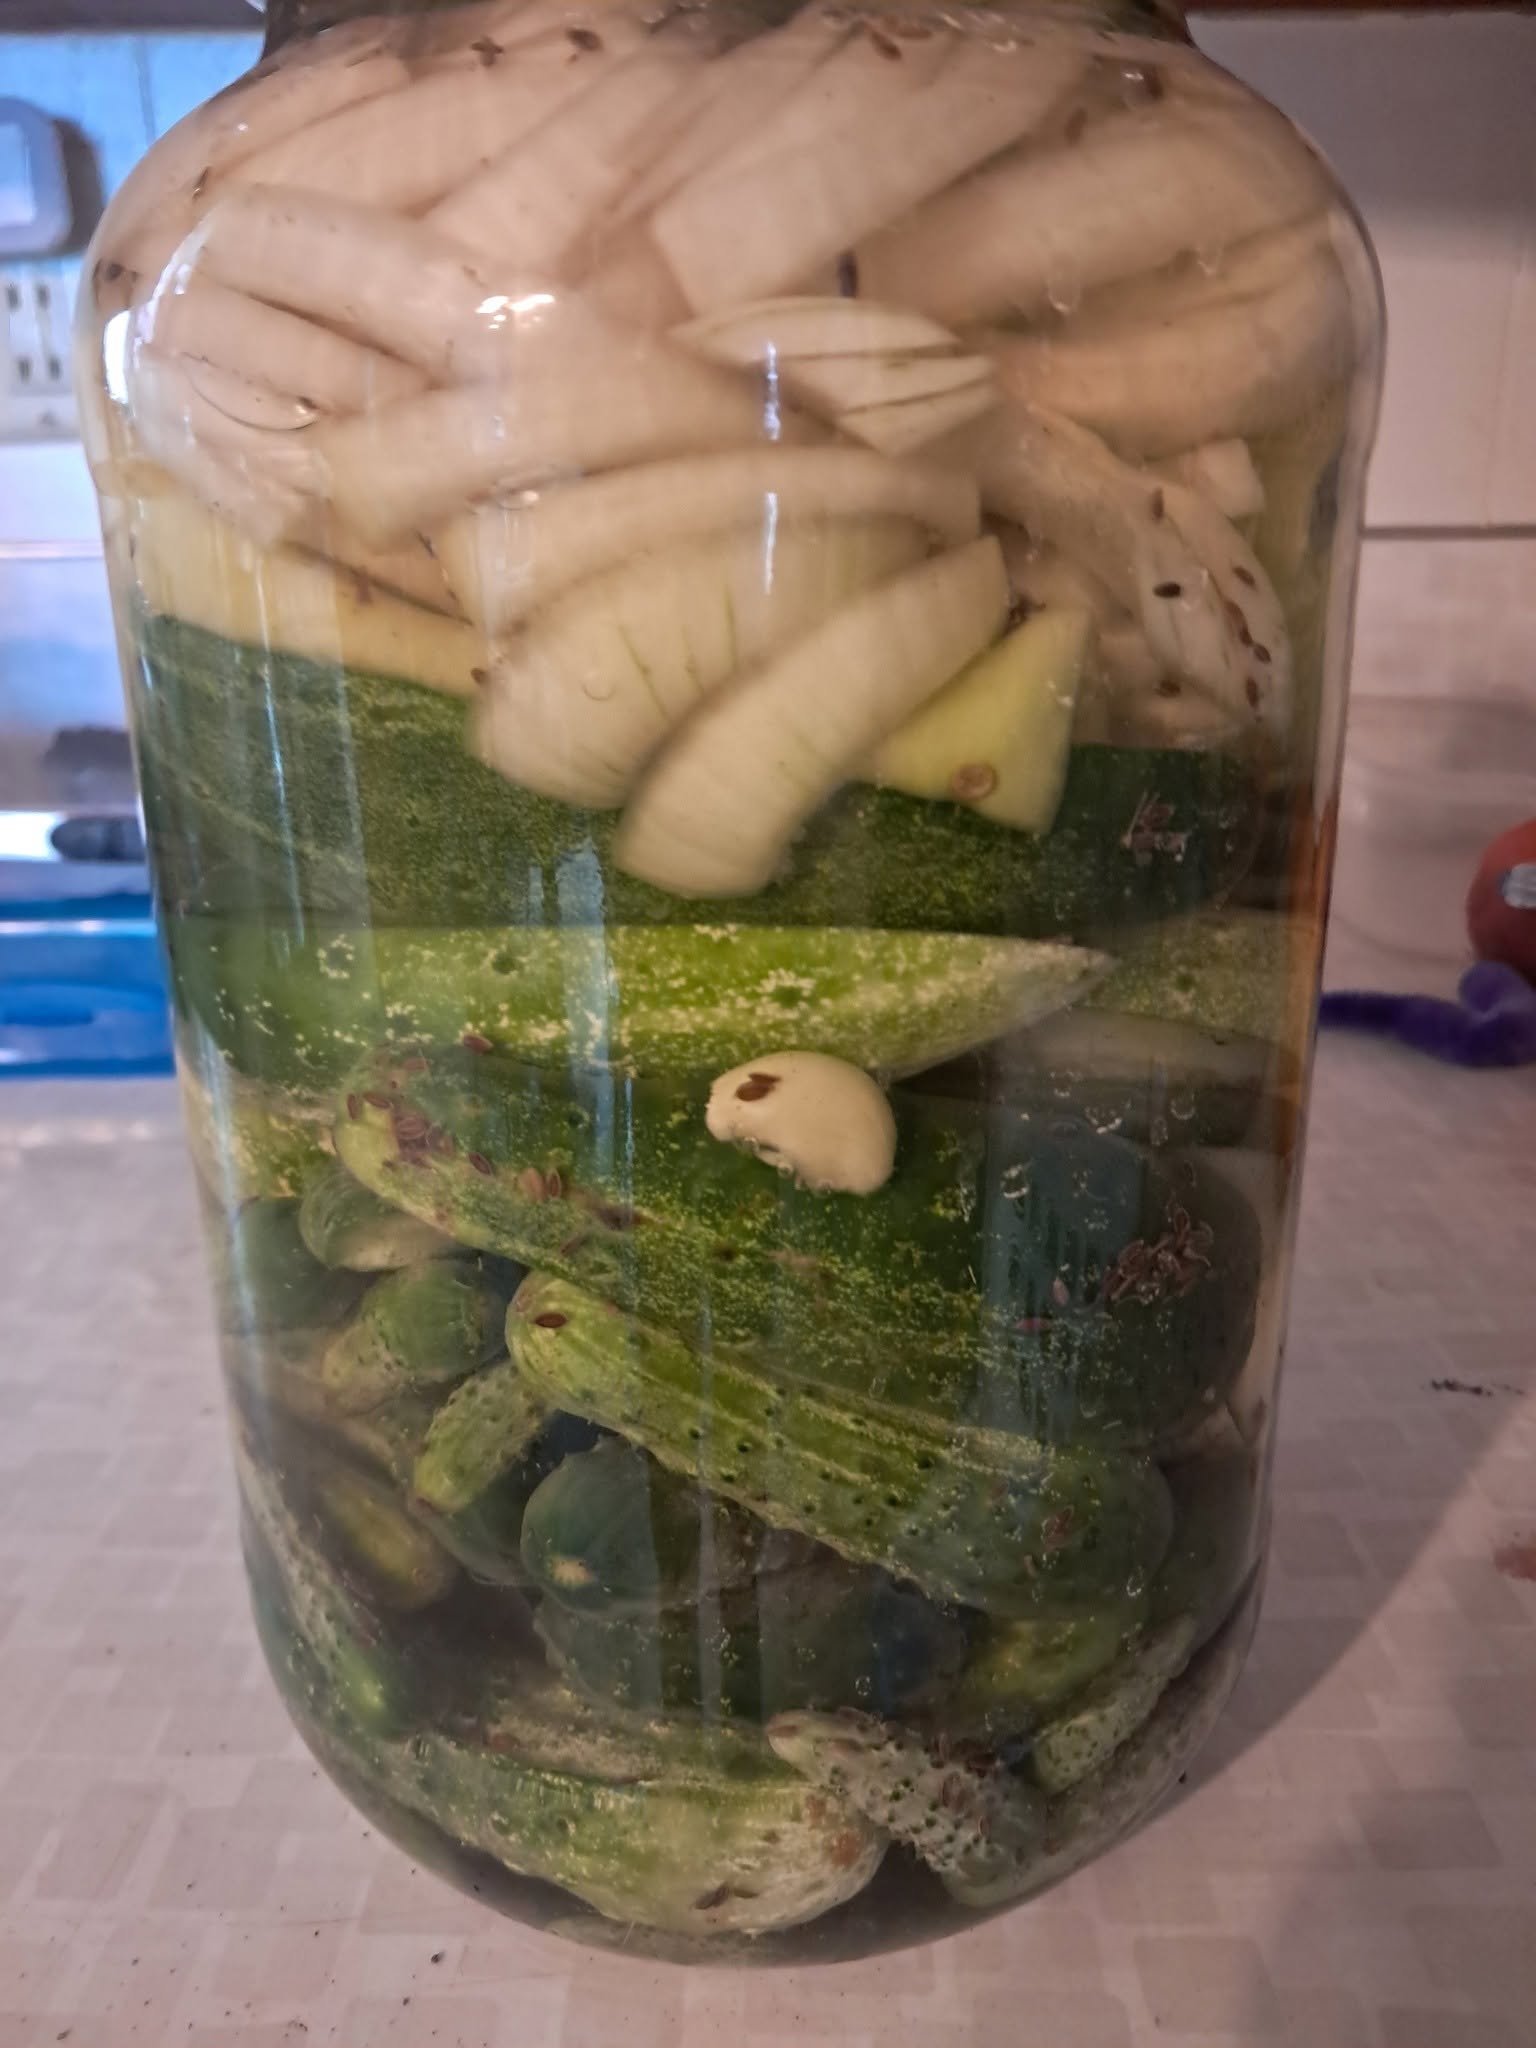
    These are not quick refrigerator pickles made with vinegar. They are lacto-fermented pickles: cucumbers packed in a salt brine with dill, garlic, onions, and seasonings, then left to ferment slowly. The result is a tangy, savory pickle with a flavor that is different from a vinegar pickle—less sharp, more complex, and deeply satisfying alongside a sandwich, a plate of meat and cheese, or a simple summer meal.

    I like fermentation because it gives the harvest a slower rhythm. In the middle of a busy garden season, there is something satisfying about checking a crock, watching for bubbles, smelling the brine, and waiting for ordinary cucumbers to become something else.

    What Are Lacto-Fermented Pickles?

    Lacto-fermented pickles are made by submerging cucumbers in a salt brine and allowing naturally occurring lactic-acid bacteria to ferment the vegetables. As fermentation progresses, those bacteria transform sugars in the vegetables into lactic acid. That acid creates the familiar sour flavor and helps preserve the cucumbers when the ferment is made and stored properly.

    Wet brines work well for fermenting whole vegetables or large pieces of produce, including cucumber pickles. The salt concentration, clean equipment, temperature, and keeping vegetables submerged are all crucial in this process.

    Lacto-fermented pickles are different from vinegar pickles in the following ways:

    Vinegar picklesLacto-fermented pickles
    Acidity comes from added vinegar.Acidity develops naturally during fermentation.
    Often made as quick refrigerator pickles or canned using a tested vinegar recipe.Fermented in a salt brine with time and proper conditions.
    Flavor is bright, sharp, and vinegar-forward.Flavor is tangy, savory, and develops gradually.
    Storage depends on the tested recipe used.These pickles are refrigerated once they have fermented to the flavor you like.
    Vinegar strength and processing directions matter for safety.Salt concentration, temperature, clean equipment, and keeping vegetables submerged matter for safety.

    This post explains how I make salt-brine lacto-fermented pickles in my kitchen. There is no added vinegar. If you are new to fermentation, I encourage you to read guidance from a university Extension service or another reputable fermentation resource before starting.

    What I Use for Crock Pickles

    You do not need a fancy setup, but you do need clean, food-safe equipment and a way to keep the cucumbers below the brine.

    Here is what I gather:

    • Fresh pickling cucumbers
    • Fresh dill heads, dill seed, or dried dill
    • Garlic cloves
    • Sliced onion
    • Optional banana peppers
    • Pickling or canning salt
    • Water
    • A clean glass jar, crock, or food-safe fermentation vessel. I like using a gallon-size olive jar that I have cleaned carefully
    • A food-safe weight and cover
    • Optional seasonings, such as peppercorns, dried red pepper, or pickling spices
    • Optional clean raspberry leaves or grape leaves

    Use a cover that keeps out dust and insects while still allowing fermentation gases to escape, unless you are using a fermentation lid designed for that purpose.

    I use raspberry or grape leaves because they contain tannins, which have traditionally been used to help pickles stay crisp. They are optional, and I enjoy using them when I have them. Fresh cucumbers, proper brine, suitable temperature, and keeping the cucumbers submerged matter much more than any crispness add-in.

    Use pickling or canning salt rather than table salt or flake salt. Pickling salt dissolves cleanly, while additives in some table salts can cloud the brine and flake salt does not measure consistently by volume.

    My Crock-Pickle Process

    I start with cucumbers that are as fresh as possible. Small, firm pickling cucumbers are ideal. Once cucumbers begin to sit around for several days, they are less likely to make the crisp pickles everyone hopes for.

    1. Wash and trim the cucumbers

    Wash the cucumbers well. I trim a very thin slice from the blossom end—the end opposite the stem—before placing the cucumbers in the brine.

    For larger cucumbers, I cut them into halves or quarters so the pieces ferment more evenly. Whole oversized cucumbers can be less pleasant in texture and harder to use once fermented.

    2. Prepare the crock

    Wash the crock, container, plate, weight, and utensils well with hot, soapy water. If you choose to sanitize food-contact surfaces with bleach, follow current label directions and food-safety guidance for dilution. Let the equipment drain or air-dry before it comes into contact with the cucumbers or brine.

    I place some of the dill and seasonings in the bottom of the crock or jar, then add the cucumbers. I tuck in garlic, onions, optional banana peppers, and clean raspberry or grape leaves.

    I do not ferment only cucumbers in the brine. The onions, garlic, and peppers change right alongside them. By the time the cucumbers are tangy and ready, the onions have softened and become pleasantly sharp, the garlic has mellowed, and the peppers have taken on the same salty, sour flavor as the pickles.

    They are delicious tucked into sandwiches, added to a charcuterie board, chopped into potato salad, or eaten straight from the jar alongside the cucumbers.

    3. Make the salt brine

    This is the one part of the process where I stay consistent.

    For each batch, I make a brine with:

    • ½ gallon water
    • ¼ cup pickling salt

    I start with a little hot water so the salt dissolves more easily, then add cool water until I have the full half-gallon of brine. I let the brine cool before pouring it over the cucumbers.

    This is a salt-brine ferment, not a vinegar pickle. The salt creates the environment where lactic-acid bacteria can do their work while the cucumbers, garlic, onions, peppers, and dill slowly develop their flavor.

    If you use a different type or brand of salt, calculate your brine by weight or follow a tested recipe designed for that specific salt rather than assuming volume measurements will transfer exactly.

    4. Keep everything under the brine

    This may be the most important practical step: the cucumbers need to stay submerged.

    Keeping the cucumbers below the brine limits their exposure to air and helps prevent surface mold and spoilage. The National Center for Home Food Preservation recommends keeping fermenting cucumbers 1–2 inches beneath the brine. In a crock, a clean plate that fits inside the container can be weighted with sealed jars of water; a properly sealed food-safe bag filled with brine can also serve as a weight.

    I have used food-safe zip-top bags filled with brine, as well as glass fermentation weights. Both work very well.

    I check mine regularly. Cucumbers bobbing above the brine are not a small cosmetic issue—they are more exposed to air, mold, and spoilage.

    5. Ferment until they taste right

    Fermentation is not instant, and warmer is not always better.

    In my kitchen during the warm part of summer, I typically begin tasting the pickles after about a week at room temperature. Small cucumbers are usually ready first; larger cucumbers, halves, or quarters may need several more days. If you are fermenting in a cooler basement, the process may take longer.

    The best guide is the pickle itself. I look for a pleasantly sour, tangy flavor; a change in the cucumber’s color and texture; active bubbles early in the process; and brine that smells clean and pickle-like.

    Warm temperatures speed fermentation, but temperatures over about 80°F can make cucumbers soften more quickly. If your kitchen is very warm, begin checking earlier and move finished pickles to the refrigerator promptly.

    Every batch is a little different, so I pay attention to the actual cucumbers: the smell, the brine, the level of sourness, and the condition of the vegetables—not only the number of days on the counter.

    6. Check the crock regularly

    During fermentation, the brine may become cloudy and bubbles may appear. Those can be normal parts of active fermentation.

    Check the container regularly. A little surface scum can occur during fermentation, but any growth should prompt a careful assessment. If you see mold or are uncertain about what you are seeing, do not assume the batch can be made safe by removing what is visible.

    If the pickles become soft, slimy, or develop a disagreeable odor, discard them. When in doubt, I do not try to save a batch. Cucumbers are replaceable; food safety is not.

    Ingredients
      

    • Fresh pickling cucumbers enough to fill a clean gallon-size jar or crock
    • ½ gallon water
    • ¼ cup pickling or canning salt
    • Fresh dill heads dill seed, or dried dill, to taste
    • Garlic cloves to taste
    • 1 sliced onion
    • Optional banana peppers
    • Optional peppercorns dried red pepper, or pickling spices
    • Optional clean raspberry leaves or grape leaves
    • Extra prepared brine if needed, to keep all vegetables submerged

    Equipment

    • A clean, food-safe gallon jar, crock, or fermentation vessel
    • A fermentation weight, small plate and weight, or food-safe zip-top bag filled with brine
    • A cover that protects the ferment from dust and insects while allowing gases to escape, unless using a fermentation lid designed for that purpose

    Method
     

    1. Wash the cucumbers well and trim a very thin slice from the blossom end. Cut very large cucumbers into halves or quarters.
    2. Wash the fermentation vessel, weight, cover, and utensils thoroughly with hot, soapy water. Allow them to drain or air-dry before use.
    3. Add some dill, garlic, onion, optional peppers, spices, and optional raspberry or grape leaves to the bottom of the vessel.
    4. Pack the cucumbers into the vessel. Add the remaining dill, garlic, onion, peppers, leaves, and seasonings throughout the jar or crock.
    5. Make the brine by dissolving ¼ cup pickling salt in ½ gallon water. Use a small amount of hot water first if desired, then add cool water to reach the full amount. Let the brine cool before using.
    6. Pour enough cooled brine over the vegetables to cover them completely.
    7. Add a weight to keep the cucumbers and other vegetables fully submerged beneath the brine. Leave a little headspace at the top of the vessel.
    8. Cover and ferment at room temperature, away from direct sunlight.
    9. Begin checking and tasting after about 7 days. Small cucumbers may be ready first; larger cucumbers or pieces may need several more days.
    10. Once the pickles are pleasantly sour and tangy, refrigerate them. Keep the vegetables under the brine during storage.

    Notes

    • A room that is too warm—especially above about 80°F—can cause cucumbers to soften more quickly.
    • Cloudy brine and small bubbles are often normal during active fermentation.
    • A little surface scum can occur during fermentation. If you see mold or are uncertain about a batch, do not assume it can be made safe by removing visible growth.
    • Discard pickles that are soft, slimy, smell rotten or unpleasant, or otherwise seem questionable.
    • The onions, garlic, and banana peppers become deliciously tangy too. Use them on sandwiches, charcuterie boards, potato salad, burgers, or alongside a meal.
    • Use pickling or canning salt. Do not substitute flake salt by volume because its density varies; additives in other salts can cloud the brine.

    What Is Normal – and What Is Not?

    Often normal during fermentationDiscard or seek reliable guidance
    Cloudy brineSoft or slimy cucumbers
    Small bubblesRotten, foul, or unpleasant odor
    Sour, pickle-like smellVegetables left above the brine
    Gradual changes in color and flavorVisible mold or growth you cannot confidently identify
    Mild surface scum that you assess carefullyAny batch you do not feel confident is safe

    If you are new to fermentation, begin with a reliable salt-brine fermentation method and pay close attention to the recipe’s recommended salt concentration, temperature, and storage guidance. It is the easiest way to learn what a healthy ferment should look and smell like.

    My Best Tips for Crisp Pickles

    Crispness is usually the biggest question with homemade pickles. These are the habits that make the biggest difference for me:

    • Start with very fresh, firm cucumbers.
    • Use small pickling cucumbers rather than oversized slicing cucumbers.
    • Trim the blossom end.
    • Use pickling or canning salt in a consistent brine.
    • Keep the cucumbers completely submerged.
    • Ferment in a suitable temperature range.
    • Use raspberry or grape leaves if you enjoy that traditional practice, but do not rely on them in place of proper fermentation conditions.
    • Refrigerate the finished pickles once they reach the flavor you enjoy.

    The best pickle batches begin before the crock ever comes out: with cucumbers picked at the right time and used while they are still firm and fresh.

    Why I Keep Making Them

    Canning, freezing, and dehydrating are all useful ways to handle a harvest, but fermentation feels different to me.

    It is slower. It asks for a little attention instead of one long afternoon of work. I like opening the crock, checking the brine, and knowing the cucumbers are changing a little every day. I like that it turns a summer overflow into something we can enjoy later, one crunchy pickle at a time.

    And I like that no two garden seasons are exactly alike. Some years the cucumbers come in steadily. Some years they seem to appear all at once. Some batches are crisper than others. But every time, the crock gives me one more way to use what the garden provides.

    One reason I enjoy traditionally fermented pickles is that, unlike vinegar pickles, they are a living ferment while they are fresh and refrigerated. Salt-brine fermentation is driven by lactic-acid bacteria, which transform the vegetables’ natural sugars into lactic acid and create that familiar tangy flavor.

    I enjoy them first because they are delicious, but I also appreciate that fermentation brings living cultures and a different kind of complexity to the food. The exact microorganisms in fermented foods can vary by batch and storage method, so “fermented” does not automatically mean every batch contains proven probiotic strains or creates the same health effects for every person.

    My husband also remembers his grandmother making crock pickles and sharing them with the family. I love that this kind of preservation carries more than food forward. It carries the memory of a kitchen, a season, and the people who taught us how to make something from what was growing.

    I shared more of that family story here: One Jar at a Time:  A legacy in Brine.


    Plan Before the Cucumbers Pile Up

    If your garden is beginning to produce more than you can use fresh, download my free Grow What You’ll Use: A Simple Garden and Harvest Planner for Real Life. It includes a place to track what is ready now, decide what to eat fresh or preserve, and make a manageable plan for the harvest.

    And if you are deciding how to preserve extra vegetables, you may also find these helpful:


    A Note for New Fermenters

    Fermentation can feel intimidating at first, but you do not need to learn every preservation method at once. Start with one reliable salt-brine method, clean equipment, good cucumbers, and the patience to let the process happen.


    Do you make fermented pickles, vinegar pickles, or both? I would love to hear what you add to your crock—and whether you use grape leaves, raspberry leaves, or another trick to keep your pickles crisp.

    If this post helped you feel more confident about using a cucumber harvest, please consider liking it or sharing it with a gardener, pickle lover, or friend whose cucumber plants are beginning to take over.

    Read More Here: How to Freeze Peppers, Tomatoes, Zucchini, and Berries for Later

  • How to Make Dehydrated Meals for Camping and Busy Days

    How to Make Dehydrated Meals for Camping and Busy Days

    This is the third and final post in my food dehydration series. In the first post, I covered How to Dehydrate Food at Home: Air Drying, Oven Drying, and Dehydrators. In the second post, I shared How to Dehydrate Fruits, Vegetables, and Herbs From the Garden.


    One of the most useful things you can do with a dehydrator is make simple meal bases that can be rehydrated later. They are especially handy for camping, but they are also useful during busy weeks or anytime you need a quick meal from pantry ingredients and have a way to boil water.

    The basic idea is simple: cook a meal you already enjoy, make a double batch while you are already cooking, then dry the extra portion in thin layers. Later, you can turn it into an easy meal with a little boiling water.


    For a kitchen-friendly reference with preparation, temperature, drying time, storage, and rehydration charts, see my Garden Drying Guide. Thank you for supporting my mission to help aspiring homesteaders gain the knowledge they need.


    Why Dehydrated Meal Bases Are So Helpful

    Dehydrated meals are lightweight, compact, and easy to pack. That is why they are popular for camping and hiking. They can also be a simple option when you want meal ingredients that do not take up freezer space.

    I like this method because it lets me make the most of work I am already doing in the kitchen. If I am making a pot of rice and beans for dinner, it is not much harder to make extra and prepare some for the dehydrator at the same time.

    Choose Low-Fat Foods for Dehydrated Meals

    This method works best with low-fat foods. Rice, beans, vegetables, tomato-based sauces, and many simple seasonings dry well and rehydrate nicely. I include a guide on how to use a pressure cooker to prepare rice here and a guide on how to cook beans here.

    I avoid using this method for fatty foods, creamy sauces, oily foods, or meat unless I am following a tested recipe written specifically for dehydrating and storing those foods. Fat does not dry the same way moisture does and can go rancid during storage.

    For this reason, I usually focus on vegetarian meal bases when I am making dehydrated meals at home. The good news is that you can always add fresh toppings, cheese, avocado, or a cooked protein later when you are ready to serve the meal.

    How to Dehydrate Cooked Rice and Beans

    Cooked rice and beans are two of the easiest meal ingredients to dehydrate. They are inexpensive, filling, and easy to use later. I cover how to use a pressure cooker to cook rice here and how to cook beans here.

    Because rice is already cooked, I spread it onto dehydrator trays soon after cooking. If I cannot dry it right away, I cool it promptly and refrigerate it until I am ready to use it.

    Spread the rice or beans in a thin, even layer across a dehydrator tray. Break up clumps so air can move around the food. I typically dry meal bases at about 145°F, checking them regularly as they get close to finished. Drying time will vary depending on how wet the meal is, how thickly it is spread, and the type of dehydrator you are using.

    Dry until the pieces are hard and no longer feel soft or moist. If your meal is saucy or has small pieces that might fall through the trays, use a solid tray liner or fruit-roll sheet made for your dehydrator.

    Once dry, let everything cool completely before placing it in an airtight container or freezer bag. Label it with the contents and date.

    When you are ready to use it, start with roughly equal amounts of dried food and boiling water. Cover the bowl or pot and let it sit for about 10 minutes, then add a little more water if the meal still seems dry or firm. Larger pieces and thicker ingredients may need more time.

    Easy Dehydrated Meal Ideas

    Vegetarian Jambalaya-Style Base

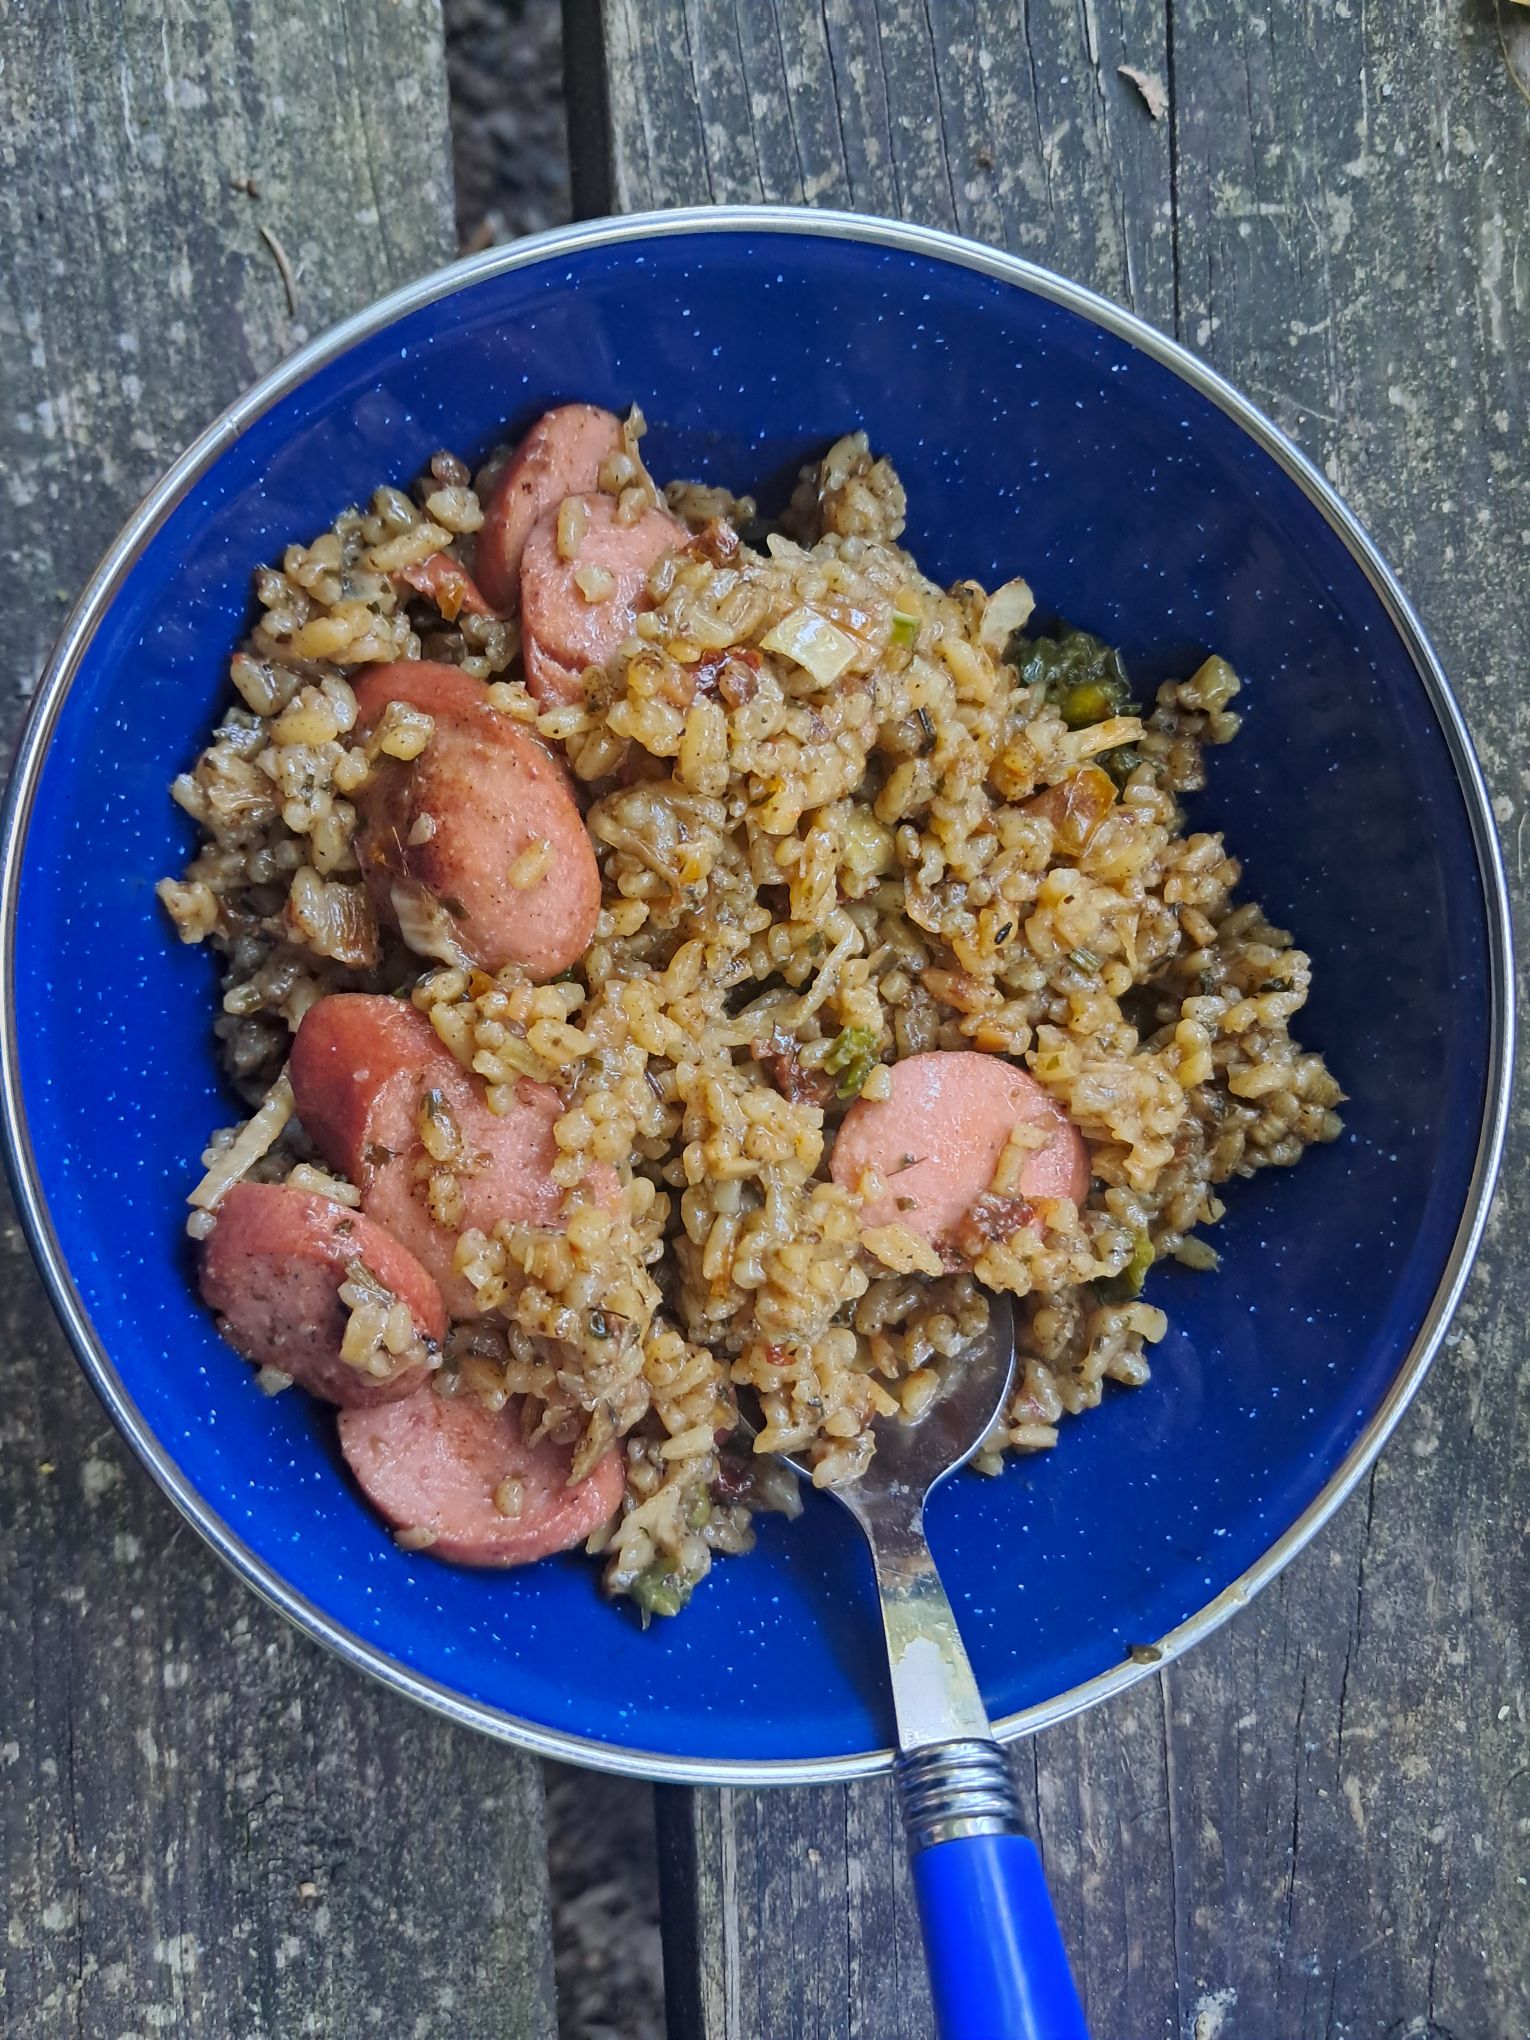
    A vegetarian jambalaya-style base is one of my favorite options. Make a batch using rice, beans, peppers, onions, tomatoes, and seasonings. Keep the mixture low in fat, then spread it in a thin layer on dehydrator trays.

    When you are ready to use it later, add boiling water and let it rehydrate. You can enjoy it as-is or add a freshly cooked protein when you prepare it.

    Before drying
    After drying. I know it looks less than appetizing, but it’s truly delicious when you add water back.

    Rice and Bean Taco Filling

    Rice and bean tacos are another easy option. Cook rice with beans, corn, peppers, onions, taco seasoning, and tomatoes or tomato sauce. Dry the finished mixture in thin layers.

    Later, rehydrate it with hot water and serve it in tortillas, over lettuce, with tortilla chips, or as a quick burrito bowl. Add avocado, cooked ground beef, cheese, or sour cream when serving to make the meal more filling.

    Dried cooked black beans
    Dried cooked rice.

    Soup and Stew Bases

    You can also make dehydrated soup or stew bases using dried vegetables, beans, rice, pasta, and seasonings. When it is time to cook, add water or broth and simmer until everything is tender.

    These are especially nice for camping because you can pack a full meal into a small bag.

    Simple Steps for Drying Meal Bases

    1. Cook a low-fat meal you already enjoy.
    2. Make a double batch so the extra work is minimal.
    3. Spread the cooked food in a thin, even layer on dehydrator trays.
    4. Break up clumps and stir occasionally as it dries.
    5. Dry until the food is completely hard and no longer feels moist.
    6. Let it cool completely.
    7. Package it in airtight containers or bags and label with the date.
    8. Rehydrate later with boiling water or add it directly to soups and stews.

    Want a kitchen-friendly reference?

    My Garden Drying Guide includes printable preparation, temperature, drying time, storage, and rehydration charts for garden produce and simple meal bases.


    Storage Tips for Dehydrated Meals

    Keep dried meal bases in airtight containers and store them in a cool, dark, dry place. Smaller packages are helpful because food begins taking on moisture from the air once a container is opened.

    I also like to package meal bases in one-meal portions so I can grab exactly what I need without opening a larger container.

    For longer-term storage, especially if I am making meals well ahead of a trip, I prefer to keep sealed meal bases in the freezer until I am ready to use them.

    Be sure to label your bags with the contents and the year at a minimum. Also add the rehydration instructions if they’re not straightforward.

    Before storing meal bases for a longer period, I like to check the container after a day or two for any signs of condensation. If moisture shows up, the food needs more time in the dehydrator before it is stored again.

    As with any home-preserved food, check it before using it. If you see moisture, mold, or anything that looks or smells off, throw it away.

    A Simple Way to Save Time Later

    Making dehydrated meal bases is one of those small projects that can pay off later. It takes a little extra time on cooking day, but it gives you something useful for camping trips, busy nights, and days when you need a simple meal without much planning.

    This is the conclusion of my food dehydration series, but it is only one of many ways to preserve a harvest at home. Whether you freeze, dehydrate, or eventually try canning, each method is another way to make the most of what you grow.

    If you are just getting started with dehydration, you can also read my posts on choosing a drying method and preparing fruits, vegetables, and herbs for dehydrating.


    Do you make homemade dehydrated meals for camping, hiking, or busy days at home? Share your favorite meal ideas or ingredients to dehydrate in the comments.

    If this post was helpful, please like and share it with a friend who enjoys camping, hiking, gardening, or making homemade food for later.

    Read More Here: Our Simple, Budget-Friendly Camping Setup for Family Road Trips