This winter, I’m on a delicious quest to make the ultimate homemade Reuben sandwich—from scratch.
It’s a three-part series:
Sauerkraut
Rye bread
Home-cured corned beef
Every piece is made right here at home. Because when you love good food and the process that brings it to the plate, every step matters.
Today, we start where every great Reuben does—with sauerkraut.
Disclosure: This post contains affiliate links. As an Amazon Associate, I earn from qualifying purchases. Thanks for supporting Practical Homesteading!
From Garden to Crock
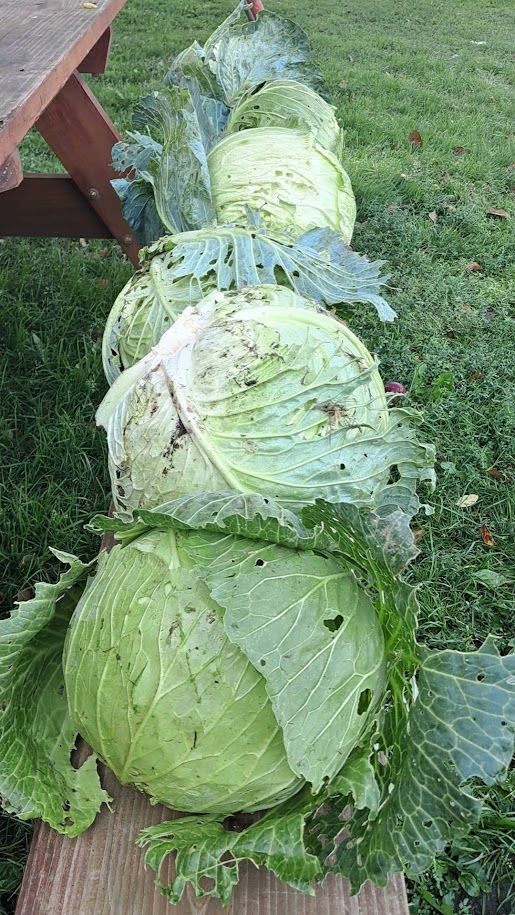
Back in September, I harvested crisp green Megaton hybrid cabbages from the garden and tucked them away for something special.
We stripped off the outer leaves, then cut the heads into manageable chunks with this knife (affiliate link) after using this honing steel (affiliate link) to sharpen the blade. My husband pulled out our meat slicer to shred the cabbage into fine ribbons—teamwork at its best!
Next, we weighed the shredded cabbage on a kitchen scale, then calculated and measured out 2% canning salt (affiliate link) by weight. After mixing the cabbage and salt together, we packed it down firmly into our antique RedWing stoneware crock using a homemade stamper (basically a broom handle fitted onto a wooden block—but it works perfectly for this purpose).
The Secret to a Clean Ferment
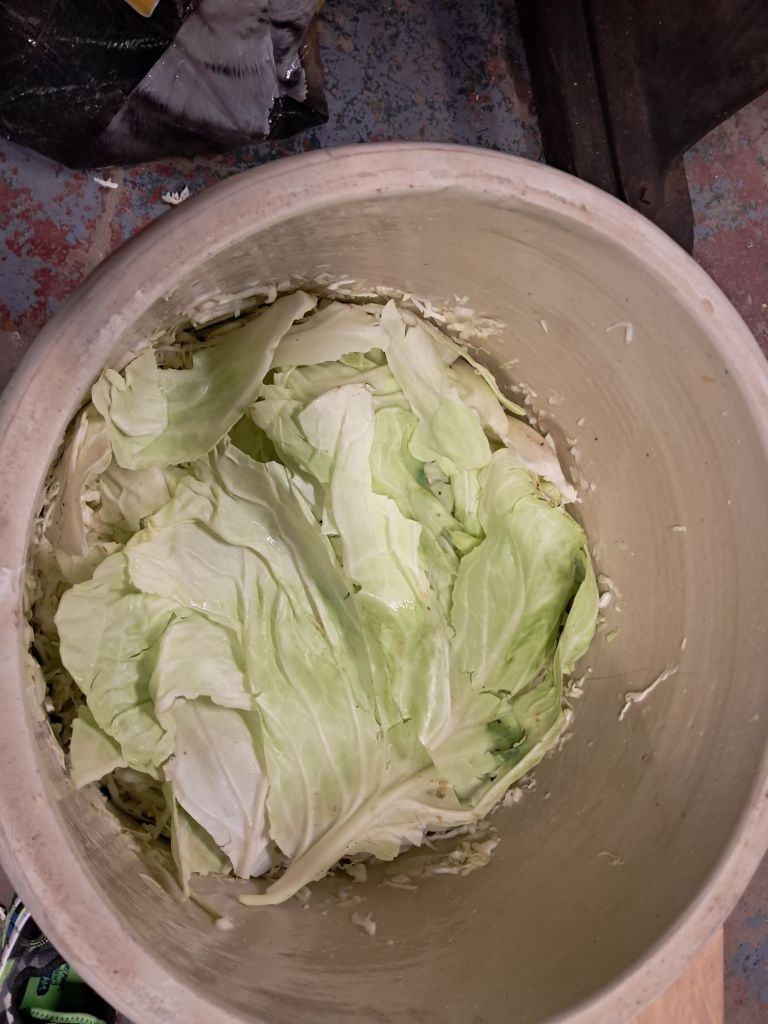
Place cabbage leaves above the salt/cabbage mixture.A garbage bag filled with water helps to seal the fermenting sauerkraut from outside air.
To finish, we laid a few whole cabbage leaves on top and placed a water-filled plastic garbage bag over everything. This simple trick does two things:
The weight keeps the cabbage fully submerged in brine.
The plastic molds to the sides of the crock, reducing airflow and spoilage.
Then the real magic began—waiting. The crock sat in a cool, dark corner of the basement for about three and a half months. Time and microbes quietly transformed that fresh cabbage into something incredible.
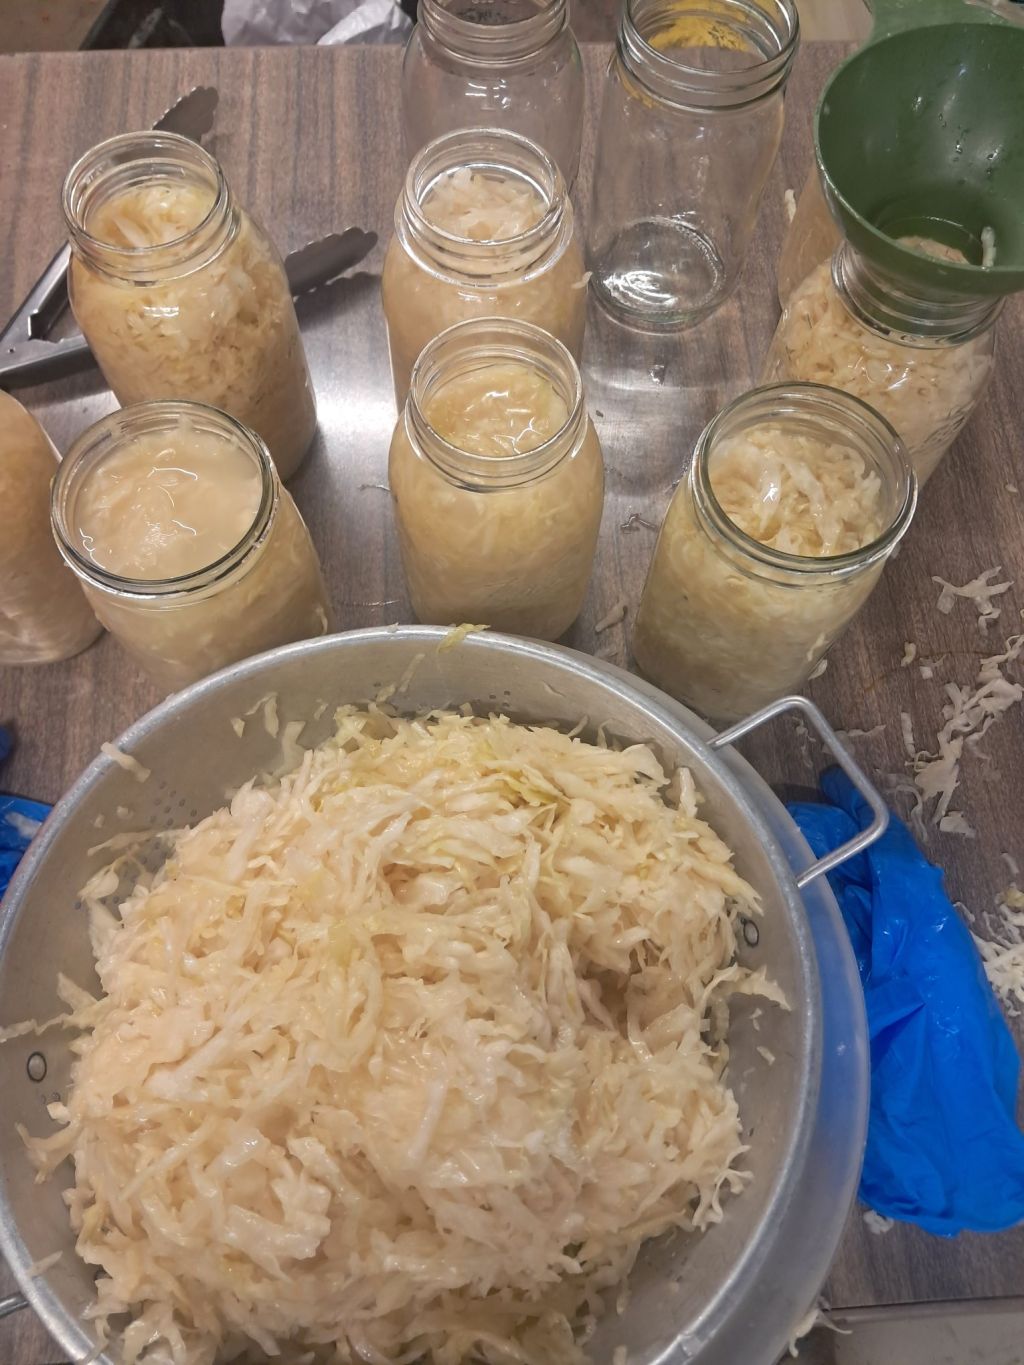
The Big Reveal
That beautiful sauerkraut after 3.5 months of fermentation.
When I finally opened the lid, I was greeted by the unmistakable scent of good fermentation—earthy, tangy, and fresh. The sauerkraut was crisp, slightly golden, and bursting with flavor.
This batch is destined for homemade Reubens and maybe a pork roast or two. The wait? Absolutely worth it.
Reflections from the Crock
Homesteading has a way of teaching through food—patience, balance, and trust in nature’s quiet work. The same rhythms that shape a garden shape us, too.
Have you ever made your own sauerkraut or fermented veggies? Homesteading is more fun when we learn together.
Tell me what’s bubbling on your countertop—or what I should try fermenting next!
💚 If you enjoyed this post, please take a moment to like, share, and subscribe!
New readers help this little homestead grow—and sharing your own food projects inspires others, too.
Subscribe to join me for the next part of this Reuben adventure: homemade rye bread!
A 2025 garden reflection full of lessons, surprises, and laughter—one-pound onions, overflowing basil, hybrid watermelon mishaps, and happy pigs. Discover the stories and takeaways from our most rewarding gardening season yet.
Never wanted pigs on the homestead? How chickens → ducks → homestead pigs transformed farm life. Pig pen build, pig feed lessons, pig health scares, and why raising pigs beginners find unexpected joy. Real homesteading story.
Discover why growing food, raising children, and building community are at the heart of my homesteading mission. Together, we can return to the roots of connection, resilience, and hope.
What the seasons can teach us about slowing down, finding balance, and belonging A version of this essay appears in the January 8, 2026 edition of the Dodge County Pionier.
Ask most people how they measure time today, and the answers sound familiar: alarms, deadlines, color‑coded calendars, the endless scroll of days on a glowing screen. Phone notifications cut across dinner, school schedules slice afternoons into drop‑offs and pickups, and the next bill due date is never far from mind.
Where I live, time follows a different rhythm—guided not by screens but by the soil itself.
My family keeps time by the signals nature gives: sap rising in March, turtles crossing the road in May, fireflies at dusk in June, corn drying into gold by October. A cold north wind can say “November” more clearly than any app. These cycles remind us that time isn’t a race toward exhaustion; it’s a loop—a pattern of effort, rest, and return.
In a world obsessed with productivity, the land offers a quiet lesson: slowing down isn’t falling behind. It’s catching up to what matters.
Winter: the radical act of rest
When the holidays end and snow hushes the fields, stillness takes hold. The world outside the window turns soft and muted, as if someone turned down the volume. Days stretch long. Nights invite reading, conversation, and quiet.
In modern life, that slowness often gets labeled “unproductive.” Inbox counters climb even as the sun sets before dinner. But in the rural calendar, winter is preparation—the season the earth itself uses to heal. Under the frozen top layer, roots are resting, waiting for their cue.
Inside, a different kind of work takes over: soup on the stove, a deck of cards on the table, a cat snoring near the heat register. There’s no badge for this kind of work, but the house feels fuller for it.
Winter offers permission to pause. Even without a farm or a woodstove, anyone can claim a bit of that wisdom: choose a few evenings when nothing is scheduled, let the phone stay in another room, and let the quiet do its work.
Spring: a rehearsal for renewal
Spring announces itself quietly at first—a drip of meltwater from the eaves, the smell of mud, the first bird that sings before sunrise. One morning the snow looks tired; the next, you notice a thin green line where the lawn meets the sidewalk.
We tap trees and plant seeds, acts that serve no instant gratification. The sap runs clear and cold, one slow drop after another into plastic jugs. Seed trays sit under lights, all dirt and hope, for weeks before anything green appears. Yet when syrup warms pancakes or sprouts unfurl in a window box, you can taste reward drawn from patience.
Spring teaches urgency without panic. Ramps, asparagus, morels, and rhubarb arrive in a rush, then slip away as if they were never there. The season reminds us that beginnings are not one-time events but recurring invitations. The world doesn’t ask, “Did you start perfectly?” It asks, “Are you willing to start again?”
You don’t need a sugar bush or a greenhouse to feel this. A single pot of herbs on a balcony, or a commitment to walk the same city block once a week and notice what’s blooming, can turn spring into a ritual rather than a blur.
And after that first rush of green, the land hardly pauses—by July, it’s in full voice.
Summer: where work and joy meet
By midsummer, everything hums. In the afternoon heat, insects buzz like a low electric current in the fields. Lawnmowers start and stop up and down the street. Windows are open, and someone, somewhere, is grilling.
Gardens overflow. Tomatoes split if you don’t pick them in time. Zucchini multiplies on the counter and quietly appears on neighbors’ doorsteps. Kids shriek through sprinklers, leaving wet footprints on hot pavement. Even the air smells different: cut grass, sunscreen, diesel from a tractor on a distant road.
Like the growing season, our best days often mix effort with enjoyment. Summer’s lesson is simple: work and joy are not enemies. They often belong in the same hour. There is satisfaction in going to bed with dirt under your fingernails and the memory of a late sunset still bright in your mind.
The reward for effort can be as close as a ripe berry, a shared picnic in a city park, or a tired, happy body at the end of a long, light-filled day.
Autumn: gratitude and gathering
Autumn softens the light and sharpens the air. Mornings carry that first hint of frost, and you can see your breath if you step outside before the sun gets serious. Leaves turn from green to gold and red, then crunch underfoot in the driveway.
The season’s abundance—pumpkins on porches, apples piled in crates, shelves lined with jars and loaves—reminds us how much depends on cooperation: between people, earth, and time. No one person makes a harvest alone. There are seed savers, farm workers, truck drivers, grocers, and cooks all woven into the meal.
Gratitude, in this season, isn’t just a word reserved for a single holiday. It’s the habit of looking at an ordinary table—soup, bread, a piece of fruit—and seeing the many hands and seasons that brought it there.
Even in an apartment, autumn can become a practice of gathering: inviting friends over for a simple pot of chili, walking through a park under changing trees, or taking five extra minutes to watch the early dark settle in instead of rushing past it.
What circles can teach a linear world
When winter returns, it’s easy to see it as a setback: dark, cold, the end of something. But the more closely the seasons are watched, the clearer it becomes that time does not move in a straight line. It hums in a circle.
Each season brings another chance to begin again—not by doing more, but by noticing more. The calendar on the wall may march from one square to the next, but the world outside repeats its old, trustworthy patterns: thaw, bloom, heat, harvest, rest.
Wherever you live—city or countryside—you can keep time with the land in your own way. Let January be a little slower. Let spring mean at least one meal built around what is fresh where you are. Let summer include a night spent outdoors until it’s fully dark. Let autumn carry a moment of thanks, even if it’s just whispered over a sink full of dishes.
The land has never hurried. It always arrives where it should. Maybe we can too, if we’re willing to step out of the race now and then and walk in circles for a while instead.
How could you bring a bit of seasonal balance into your daily routine? Please let me know below in the comments.
If this reflection on seasonal living resonated with you, please take a moment to like and share it with someone who might need a gentler rhythm right now.
To receive future essays on slow, seasonal living straight to your inbox, subscribe to the blog and join this little community of people learning to keep time with the land.
Welcome to the rural economy—where value isn’t counted in cash but in connections. Beneath the wide-open sky, where grain silos and fence posts stitch the land into neat parcels, the real currency is not minted or printed. It’s grown and built, raised and traded. Trust, hard work, the barter of honest services and handmade goods.…
Happiness doesn’t come from perfect days—it grows in balance, family, friendship, and the quiet rhythm of everyday life. Here’s how I find joy in being present.
When my son asked to go sledding after a long week, my instinct was to say no. Dinner had to be made, and I was tired. But one small “yes” led to laughter, connection, and a moment that reminded me why slowing down matters most.
Beef prices are higher than ever, and it’s hard not to flinch when you see the total at the checkout. But there’s a bigger story behind that price tag. It’s a story of weather, supply, and the everyday people who make your meals possible.
The Shrinking Herd Across the country, the U.S. cattle herd is the smallest it’s been since 1951. Years of drought have dried up pastures. Rising feed and fuel costs have forced many families to sell breeding cows just to hold on.
With fewer calves entering the pipeline and beef taking about two years to raise from birth to butcher, this shortage doesn’t rebound quickly. Meanwhile, Americans still love their beef—consuming around 57 pounds per person each year, according to USDA estimates.
When demand stays strong and supply runs short, prices naturally climb.
Family Farms Under Pressure But economics only tell half the story. On my sister’s small farm, she and her husband raise beef—a side project that grew out of their love for good food and good land. Like many small producers, they both work jobs outside the home to keep their operation going.
What started as a passion for raising healthy animals and feeding their neighbors has become a delicate balance between purpose and practicality. For them, and countless others, farming isn’t just about income—it’s about identity, family, and stewardship of the land.
Their experience isn’t unique. The average farmer in the U.S. is now around 58 years old, and for younger generations, getting started can feel impossible. Land, equipment, and livestock cost hundreds of thousands of dollars before the first calf is ever born.
On top of that, just a handful of large companies control most of the nation’s beef processing. That means family farms earn less, even as consumers pay more at the store. It’s a painful disconnect that continues to squeeze rural families across the country.
Watching my sister pour her time and heart into those cattle reminds me of something deeper. Homesteading—like life—rarely offers shortcuts. The work is long, often quiet, but filled with meaning that doesn’t show up on a price tag.
The Cost of Keeping Food Safe Processing adds another layer of expense. Federal law requires a USDA inspector to be on-site during every moment of slaughter and processing. Their presence ensures animal health, cleanliness, and safety—vital safeguards that protect us all—but compliance adds time, labor, and cost.
Some experts believe these inspections could be modernized and streamlined to preserve safety while easing financial pressure on small processors. For now, those costs carry through the system, one steak at a time.
Beyond the Farm Gate Every link in the supply chain—from pastures and processors to packaging and transport—feels the strain of rising fuel prices, labor shortages, and inflation. And behind that rising price tag are families working early mornings and late nights to keep barns running, pastures green, and herds healthy.
For many, it’s more than work—it’s a calling built on resilience and pride.
And for those of us on the other end, part of honoring that work is learning to value the whole animal. Beef isn’t just ribeyes and tenderloins. It’s also the flavorful roasts, shanks, and stewing cuts that take time, effort, and patience to cook.
When we learn to use every cut—every bit of what an animal gives—we stretch our dollar, reduce waste, and show respect for the life and effort behind our food. In a way, that practice is at the very heart of homesteading: using wisely, wasting little, and cooking with gratitude.
What You Can Do Understanding the system is a great first step. Visit your local butcher or farmers’ market. Ask where your beef comes from. Learn from small farmers who raise animals with care and integrity—and don’t be afraid to try new cuts or cooking methods.
If you have the freezer space, consider buying a quarter beef directly from a local farmer. It’s roughly 200 pounds of meat—everything from premium steaks and roasts to ground beef and lesser cuts. Buying this way often saves money per pound, puts more of your dollars directly into the farmer’s pocket, and helps keep local processors and butchers in business.
This is what a quarter beef looks like, directly from the butcher.
Supporting local producers and cooking with intention helps preserve the values that built rural communities: thrift, respect, and connection to the land. When you approach food with awareness, every meal becomes an act of gratitude.
If you try a new cut or buy in bulk from a local farm, share your experience in the comments. I’d love to hear how you’re honoring the hands and hearts behind your food.
A Final Thought The next time you pick up a steak—or a simple pack of stew meat—remember the weather, markets, and families who make it possible. Every mindful purchase helps sustain not just a food system, but a tradition of stewardship that keeps families—and their farms—going strong.
If this story resonated with you, give it a like. Share it with a friend or pass it along to someone who loves good food and community.
Your support helps this blog keep shining a light on local farmers, homesteading life, and the values that keep our tables full of meaning.
Subscribe for more stories—and practical tips—on living simply, eating well, and staying connected to the land.
Learn how to turn wild venison into a tender, flavorful stir fry with simple slicing tricks, an overnight marinade, and a hot skillet. A homesteader’s guide to cooking with heart — from field to family table.
The hum of diesel engines and the scent of dusty corn fill the air every fall, signaling harvest season and long days ahead. For the local farmers, this time of year brings both relief and pressure—hundreds of acres to harvest before rain or early snow set in. My dad is always there to help, his…
What are your family’s top 3 favorite meals? Disclosure: This post contains affiliate links. As an Amazon Associate, I earn from qualifying purchases. Thanks for supporting Practical Homesteading! Imagine standing in your kitchen after a long day, staring into the fridge and pantry. Hungry family members are standing by waiting not-so-patiently. You juggle not only…
Disclosure: This post contains affiliate links. As an Amazon Associate, I earn from qualifying purchases. Thanks for supporting Practical Homesteading!
If you walked down a typical grocery store aisle with me, you might think I’m lost. While most American shoppers reach for convenience, I’m the one squinting at sacks of flour, jars of yeast, and tubs of coconut oil — the same staples my great-grandmother probably chose 75 years ago. I don’t shop for ready-made meals; I shop for possibility.
At home, those bulk ingredients become whatever we need — bread, tortillas, sauces, or even snacks. If I don’t know how to make something, I learn. A simple search and a quiet evening in the kitchen have taught me more than any cookbook could. This hands-on, old-fashioned approach has saved us thousands over the years, but more importantly, it’s built confidence, patience, and gratitude for every meal we share.
Now, that doesn’t mean I don’t enjoy Chinese takeout once in a while! I’ve learned to make my own dumpling and stir-fry recipes — they’re delicious when they turn out, and hilarious when they don’t. (One of my most epic flops was a lemon pepper chicken so salty it could’ve been used as a salt lick.) Mistakes keep me humble, and in a way, they’re the best ingredient for growth.
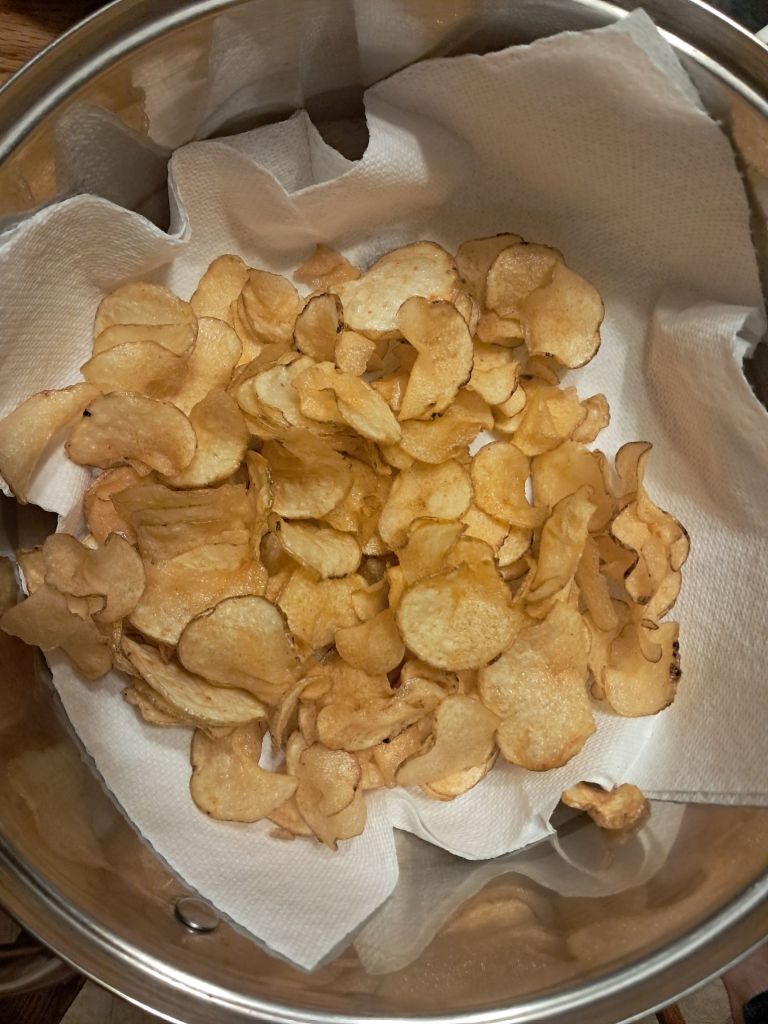
Homemade potato chipsBloody Mary with mostly homegrown ingredients
So with gratitude — and a dash of humility — here are my five most essential grocery items and how they shape my kitchen life on the homestead.
5. Coconut Oil
Coconut oil (affiliate link) is my go-to multipurpose fat. It melts like butter and works wonders in place of lard or shortening. I use it to pop popcorn, bake desserts, and even blend it into homemade flour tortillas.
Its aroma — faintly sweet and buttery — adds a subtle depth you can’t quite place but always appreciate.
Tip: For tender baked goods, replace half the butter or shortening in your recipe with coconut oil, then reduce liquid slightly. It gives just enough chew without the greasy feel.
4. Active Dry Yeast
Yeast (affiliate link) is the quiet hero of my kitchen — small, simple, and full of potential. Watching dough rise never loses its magic, especially when the kitchen smells of warm, sweet yeast and anticipation.
It symbolizes self-reliance: turning flour, water, and salt into something living, breathing, and nourishing.
Tip: Always proof yeast with a pinch of sugar in warm water (around 110°F). If it bubbles within 10 minutes, your dough is ready to rise.
3. Chicken and Beef Bouillon Powder
I lean on chicken (affiliate link) and beef (affiliate link) bouillon powders for soups, gravies, and especially rice. Cooking rice in chicken or beef stock instead of water transforms it from plain to crave-worthy.
I also mix beef bouillon into my homemade onion soup powder — it adds warmth and richness that store mixes can’t match.
Tip: Swap half the water for stock when cooking noodles, grains, or vegetables. It’s the fastest way to round out flavor without extra sauces or salt.
2. Plain White Sugar
Plain old white sugar earns a spot near the top because it does so much more than sweeten desserts. It wakes up yeast, balances tomato acidity, and — lately — fuels our lemonade habit.
My sister keeps me well-supplied with lemons, so I make fresh lemonade weekly. When the kids come in sun-dusted and thirsty, that chilled pitcher waiting in the fridge makes them light up.
Tip: Add a teaspoon of sugar to tomato sauces or soups to tame acidity without losing depth of flavor.
1. Flour
If coconut oil is the heart of my pantry, flour is its backbone. I buy high-gluten flour for breadmaking (affiliate link), but I’m excited to experiment more with ancient grains soon.
The feel of dough under my hands, the smell of a fresh loaf cooling on the counter, and the crackle as it’s sliced — it’s the rhythm that grounds my kitchen.
Flour builds loaves, tortillas, focaccia, and even desserts. It’s humble, forgiving, and powerful — no one in my house has ever once complained about home-baked anything.
We rarely buy vegetables from the store, relying instead on what we’ve grown and preserved — jars of tomatoes, beans, and pickles lining the pantry. They remind me that what we grow in summer sustains us long after the frost sets in.
Our winter meals center around potatoes, onions, and frozen vegetables like broccoli and bell peppers. We’ve experimented with extending our garden season using a small greenhouse and straw. There’s something deeply satisfying about pulling greens or a carrot from a garden while snow still glitters outside.
As for meat, we’re still building toward full independence. We raise our own pork, purchase beef from my sister’s grass-fed herd, and still buy chicken from the store — for now. One day soon, meat birds will join the homestead lineup, and the circle will feel more complete.
Each grocery item on this list earns its place not for novelty but for versatility. They remind me that eating well doesn’t require endless ingredients — just a few solid building blocks and the creativity to make them shine.
This slower, more deliberate approach to cooking has taught me creativity, patience, and gratitude — lessons that spill over into every other area of life.
Homesteading has shown me that ingredients matter less than the care and love you pour into them. Every loaf, jar, and meal built from raw goods feels like an act of heritage — and hope — in a world that moves too fast.
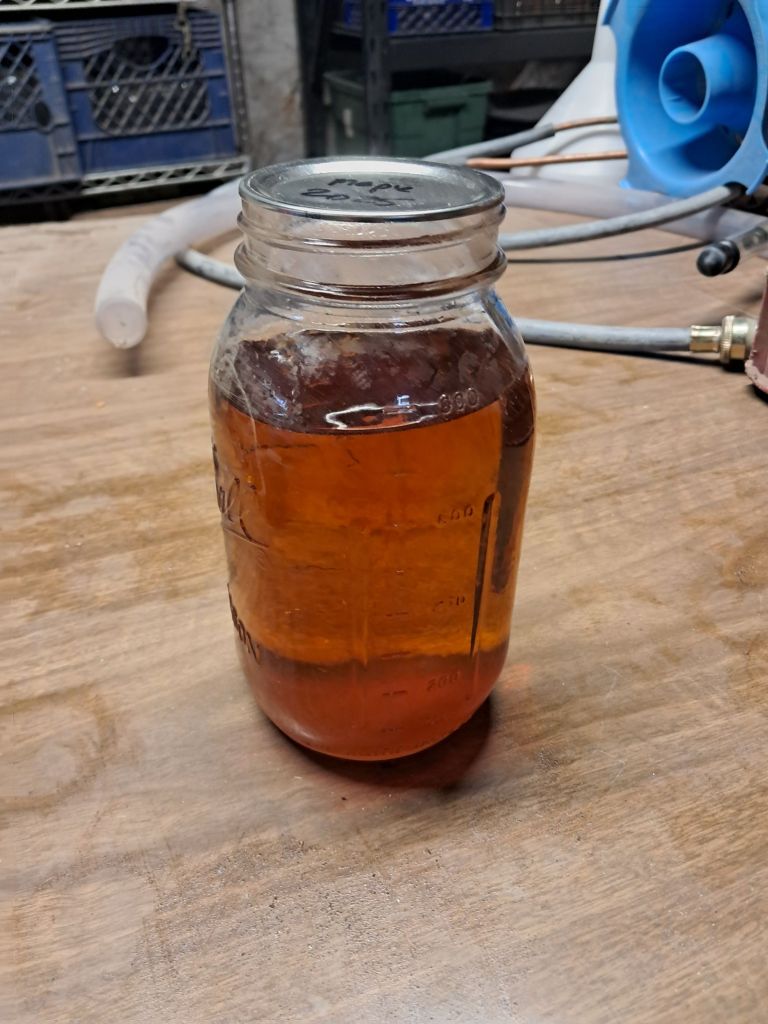
Homestead maple syrup
What five grocery staples would make your list? Please share them in the comments. And if this post inspired you, please like, share, or subscribe to follow more homesteading stories, seasonal recipes, and simple living tips.
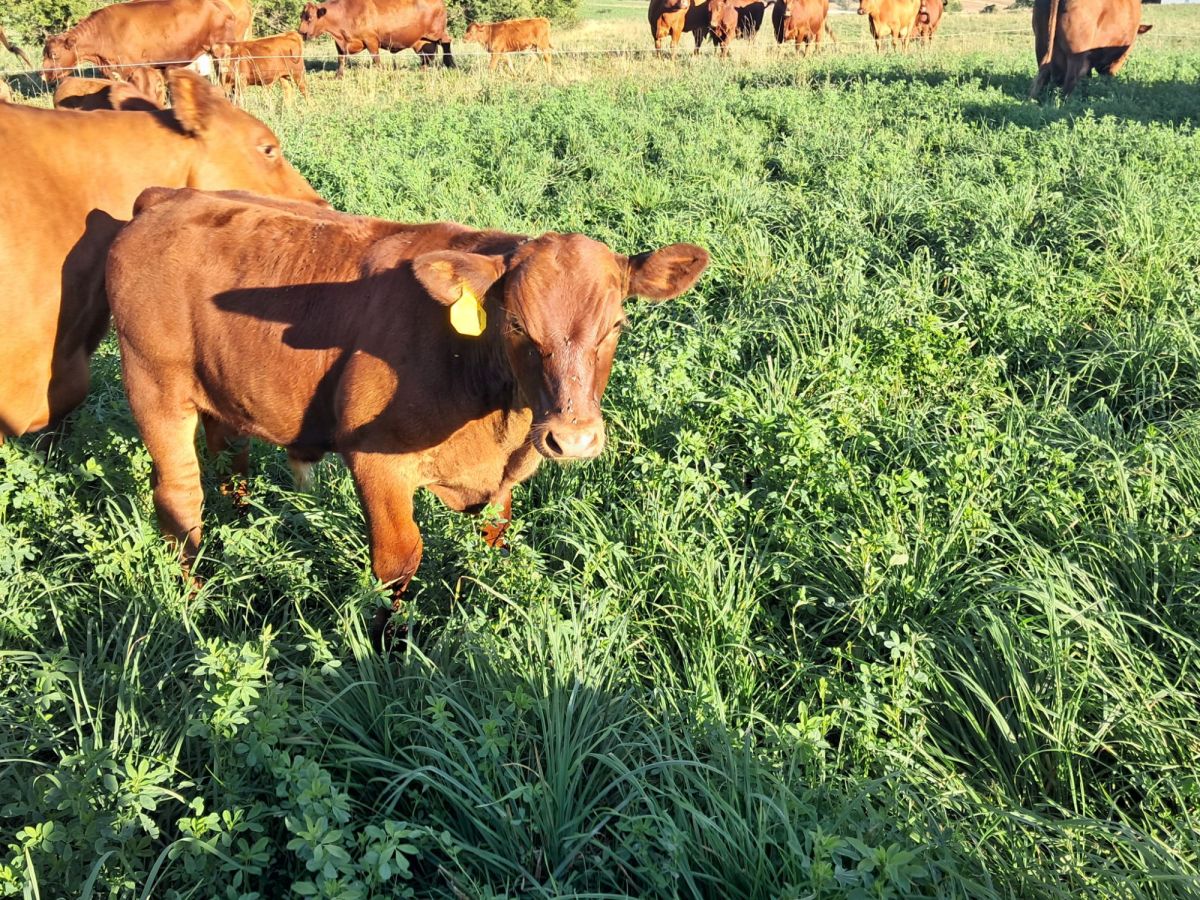
Experience a vivid farm story about rotational grazing, resilience, and regenerative land stewardship through the eyes of a family and their Red Angus herd. Discover how cattle, people, and pasture move together in balance
Disclosure: This post contains affiliate links. As an Amazon Associate, I earn from qualifying purchases. Thanks for supporting Practical Homesteading! There’s something special about meals that tell a story. The kind of food that’s more than a recipe — but part of life. For us, that story came together in one simple dish: a homemade…
A 2025 garden reflection full of lessons, surprises, and laughter—one-pound onions, overflowing basil, hybrid watermelon mishaps, and happy pigs. Discover the stories and takeaways from our most rewarding gardening season yet.
Disclosure: This post contains affiliate links. As an Amazon Associate, I earn from qualifying purchases. Thanks for supporting Practical Homesteading!
Venison gets an unfair reputation — people call it tough, gamey, or finicky. But after more than six years of learning, tinkering, and a few overcooked inedible mistakes, I’ve found the secret to turning this beautiful wild game into something melt-in-your-mouth tender. It’s not magic — just good technique, a mindful marinade, and a skillet hot enough to make Hank Shaw proud.
1. Start with quality Good venison starts long before it hits the pan. Pick a clean, lean cut — the kind that shows care in field dressing and storage. If you’ve stocked your freezer after a hunt (or a gift from a friend), make sure it’s well-wrapped and free from freezer burn. The better your meat, the better your final dish.
2. Slice it right Here’s the part most people overlook: how you cut the meat changes everything. Slice thin (less than 1/8 inch [3 mm]), against the grain, and while it’s still half-frozen. That half-frozen state gives you control. If it’s too frozen, you’ll be sawing through it. If it’s too thawed, you’ll end up mashing it. I use this knife (affiliate link) this honing steel (affiliate link) to sharpen the blade. I probably learned this trick while watching America’s Test Kitchen one winter, and it’s been my quiet edge ever since.
3. Marinade that magic This is where you build the flavor. Mix fish sauce, soy sauce, sesame oil, and a splash of dry wine. Then let it rest overnight in the refrigerator. The marinade seeps into the thin slices, giving your stir fry that rich, layered flavor that tastes like it came from a seasoned wok.
Here’s my marinade recipe. Feel free to use or modify it as needed! This marinade works well with any protein, and even tofu if you prefer vegetarian dishes!
3/8 cup (90 mL) oyster sauce
1/4 cup (60 mL) soy sauce
1.5 T (22.5 mL) sesame oil
1.5 T (22.5 mL) Shaoxing wine (I substitute in a dry white wine when I don’t have this on hand)
4. Hot skillet, quick cook Here’s a move straight out of Hank Shaw’s (the Hunter Angler Gardener Cook) playbook. Get your skillet (affiliate link) rip-roaring hot. Cover the bottom with about one-eighth inch (or 3 mm) of high-heat oil, and work in small batches. Lay the meat out in a single layer — no overcrowding.
Each side needs just a quick sear. When it’s this thin, the edges brown beautifully, and the center stays tender. This is where patience pays off — resist the urge to stir too early. This technique is called velveting, and will elevate your stir fry from merely good, to great.
5. Bring it all together Once the venison’s seared, set it aside and toss your vegetables in that same pan. The oil and browned bits from the meat give your veggies an instant flavor boost. Toss in a high water vegetable such as frozen bell pepper to deglaze the pan. Combine everything, toss until the sauce clings, and serve it steaming over a bed of rice (affiliate link). I prepare it using a pressure cooker (affiliate link) to get the perfect texture every time.
6. The reward This dish represents six years of cooking smarter — not just harder. It’s the payoff from learning where texture meets timing and how to balance heat and patience. Add in homegrown vegetables from the garden, and you’ve got a true farm-to-table moment.
Venison doesn’t have to be tough. With the right prep, it’s tender, juicy, and just a little bit wild — in the best way.
And if you want to read the full story of this stir fry, read this post.
If this recipe helped you fall a little more in love with cooking wild game, I’d love to know! Hit that like button. Share this with a fellow homesteader or hunter. Subscribe to the blog for more down-to-earth stories and recipes from our kitchen to yours.
Discover the joys and challenges of raising backyard turkeys in this heartfelt story about patience, humor, and the journey from fluffy poults to Thanksgiving centerpiece. Learn personal lessons and practical insights from a family’s wild turkey-raising adventure.
If you love making your own food from scratch, this homemade venison jerky recipe is a must-try. Whether you’re a hunter processing your latest deer or simply someone looking for a leaner, high-protein alternative to beef jerky, this step-by-step guide walks you through every stage: from processing and seasoning to smoking and dehydrating. We even…
A reflective homesteading essay about turning fifty rescued lemons into food and connection. Learn how small choices and mindful reuse can reduce the 40% of food wasted in America every year.
Disclosure: This post contains affiliate links. As an Amazon Associate, I earn from qualifying purchases. Thanks for supporting Practical Homesteading!
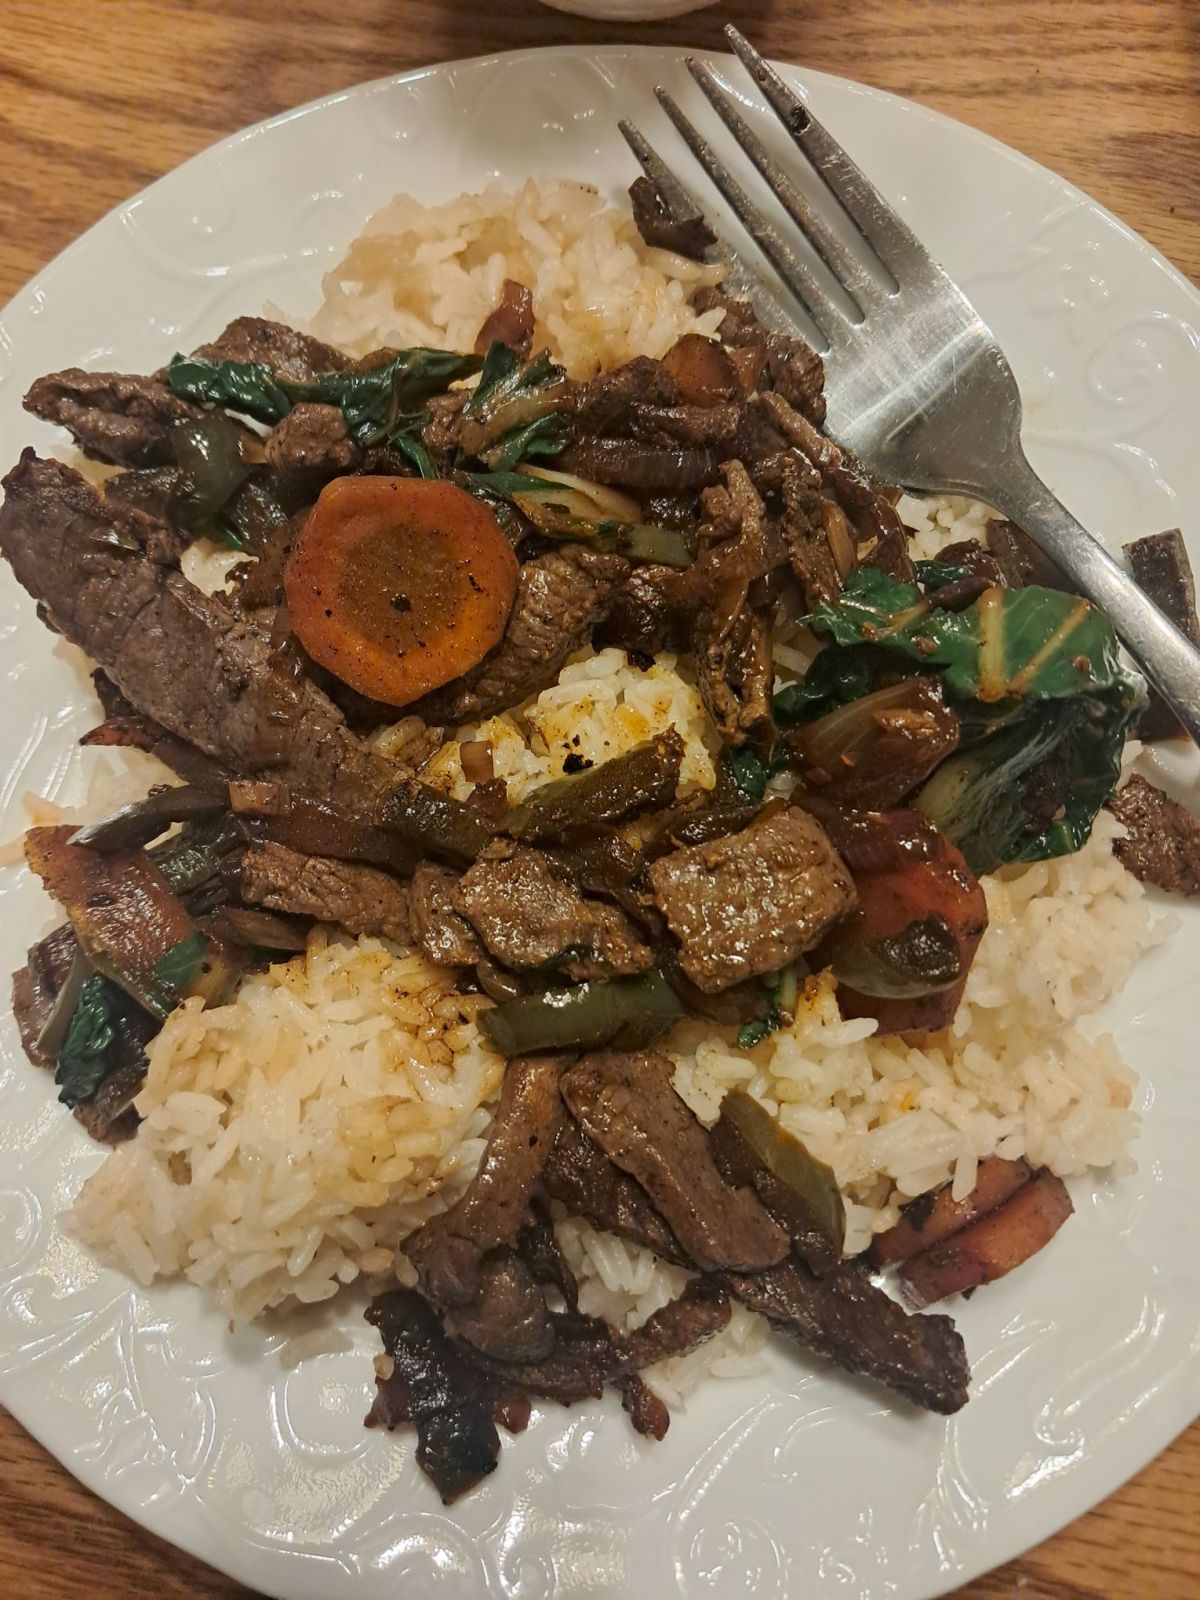
There’s something special about meals that tell a story. The kind of food that’s more than a recipe — but part of life. For us, that story came together in one simple dish: a homemade venison stir fry. It started months ago in the garden, wound through a winter greenhouse, and ended at a table surrounded by six hungry, happy faces. This wasn’t only food, but it a reminder of why we homestead in the first place.
A Stir Fry That Tells a Story
We had venison stir fry for dinner recently, a meal that smells like effort and tastes like reward. Stir fry always means chopping, sizzling, and a little chaos in the kitchen, but every bite feels like celebration. The dish is never quite the same for us. It shifts with the seasons and whatever our garden and freezer produce. That’s part of its beauty — it’s a living reflection of our homestead.
From Seed to Skillet
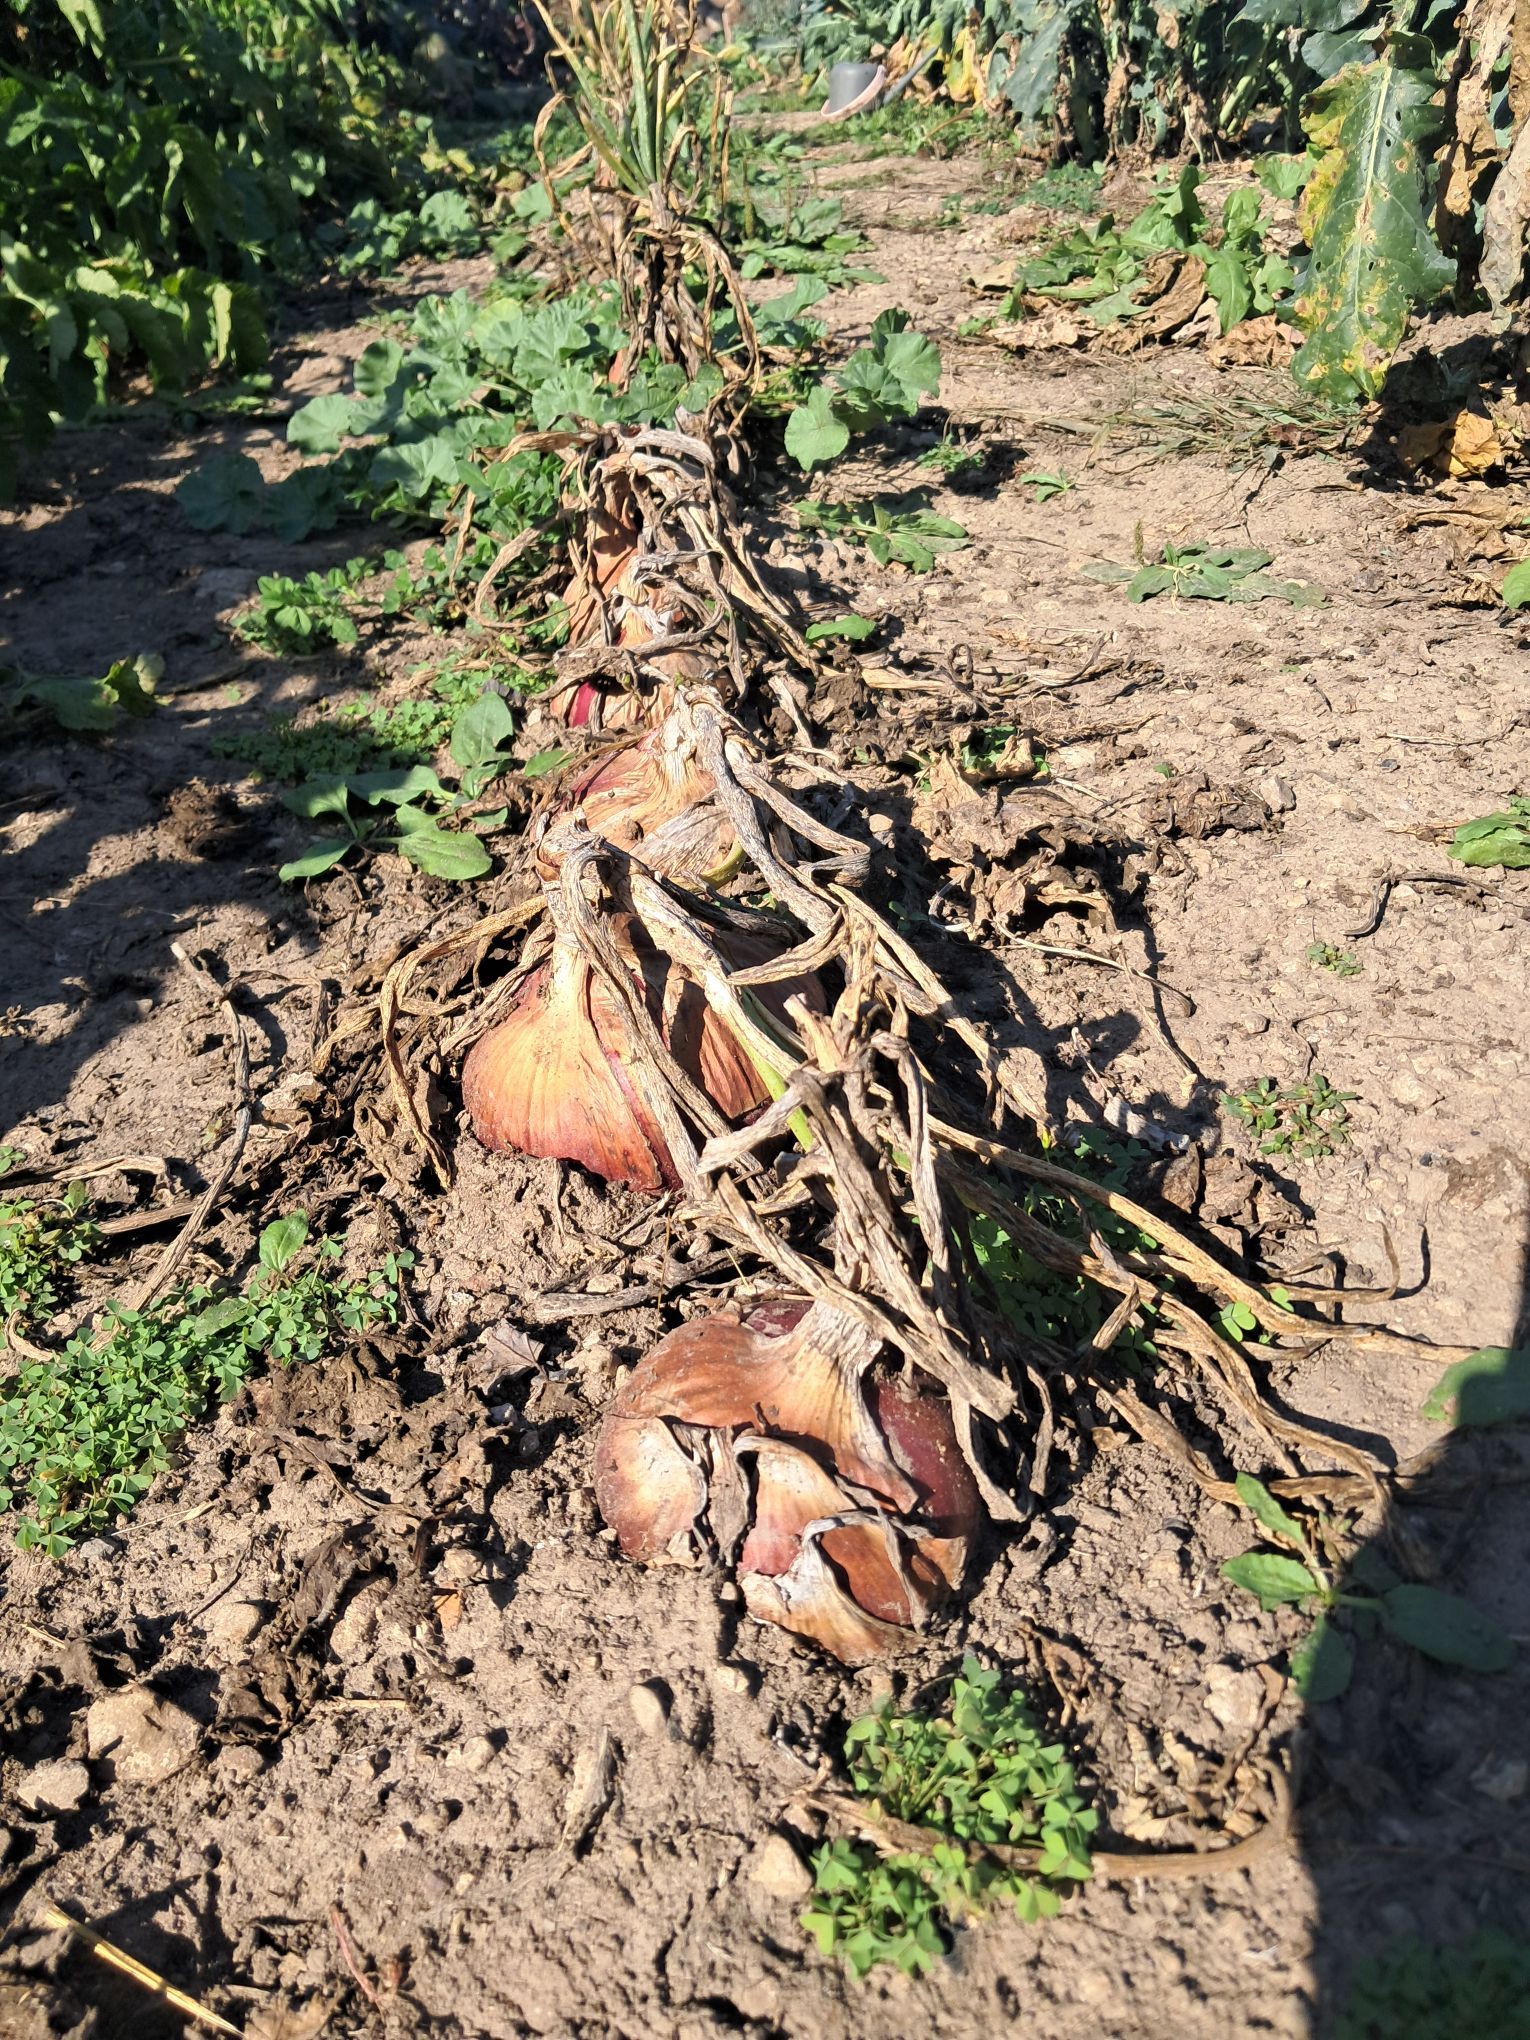
The story of this particular stir fry starts late last winter when we started onion and pepper seeds inside. We watched them grow, and my son delighted in trimming the onion shoots to give more life to the roots. Come spring, we pressed carrot seeds into the earth and transplanted our onions and bell peppers. By summer, our days smelled sweet and green. My kids loved pulling up carrots, brushing off dirt, and biting in right there in the garden. Their juice was sweeter than candy. The onions swelled to the size of softballs. When their stalks dried, we cured them in the basement. Then we set them inside old fruit crates beside jars of last year’s preserves. Peppers overflowed in waves of green, so I bagged and froze them for colder days.
Onions as they first sprouted from the ground.Mature onion, ready for harvestPeppers galore!
Homesteading tip: Frozen bell peppers don’t need blanching. To preserve, just slice, seed, and freeze them raw for perfect stir fry texture later. Onions can be cured and placed in a cool dark place to keep over winter.
By November, we tucked our last carrots under straw, the soil still holding its warmth like a secret.
Winter’s Sweetest Harvest
In December, I scraped away snow and straw with my bare hands to dig some carrots. (A mistake I won’t repeat — frostbite nearly earned an invitation to dinner.) My son peeled them eagerly, and when we tasted the first one raw, its sweetness floored us. Cold turns carrots into sugar. They’re winter candy disguised as vegetables.
Homesteading note: A thick straw mulch keeps carrots from freezing and lets you harvest them into early winter.
Winter carrots
Greenhouse Gold
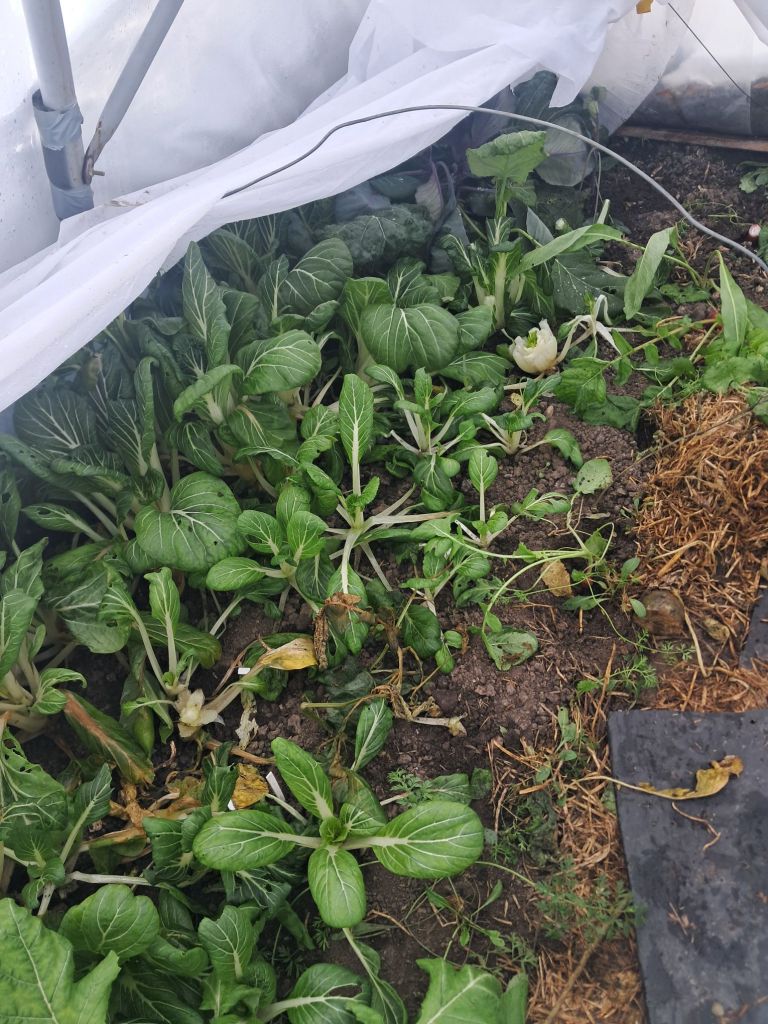
The bok choy came from a new experiment. I helped my experienced friend start a winter garden. I still remember stepping into her small greenhouse surrounded by snow. The chill outside vanished into crisp air that smelled of soil and life. Beneath soft covers, green leaves glowed faintly in the filtered light. Harvesting bok choy in December felt like a small miracle.
Winter gardening tip: A simple plastic-covered hoop house and landscape fabric over each row can extend your growing season by months. The flavor difference in fresh winter greens is unbelievable.
Bok choy harvested in December
Family in the Kitchen
Cooking became a family affair. My daughter stood at my side, eyes watering over the cutting board, proudly dropping onion slices into the container as I sliced them with this knife (affiliate link). My six-year-old son learned how to make rice that night — a big responsibility. We’d bought the rice from our local scratch-and-dent store for much less than retail. It wasn’t something we grew ourselves, but it was another way to live intentionally, supporting local businesses and stretching our budget.
He measured the rice, water, and bouillon with quiet focus, stirring carefully to break up every clump in the pressure cooker (affiliate link). Watching his concentration, I realized that learning to cook simple staples might be one of the best skills a homesteader’s child can develop.
Parenting philosophy: Give your children small but meaningful jobs in the kitchen as you cook. It takes the burden from you to endlessly entertain them, and they learn real life skills.
Wild Meat, Real Gratitude
The venison came from the road. This deer was recently hit by a car, and my husband found it on his way to town one chilly fall day. He hauled it home, and that night he and his dad processed every usable piece. We made jerky from some and froze the rest for meals like this. There’s a quiet satisfaction in knowing exactly where your food came from, in salvaging instead of wasting.
Homesteading philosophy: Nothing should go to waste. This includes an animal, harvest, and opportunity to teach your children how to create value from what’s available.
From Skillet to Supper Table
When it was time to cook, I sliced the venison thin while half-frozen and marinated it overnight. The next day, the meat hit the hot skillet (affiliate link)— hissing, sizzling — browning into tender, caramelized pieces. My kids stole bites faster than I could cook them.
Cooking tip: Slice meat against the grain while it’s half-frozen for cleaner cuts and more tender results. This small trick makes all the difference with lean game meat like venison.
The vegetables followed: frozen peppers releasing water that deglazed the pan. The onions soaked up the sauce until they were golden brown. The carrots softened just a bit. The bok choy folded gently into the mix. The whole kitchen filled with the earthy perfume of garlic, soy, and family.
Six Around the Table
By dinner, the six of us — our little family and my husband’s parents — gathered around a steaming pot of rice and a glossy pot of stir fry. It wasn’t just delicious; it was ours — every part grown, harvested, found, or crafted by hand. That’s the heart of homesteading for me. It’s not simply saving money or knowing what’s in your food. It’s seeing how the garden dirt beneath your nails, a salvaged deer, and a child’s curiosity can all end up in the same bowl. It’s nourishment that carries the story of your family’s seasons.
Homestead Notes
Preserve what you grow: Freeze peppers raw and store onions in breathable boxes.
Extend your harvest: Straw-mulched carrots and cold-frame greens can provide fresh food even in winter.
Use what you have: Venison, garden vegetables, and discounted pantry staples can turn a simple meal into a story.
Teach through involvement: Kids remember the meals they helped make far more than the food they simply ate.
If our venison stir fry story stirred something in you — a memory, a craving, or just a bit of inspiration to slow down and cook what you grow — we’d love for you to join our little homestead circle.
Click like if you enjoyed this story. Share it with someone who’d appreciate the journey from seed to supper. Subscribe to follow along as we grow, cook, and live season by season.
If you love making your own food from scratch, this homemade venison jerky recipe is a must-try. Whether you’re a hunter processing your latest deer or simply someone looking for a leaner, high-protein alternative to beef jerky, this step-by-step guide walks you through every stage: from processing and seasoning to smoking and dehydrating. We even…
A 2025 garden reflection full of lessons, surprises, and laughter—one-pound onions, overflowing basil, hybrid watermelon mishaps, and happy pigs. Discover the stories and takeaways from our most rewarding gardening season yet.
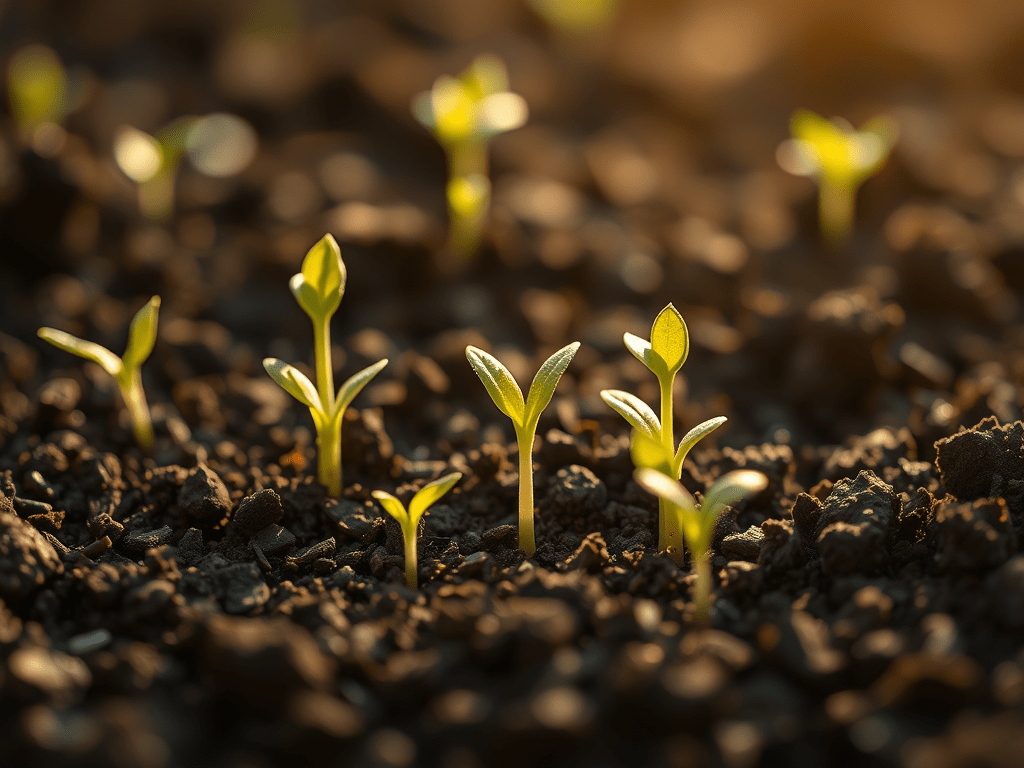
The soil was cooler than I expected when I slipped a broccoli seedling into the ground. September isn’t when I usually think about planting—it’s when I imagine gardens winding down, not continuing. For me, gardening has always belonged to summer: long days of pulling weeds at dusk, arms full of cucumbers, nights spent rushing to…
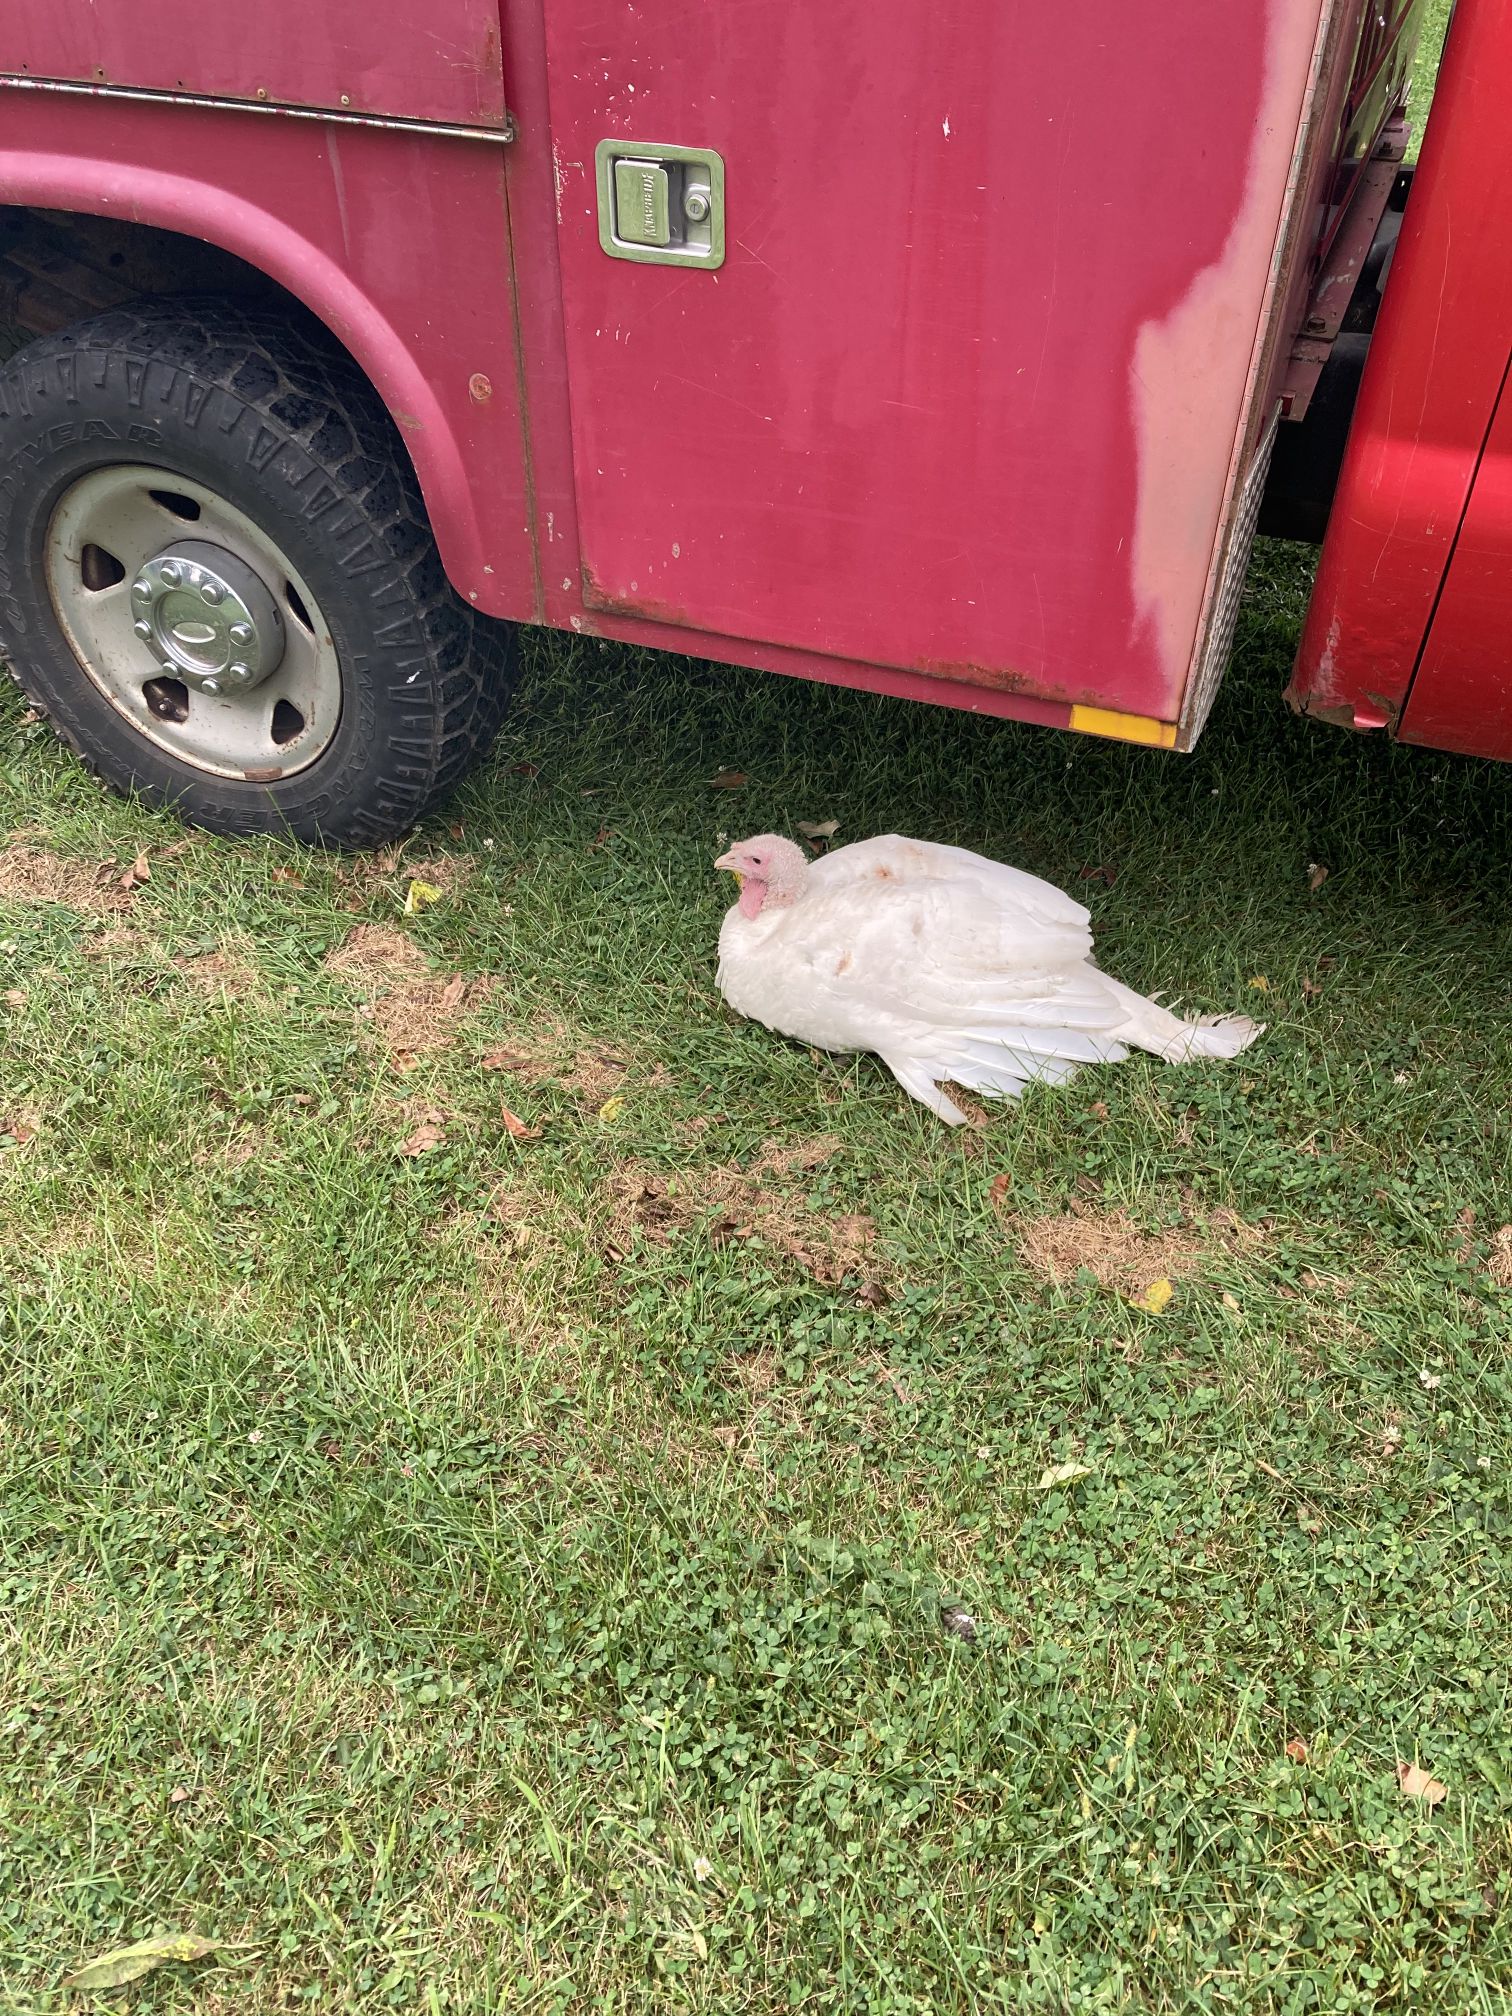
Gobbles, our forty‑pound turkey, once refused to move for the lawnmower. My husband drove closer, then closer still, waiting for the bird to do the sensible thing. Gobbles didn’t budge, and that’s how we ended up with a turkey‑shaped patch of unmowed lawn—a small, stubborn monument to the wild experiment we’d started in our backyard.
A New Chapter in Backyard Farming
Chickens had already shown me that birds can be both hilarious and mean. Ducks had proven that cuteness and filth can happily coexist. A few years ago, after reading about a woman who raised her own Thanksgiving turkeys, I realized I wanted to go further. When our local hatchery couldn’t source ducklings one spring, it was a minor inconvenience. This became the excuse to bring home three turkey poults instead.
From Basement Brooder to Outdoor Coop
This time, my husband handled pickup duty. He arrived with a box of peeping chicks and poults. Their arrival turned the whole house electric with anticipation. The brooder—a repurposed water tank in our basement—waited with a heat lamp, water, feed, and a lid to contain the chaos. At first, the turkeys were only slightly larger than the chicks, all of them fluffy and awkward. Within days, though, the turkeys started to pull away. They doubled in size, then doubled again. It seemed their entire job was to eat, drink, and poop as efficiently as possible.
We lost one poult early on for reasons we never understood, and the sudden shift from three to two landed harder than I expected. It was a quiet, early lesson in how fragile life on a small farm can be. Of the survivors, one always had his feathers sticking out at odd angles, so we named him Gobbles, a little wink to anyone who’d seen South Park. The smaller bird became Jennie, after the frozen turkey brand that had defined “Thanksgiving” for us before we raised our own.
Gobbles
By early May, the brooder was bursting, and everyone was ready for fresh air. We tried separating the turkeys from the chickens that first night outside, but the noise they made made it clear we were fighting a losing battle. After one loud, sleepless experiment, we moved everyone into our mobile chicken coop and let them sort it out. During the day, they roamed the yard as a mismatched flock, and each evening they filed back into the coop like feathered commuters, jostling for their preferred spots.
Jennie
Personality Plus: Turkeys vs. Chickens
Living with both species at once made their differences obvious. The chickens were efficient, slightly tyrannical little dinosaurs. The turkeys seemed to have missed out on common sense entirely. On Memorial Day weekend, a big storm rolled in; the chickens headed straight for shelter, while the turkeys stood in the downpour, soaked and squawking as if the rain were a personal insult.
My husband and I slogged around in the storm, alternating between laughing and swearing as we scooped them up and shoved them under cover. We were half convinced they might drown standing there or draw an eagle with all that frantic noise. By summer, their physical transformation matched their larger‑than‑life behavior. If the chickens were little dinosaurs, the turkeys were the T‑rex cousins. After about four months, Gobbles weighed around forty pounds and Jennie about twenty‑five, and both strutted like they owned the place.
Rising Stakes: Growth and Pecking Order
Gobbles clearly saw himself at the top of the pecking order, inserting his bulk into whatever drama unfolded among the hens. Jennie, despite her smaller size, regularly put the roosters in their place and even bloodied one during a particularly heated round of dominance negotiations. The same birds that made us laugh with their antics were always moving toward the date we’d circled on the calendar. Around the five‑month mark, butcher day arrived—never something we looked forward to, but the reason we’d brought them home.
Butcher Day: The Hardest Part of the Journey
My husband handled the hardest part. Once it was done, I thanked the turkeys out loud before joining the work of plucking, stepping away now and then to check on the kids. Our five‑year‑old surprised me by wanting to help, his small fingers well suited to grabbing stubborn feathers, and I felt a brief tug between pride and discomfort as I let him join in. My husband’s father arrived and the day settled into a rhythm: music playing, adults talking, drinks in hand, hands busy. The work was still heavy, but it felt shared, almost like a ritual we were inventing as we went.
By the end, we had one dressed turkey at about thirty pounds and another around twenty, lined up for the freezer like oversized, deeply personal trophies of our effort.
Preparing the Turkey for the Table
I hauled Gobbles from the freezer about a week before Thanksgiving. I set him to defrost in our unheated upstairs. He loomed silently every time I walked past. Each glance reminded me of the fluffy, clumsy poult he had been. It also brought back the long, messy chain of chores that had brought him there.
Two days before Thanksgiving, I mixed a simple brine with salt, sugar, Worcestershire, garlic, and pepper. I discovered that the only vessel big enough was our turkey fryer, minus the basket. It was a ridiculous fit, but it worked. On Thanksgiving morning, we got up early, drained the brine, patted Gobbles dry, rubbed him with salt and oil, and wedged him into a large Nesco roaster so tightly we had to shove his legs down to close the lid. Then we poured in four cans of Miller Lite and turned our attention to the rest of the meal.
Waiting for that turkey to cook felt tense and nerve-wracking. It was like waiting for an exam grade posted in front of the entire extended family. Fifteen people, one bird, no backup plan if it turned out dry or oversalted. As the scent of beer, garlic, and roasting fat filled the house, my anxiety loosened its grip. It shifted into something closer to anticipation. Even if it wasn’t perfect, it was already unforgettable.
Thanksgiving Dinner: More Than Just a Meal
When we finally gathered around the table, Gobbles was as much story as food. As everyone carved off pieces, we traded memories of his lawnmower standoff. We recalled his attempts at intimidation. We laughed at the way he used to lumber after the flock like a confused bodyguard. Conversation took on the tone of a slightly irreverent eulogy as we honored his life in the most direct way possible. We ate the bird who had once stood his ground against a mower and won. It was the best turkey I’d ever tasted, not because it was flawless, but because we knew every step that had led to that plate.
Lessons Learned and Lasting Memories
Looking back, those turkeys demanded patience when they outgrew every space we gave them. They taught us humility when plans went sideways. We needed a sense of humor. We found ourselves sprinting through rainstorms to rescue birds that were too bewildered to seek shelter. They pulled Thanksgiving out of the grocery store freezer and dropped it squarely into our own backyard. I don’t know if I’ll raise turkeys again. Every November, when I see a frozen Jennie in the supermarket, I remember Gobbles and Jennie. I think about the stubborn patch of lawn out back. I recall the season when our holiday centerpiece had a personality—and a history—all his own.
If you’ve raised turkeys or other backyard poultry, share your stories, challenges, or favorite moments in the comments below! What surprises did your birds bring? What tips would you pass on to someone thinking about raising their own turkeys?
If you enjoyed this story, please like it. Share with your fellow backyard farmers. Subscribe for more honest, practical tales and tips from life on a small farm. Your support helps us keep these stories—and the learning—coming!
Looking for a way to turn fresh venison into something truly delicious and shelf-stable? You’re in the right place! In this post, we’re walking through how we took a deer we recently processed and transformed it into mouthwatering homemade venison jerky—a high-protein, low-fat snack that’s perfect for hunters, hikers, and anyone who loves wholesome, from-scratch food. If you’ve ever wondered what goes into making jerky from scratch or whether smoking or dehydrating tastes better, read on—because we tested both methods side by side and have the results for you!
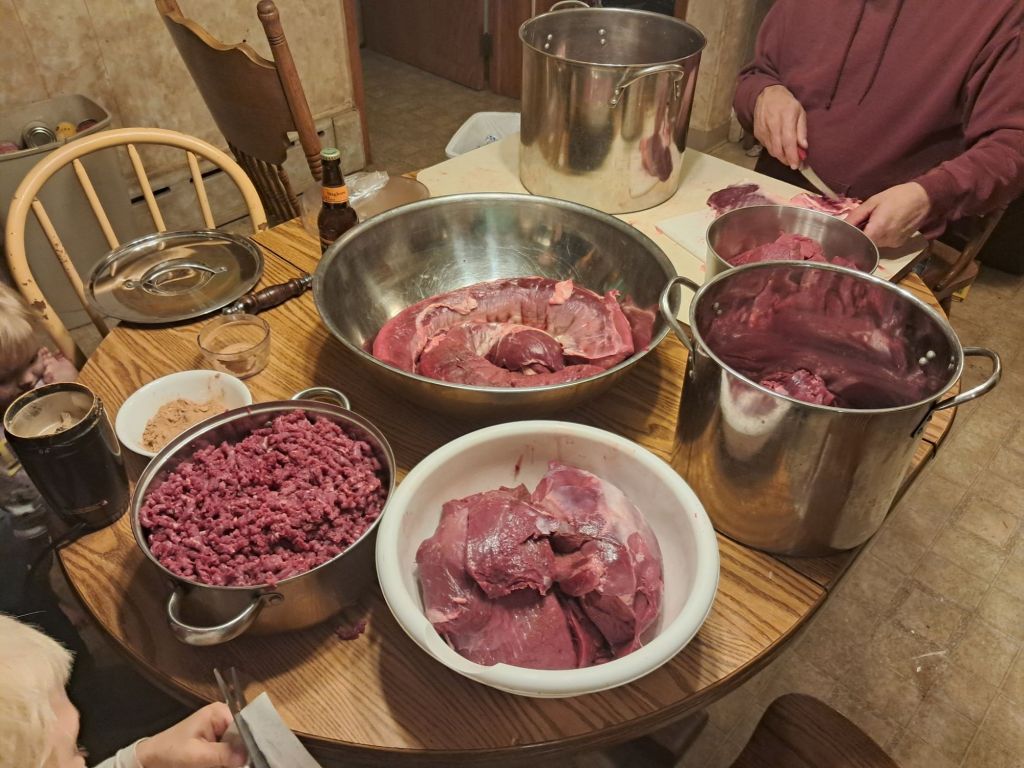
Processing the Venison After harvesting the deer, my husband handled the messy part—removing the hide and quartering the meat. While I didn’t snap photos of this step, it’s essential for breaking the animal down into workable portions. Once the meat was ready, we began deboning—a labor-intensive process!
But here’s the payoff: processing your own game ensures quality and freshness with the satisfaction of providing your own food. Plus, venison is leaner and lower in fat than beef, while being packed with protein, iron, and essential nutrients. It’s an excellent, heart-healthy meat to keep in rotation alongside veggies, fruits, and other proteins.
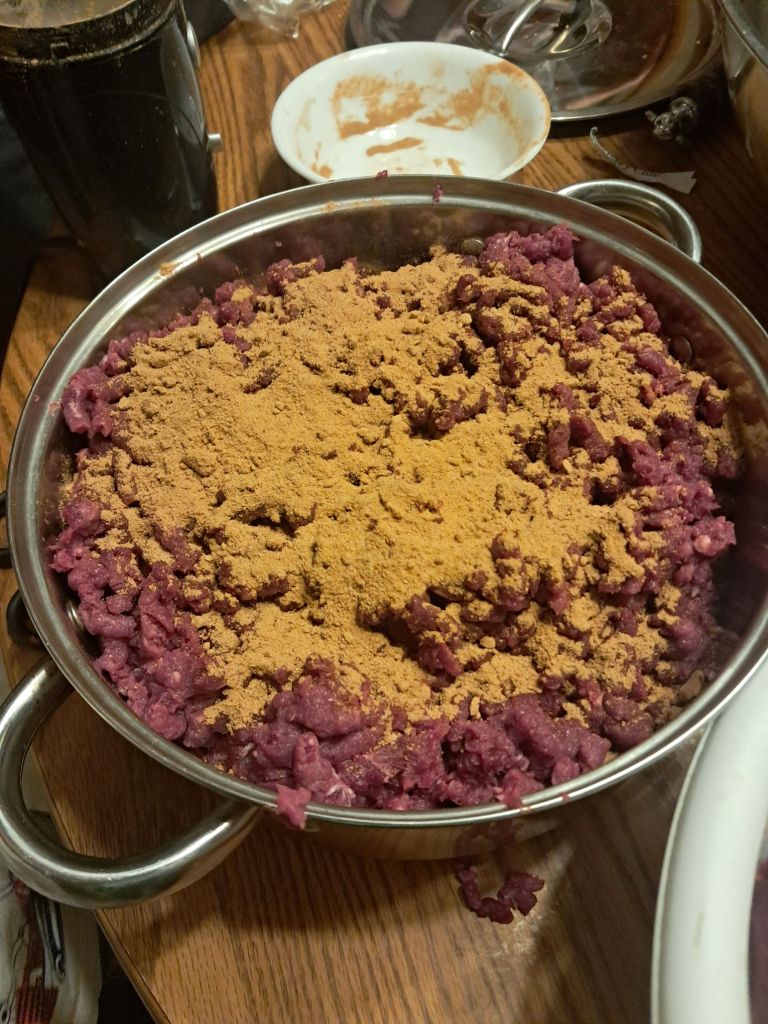
Grinding and Seasoning the Meat Once the bones were removed, we ground the tougher cuts and trimmings using our trusty meat grinder. (Ours has been a solid investment—it’s strong, doesn’t clog easily, and is simple to clean. If you’d like a product recommendation, drop a comment below!)
For seasoning, we used a Fleet Farm Original Flavor jerky seasoning mix, which offers a balanced blend of savory and slight sweetness—perfect for venison’s natural richness. We mixed the seasoning thoroughly, ensuring every bite would be flavorful, then refrigerated the seasoned meat overnight to let all those seasonings work their magic.
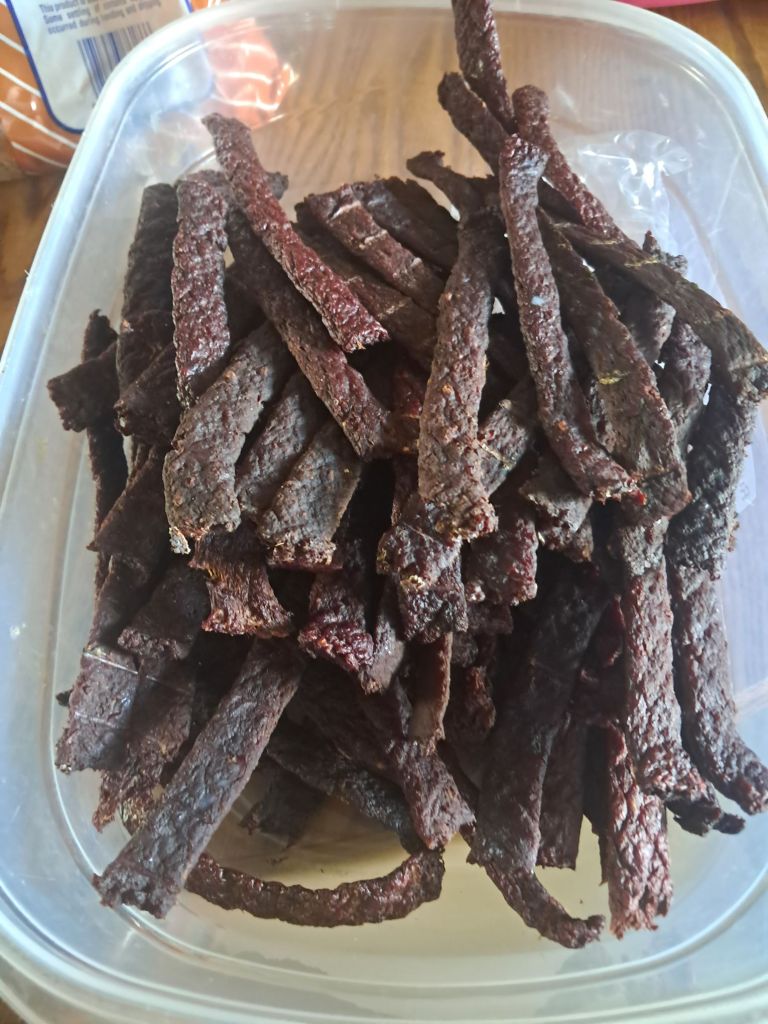
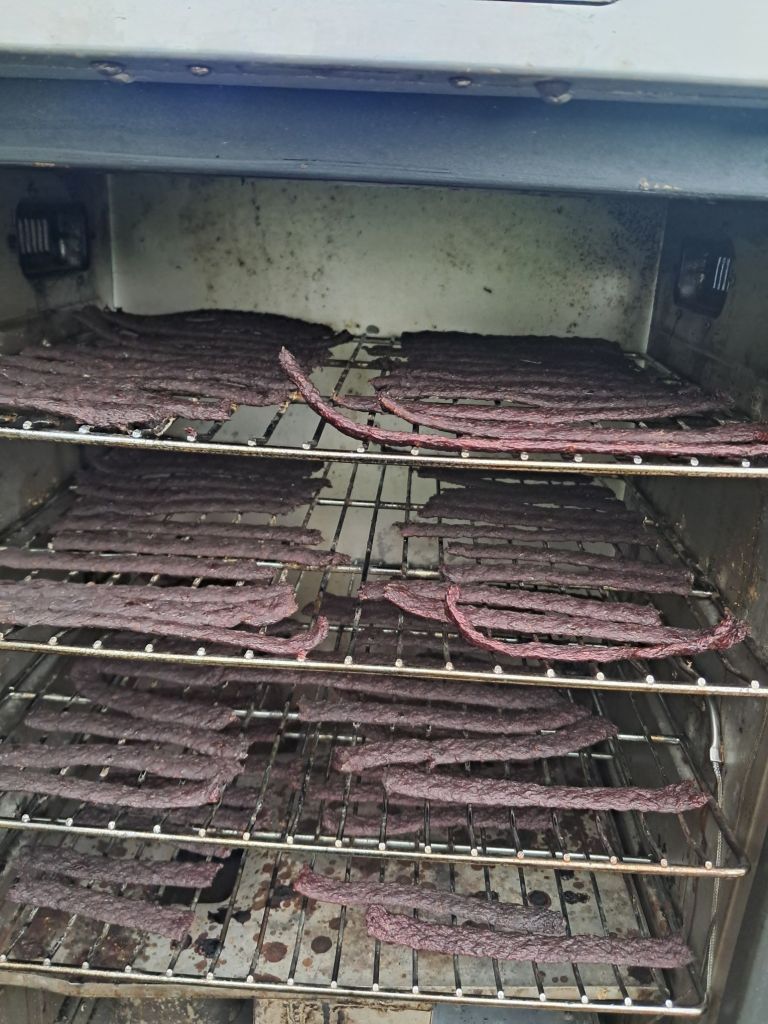
Shaping and Drying the Jerky The next day, we got creative with our setup. Instead of a dedicated jerky gun, we improvised with our meat grinder using a sausage tube narrowed down with a vice grip. Sometimes, homesteading means working with what you have, and this hack worked beautifully!
After shaping the jerky strips, we placed them on racks and divided our batch in two for a taste test: smoked vs dehydrated.
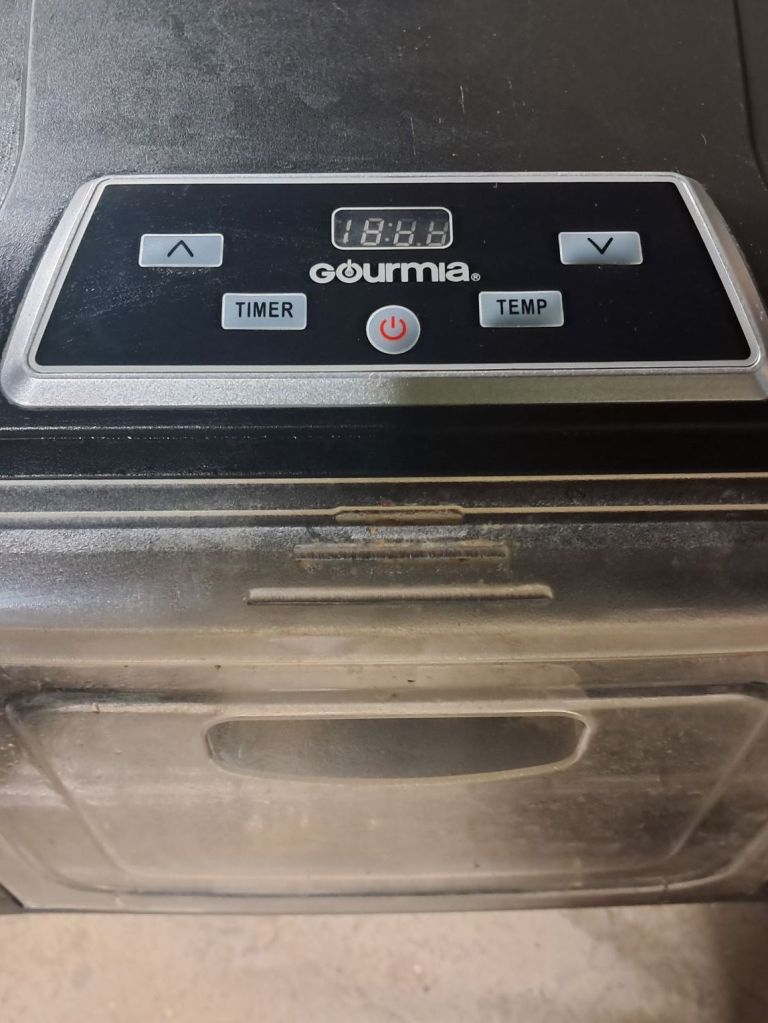
• Smoker: Applewood chips, 160°F, for 6 hours • Dehydrator: 160°F, for 12 hours
The Verdict: Smoked vs. Dehydrated Venison Jerky Both batches turned out delicious, but slightly on the dry side—a note for next time!
The applewood smoked jerky, however, stole the show. The smoky aroma, subtle sweetness, and depth of flavor make it hard to beat. If you’re on the fence about getting out the smoker, trust me—it’s worth it.
Smoked or dehydrated, homemade venison jerky tastes incredible, packs well for adventures, and gives you that satisfying “I made this!” pride every time you open a bag.
Final Thoughts and Tips Making homemade venison jerky takes time, but it’s incredibly rewarding. You know exactly what’s going into your food, it’s healthier than store-bought, and it captures the true flavor of the hunt.
If you’re new to jerky-making, I recommend experimenting with both smoking and dehydrating to see which method suits your taste best. Adjust drying time slightly to achieve your ideal texture.
Join the Conversation! Have you made venison jerky before? What seasoning blend or wood smoke do you swear by? Comment below—I’d love to hear your tips! And if you enjoyed this post: 👉 Like, share, and subscribe for more homesteading, cooking, and DIY food adventures. Your support helps us keep creating helpful content for folks like you!
Follow us on social for daily kitchen and homestead inspo.