I love harvesting vegetables from the garden and putting them up for later. There’s something satisfying about knowing summer’s work will carry us through the colder months. One of my favorite ways to preserve vegetables is by blanching and freezing them, and broccoli is one of the easiest places to start.
I usually plant far more broccoli than our family can eat during the summer, which makes it a perfect candidate for the freezer. The same method also works well for other garden vegetables like green beans, cauliflower, and carrots, depending on the vegetable and how it holds up to blanching.
How to Blanch Broccoli
I start by harvesting broccoli heads when they are ready, then cut them into bite-size pieces with some stem attached and soak them in cold water. While the broccoli is soaking, I bring a large kettle of water to a boil.
Select good heads of broccoli that have not flowered and are full
Once the water is boiling, I add the broccoli and blanch it for 2.5 minutes. Then I remove it immediately and plunge it into icy water to stop the cooking process. This helps preserve the broccoli’s color, flavor, and texture for long-term storage by slowing the enzymes that can cause spoilage and off-flavors.
Before blanchingAfter blanching
How to Freeze Broccoli
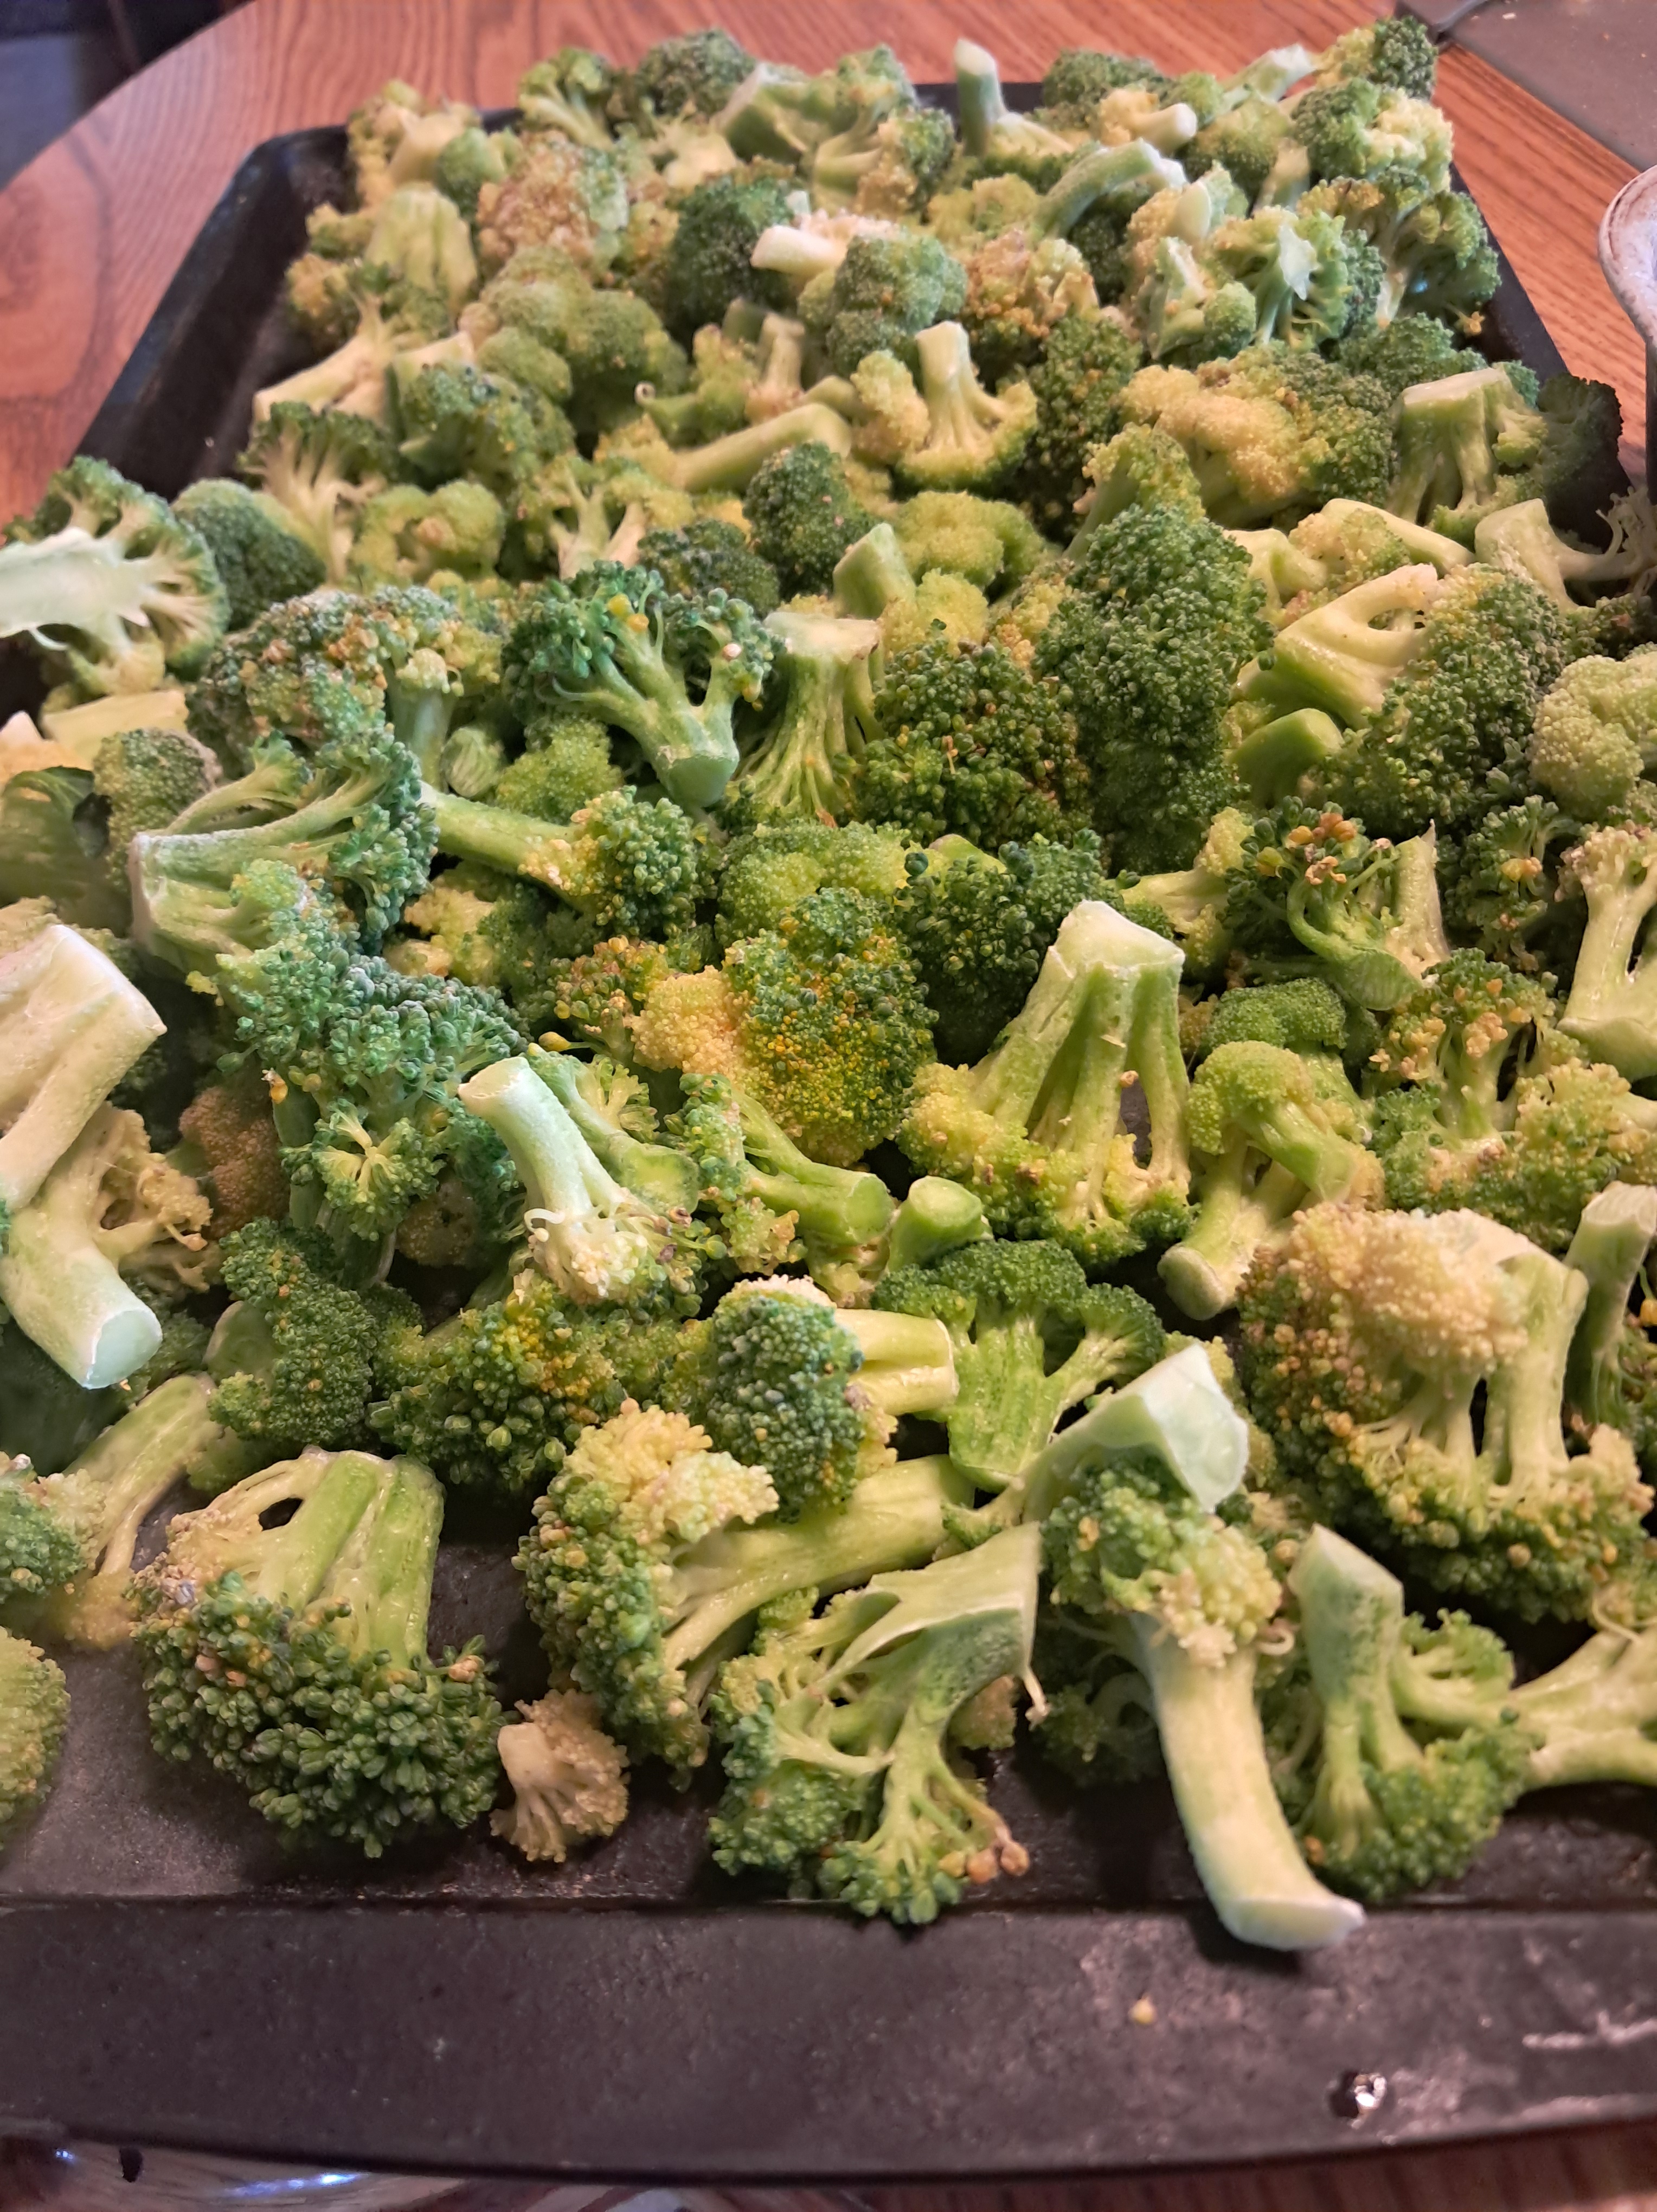
After the broccoli has cooled completely, I spread it out on a cookie sheet and place it in the freezer overnight. This step keeps the pieces from freezing into one big clump, so I can easily grab just what I need later. Once frozen, I transfer the broccoli into quart- or gallon-size freezer bags and store it in the freezer until I’m ready to use it.
I spread the broccoli onto a cookie sheet and place it in the freezer overnight so I can pull out as much as I need.Don’t forget to properly label the bags! Here, I kept it simple: food, and month/year of harvest.
Frozen broccoli is one of my favorite vegetables to pull out in the middle of winter. I use it in dressed-up ramen, soups, stir-fries, and as a simple side dish with dinner. It never seems to last until the next harvest season. Even with my best efforts, we usually run out by February, right around the time I’m planting broccoli again from seed.
Other Vegetables to Blanch and Freeze
The same basic blanch-and-freeze method works well for other vegetables from the garden too. Green beans are a freezer favorite, and I also like to preserve cauliflower and carrots when we have extra. If you grow a garden, freezing vegetables this way is one of the easiest ways to avoid waste and enjoy your harvest later in the year.
Blanching Guide for Garden Vegetables
If you like having a quick reference, here’s a simple blanching guide for a few common garden vegetables, along with the kinds of dishes they work best in after freezing.
Vegetable
Blanch Time
Freezer Life
Best For
Broccoli
2.5 minutes
8–12 months
Roasting, soups, stir-fries, side dishes
Green beans
3 minutes
8–12 months
Side dishes, casseroles, sautés
Cauliflower
3 minutes
8–12 months
Roasting, soups, mash, casseroles
Carrots
2–3 minutes
10–12 months
Soups, stews, roasting, glazing
Brussels sprouts
3–5 minutes
8–12 months
Roasting, skillet dishes, side dishes
Blanch times can vary a little depending on the size and freshness of the vegetable, so use this as a starting point. When I freeze vegetables, I usually label the bag with the date so I can keep track of what needs to be used first.
More Garden Freezer Ideas
In my next post, I’ll cover how to freeze garden vegetables that you fully cook first, such as sweet corn, beets, and squash.
Do you preserve vegetables from your garden? What are your favorites to freeze? Share your favorites in the comments.
If this post was helpful, please like and share it with a friend who loves preserving garden produce.
Camping was a big part of how we kept our 5‑day family road trip under $1,000, but we also wanted everyone to be comfortable enough to sleep. If you’re looking for a simple, budget‑friendly family camping gear list for road trips, here’s the camping setup and gear that worked for us—as well as what we’d change next time.
This post is part of our 5‑Day Family Road Trip Series. We took our family of four (kids ages 2.5 and 6) on an 800‑mile road trip from southeastern Wisconsin to Michigan’s Upper Peninsula, camping most nights and keeping our total cost under $1,000. If you’d like to see the whole picture, check out the other posts in this series:
Camping Setup: Our Simple Camping Setup for Family Road Trips (On a Budget)
You’re currently reading: Our Simple Camping Setup for Family Road Trips (On a Budget).
Our Tent and Sleeping Setup
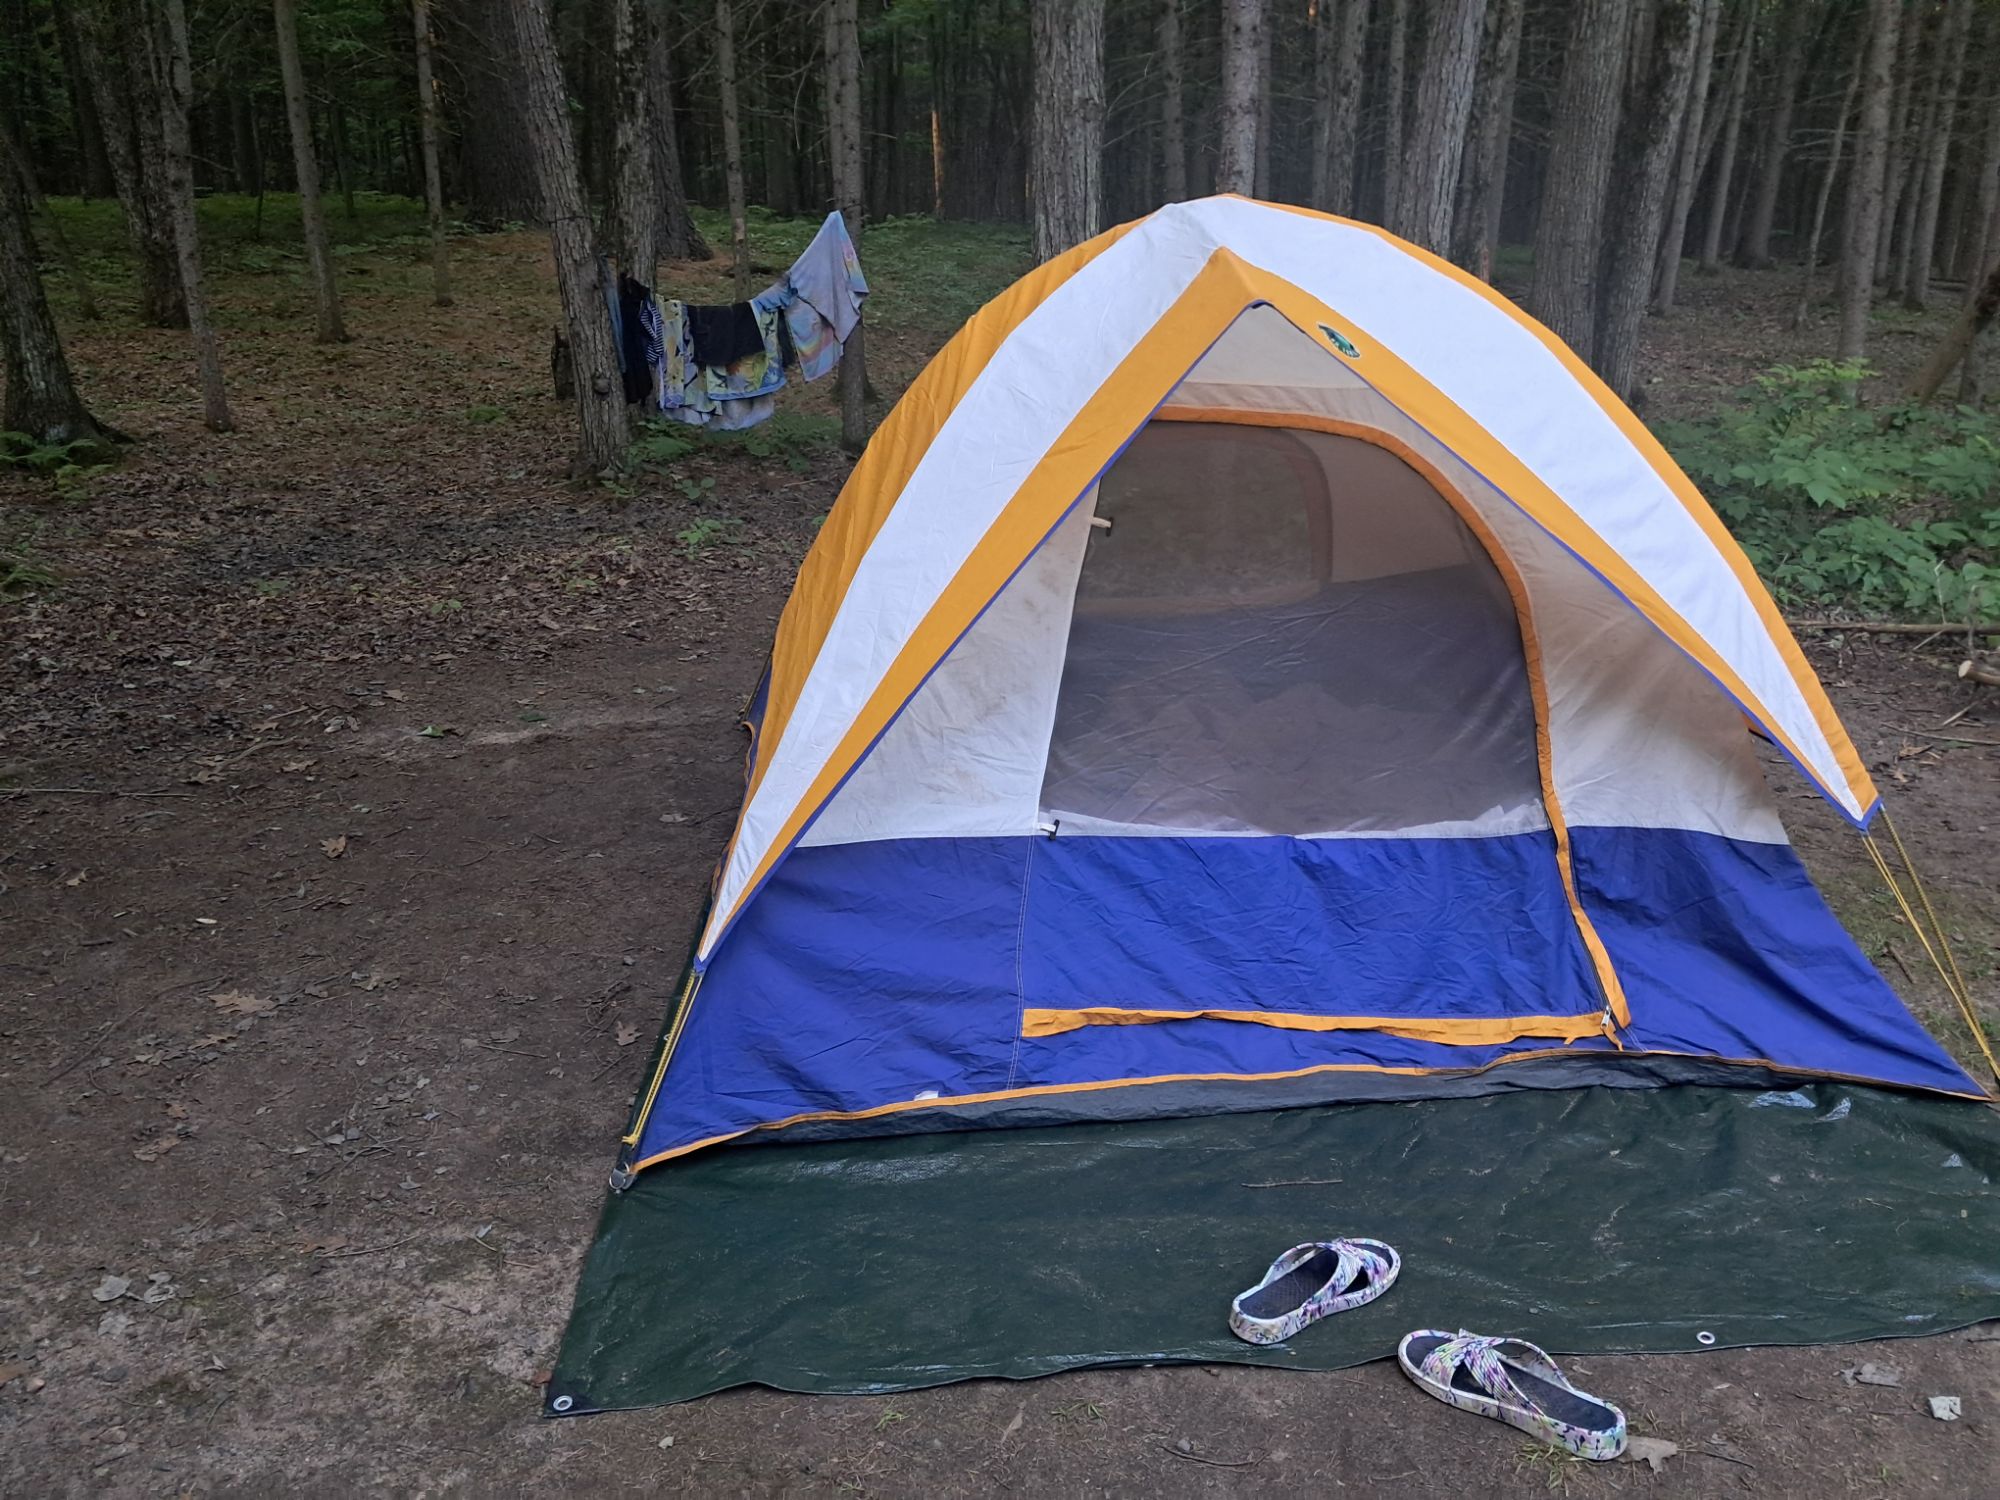
We used a 4‑person tent with a tarp underneath to protect the floor. Inside, our layering strategy looked like this:
Here’s our setup!
A puzzle‑piece mat covering the floor (36 pieces, each 1′×1′). Our kids loved assembling and disassembling it each day; it became part of the bedtime routine.
Four foldable sleeping mats on top of the puzzle mat to cushion and insulate.
A base blanket, then our main comforter on top.
Temperatures at night were around 55°F. The kids were comfortable temperature‑wise, and we stayed warm, though my husband and I did wake up a bit stiff in the morning. This setup worked well for summer nights; for colder trips, we’d add more insulation.
We also had headlamps for when it got dark, plenty of bug spray, and sunscreen, which made bedtime routines and late‑night bathroom trips much easier.
Cooking at Camp
We kept dinners simple and hearty:
Rotisserie chicken and potato wedges one night (easy grocery‑store meal).
Chorizo, black beans, and rice tacos with all the fixings.
Potato hash with chorizo, onions, and peppers from our garden.
A dehydrated jambalaya mix “boosted” with hot dogs.
Jambalaya, I prepared the rice mixture earlier and dehydrated it, then we sliced and fried the hot dogs before we rehydrated the rice in a Dutch oven.
Pre‑Dehydrated Meals
For two of those dinners—the black beans and rice tacos and the jambalaya—I did most of the work ahead of time. I cooked the dishes in my Instant Pot at home, then used my dehydrator to dry them. At camp, we simply rehydrated them in our Dutch oven. The food was delicious, and I’d recommend this approach to anyone looking for easier camping cooking with limited gear. It also helped reduce what we needed to keep cold in the cooler.
Breakfasts included:
One failed experiment with overnight oats (we ate a few bites and tossed the rest).
Leftover tacos repurposed as breakfast tacos (a win).
Classic bacon and eggs on the other mornings.
S’mores were a nightly ritual, and the kids were happily sticky by the end of each evening.
We didn’t rely on elaborate gear—just basic cooking equipment suitable for a campfire or simple stove. We had a Dutch oven, a coffee percolator, tongs, a spoon and spatula, a camping set of metal plates, bowls, and cups, plus a cutting board and a knife.
We stored our coolers on the back rack of the car, which freed up interior space and made food access easier at camp. For water, we hauled it in a repurposed 1‑gallon plastic jug (not from milk) and refilled as needed from campground spigots.
The “Oh No” Box
My husband prepared an “oh no” box to cover basic car troubles:
Essential tools like wrenches, pliers, a hammer, and screwdrivers.
Tow straps.
A basic code reader.
To make it less tempting for theft, he tucked the toolbox inside an old cooler and strapped it shut in the car. We didn’t end up needing it, but knowing it was there made us more comfortable camping and driving in unfamiliar areas.
Our “Oh No” box, which we hid in a cooler on the back rack of the car to deter potential marauders.
Managing Limited Space
We were tight on space in our 2018 Subaru Crosstrek. Every morning, my husband essentially played car Tetris to fit everything:
Camping gear
Food and cooking supplies
Clothes and personal items
We used a back rack for coolers and realized that a roof “bubble” would have made packing easier; that’s on our list for future trips. If you’re in a small SUV or crossover, this kind of packing puzzle will probably feel familiar.
What We’d Keep and What We’d Change
We’d keep:
The puzzle mat, which doubled as a comfort upgrade and a kid activity.
Simple, filling meals that didn’t require fancy equipment, especially the pre‑dehydrated Instant Pot meals we could easily rehydrate at camp and that saved cooler space.
The “oh no” box for peace of mind.
We might change:
Add a few more comfort touches for adult sleep—slightly thicker mats or compact pillows.
Invest in that roof carrier to ease packing and unloading.
If you’re assembling your own camping setup for a family road trip, you don’t need to buy everything new or go ultra‑technical. Focus on warmth, cushioning, and simplicity—and on what will make your particular family feel safe and at ease.
Want help pulling all the trip details together?
My printable Family Road Trip Planner & Budget Pack includes a camping-friendly packing checklist, budget tracker, itinerary planner, and meal planner.
What’s one piece of camping gear or one meal that’s become a must have for your family on the road? Share your favorites—or what you’d add to this setup—in the comments, and send this post to a friend planning a camping road trip.
If you’ve been following along, you know our family just welcomed 20 new homestead inhabitants. Both of our gilts farrowed 10 healthy piglets each, within eight days of one another. In this post, I’m sharing the good, the bad, and the “ugly” (if you consider birth in all its rawness “ugly”) from our first farrowing season.
If you’re a human parent, you may find yourself nodding along—there are a lot of parallels between farrowing and real childbirth.
Planning for Piglet Due Dates and Farrowing
Our first gilt was due on Mother’s Day, which felt poetic and slightly nerve‑wracking.
Counting out the classic pig gestation period: 3 months, 3 weeks, and 3 days
Mr.Eligible boar (pink)
Just like with human pregnancies, a “due date” for pigs is more like a due window. There’s a grace period on either side, and you quickly learn that the animals don’t read calendars.
On the calendar due date itself, she turned…feisty. And by feisty, I mean she was ready to bite anything that got within range of her snout. But she did not actually farrow that day.
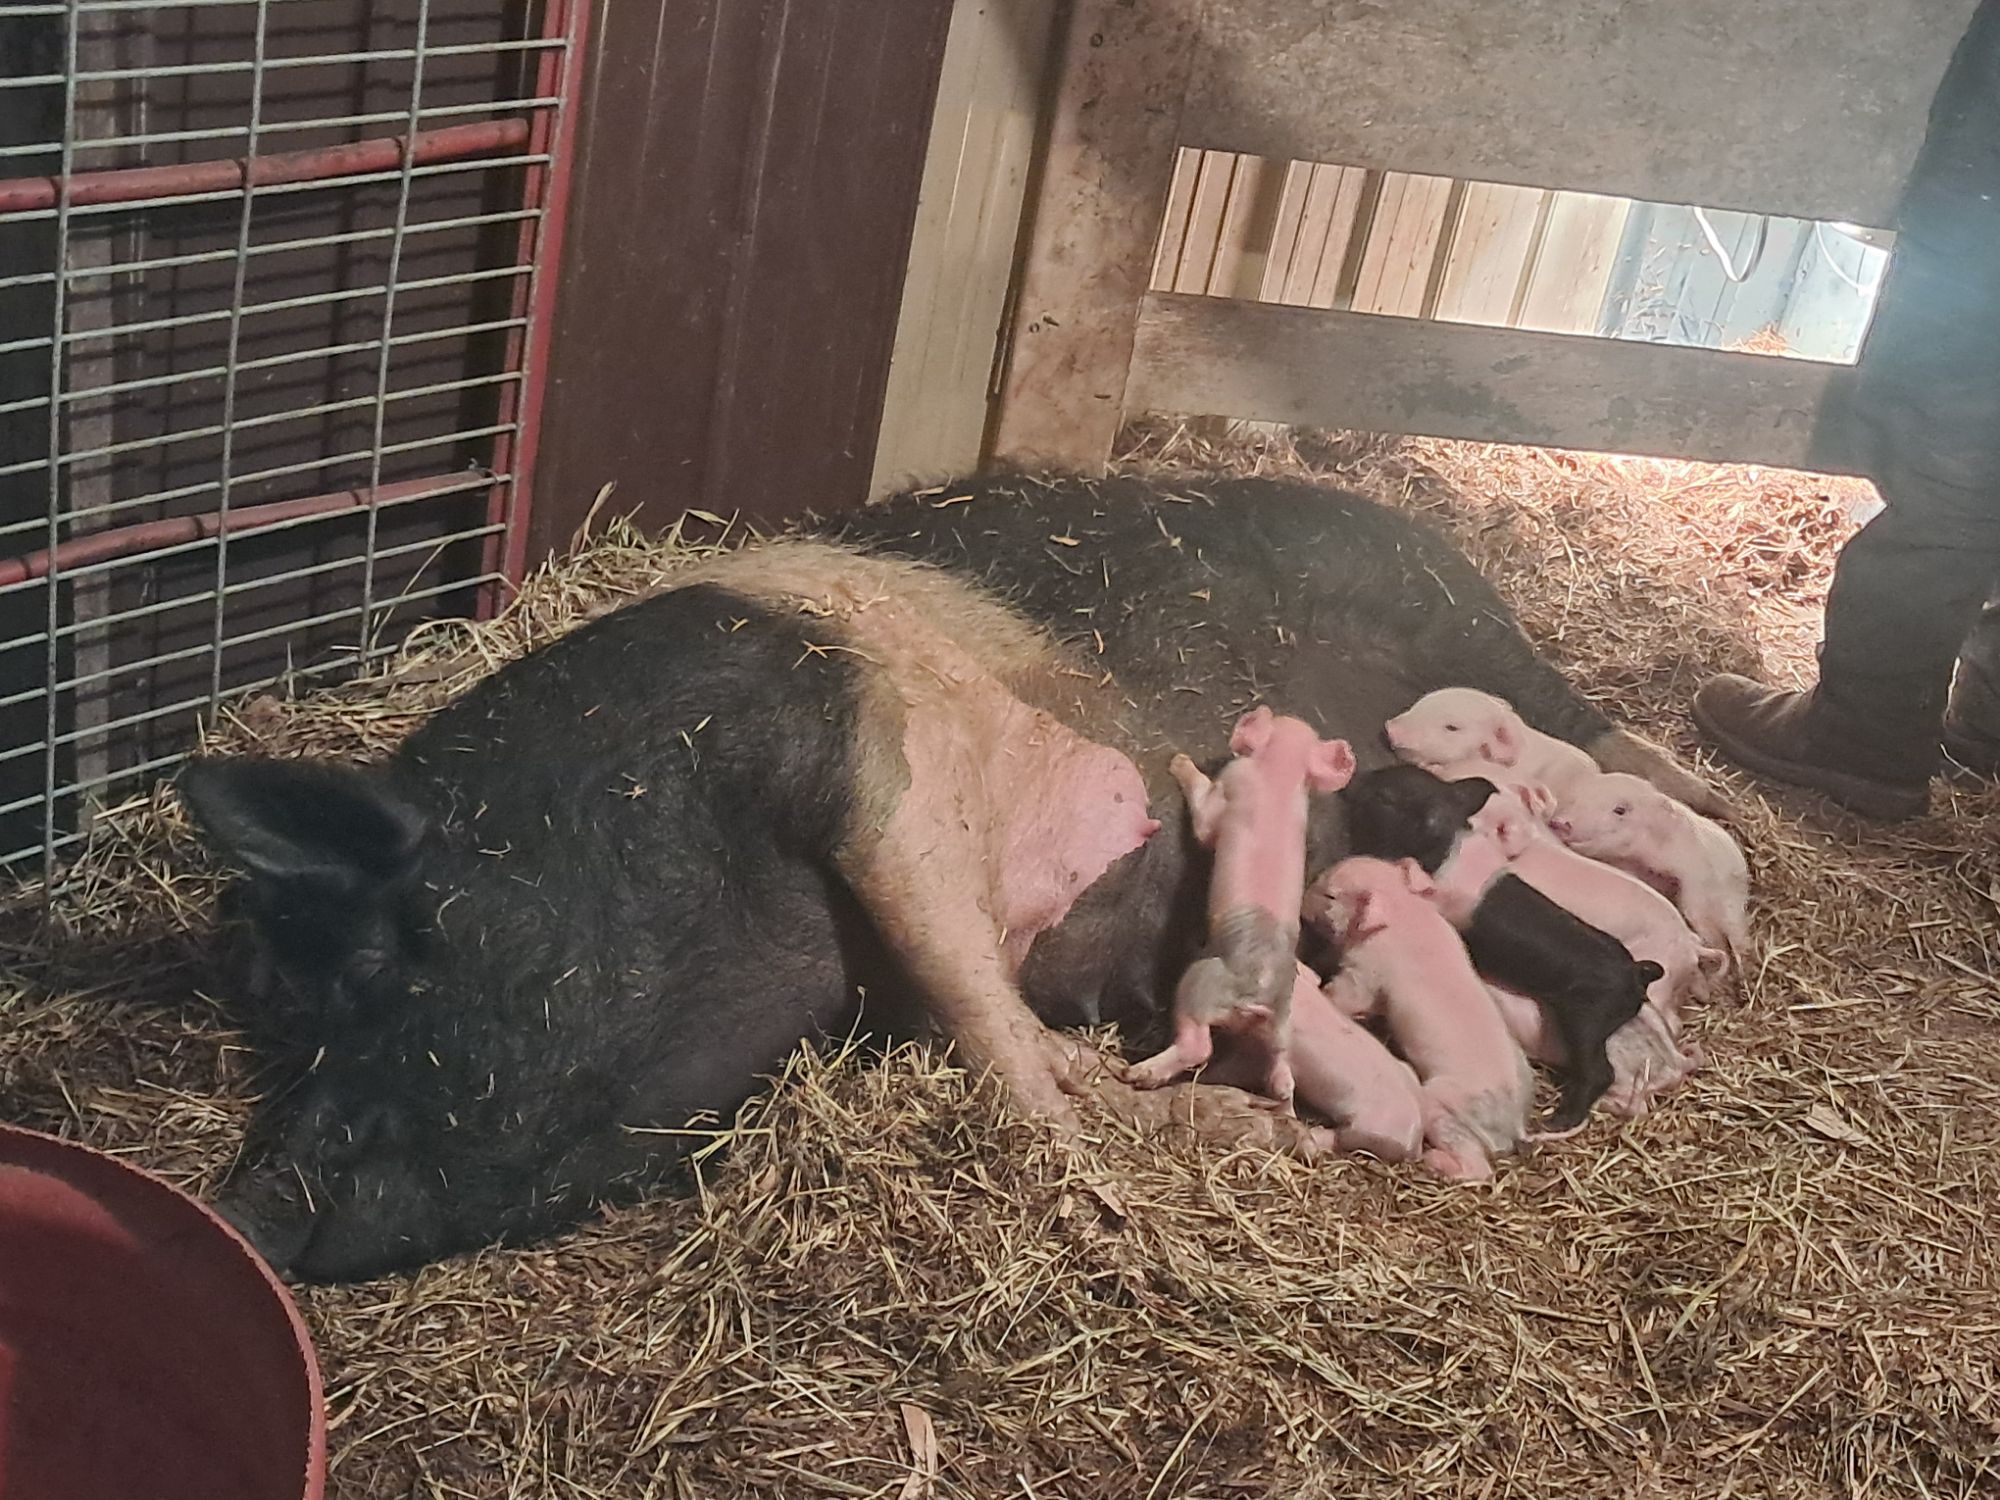
My husband and I were both on high alert. He checked on her several times from Sunday into Monday, but nothing happened. Then, midday Monday, he checked on her again, saw no progress, ran a quick errand, and came back to a surprise: three piglets, mostly dried off and already attempting to nurse.
Watching the First Piglets Arrive
He came to pull me away from my home office, and we stood there, just watching.
It’s incredible how quickly piglets transition from birth to motion:
They got up on shaky legs
They walked toward mom’s teats
They instinctively nuzzled and attempted to latch
When they wandered too close to her head or drifted off too far, she would grunt, and they would back off. You could see the communication happening instantly between mother and babies.
Based on how quickly those first three arrived, we expected more piglets to appear almost immediately. But an hour went by with no action.
We knew there were more piglets in there. A typical first-time gilt can have between 6 and 12 piglets, and we could see our girl straining. But nothing was moving.
When Birth Doesn’t Go Smoothly
At this point, we knew we were out of our depth and that simply “waiting” might not be enough. My husband called my brother-in-law, who came over quickly (we still cannot thank him enough) with oxytocin to help speed up the process if needed.
Oxytocin for pigs is similar to Pitocin for humans. It’s also a hormone our bodies naturally produce to help labor progress and to promote bonding with our young.
Before he arrived, though, the next piglet finally emerged—and it was stillborn.
Based on its size, we could tell it hadn’t fully developed in the womb, which is fairly common in pig litters. What I didn’t know beforehand was how much a stillborn piglet can slow down the farrowing process.
In a normal birth:
The sow pushes
The piglet wriggles and helps move itself along the birth canal
When the piglet is stillborn, there’s no wriggling, which reduces the sow’s natural urge to push and makes things much slower and harder.
The Rest of the Litter and Piglet Safety
Once the stillborn piglet was out, everything sped up. The next seven piglets arrived within about half an hour. Some came out in groups of three, one right after another.
We:
Caught each piglet
Used towels to dry them off
Placed them under a heat lamp in a designated corner of the farrowing crate
We had intentionally designed a piglet-only corner in the crate—an area where the babies could go but the sow could not. This gives them a protected space if mom’s hormones are running high or she’s moving around clumsily during or after farrowing.
My brother-in-law arrived during this time, showed us how to administer oxytocin, and—equally important—gave us some perspective.
He reminded us that sometimes you need to “sit on your hands.” The sow often knows what to do, and constant interference can create more problems than it solves.
Mere minutes before this, we had to sit on our hands as we were nervous the new mom would lay flat on her babies. Imagine 10 little ones walking underneath you, going in front of you as you try not to walk into them, and you can understand our apprehension.
Instincts, Bonding, and the Early Days
It was awe-inspiring to watch a first-time mom become a mother in an instant.
When we picked up a piglet, it squealed, and she would leap up, immediately on guard, ready to defend her baby. That bond is powerful and very, very real.
In the first week, we watched the piglets:
Double, then nearly triple in size
Learn to find the warmest spot under the heat lamp
Figure out (and fight over) the best spots on the udder
Because the weather was initially cold, we added a second heat lamp in the piglet-only section to keep them warm enough. Those first days felt like a delicate balancing act between warmth, safety, and giving the sow enough space to relax and recover.
Just as the first litter was settling into a rhythm, we realized we were about to do it all over again with our second gilt.
Preparing for Our Second Gilt’s Farrowing
Five days later, we moved our second gilt into her farrowing crate. In classic Wisconsin fashion, the weather changed dramatically—now it was suddenly warm.
That temperature swing added a whole different layer of worry.
Several times, we thought she was laying down to start farrowing. My husband lost more than a few nights of sleep, watching her, waiting for contractions that never came. Instead, she was simply overheated and panting, trying to cool herself down.
A few things to remember about pigs:
They don’t have sweat glands
They carry a good layer of insulating fat
Dumping excess heat is genuinely hard for them
We ended up spraying her gently with a hose during the worst of the heat, and it made a noticeable difference. She relaxed, her breathing slowed, and it was a good reminder that not every “change” in position or breathing is labor.
Sometimes, it’s just a hot pig.
A Dramatic Second Farrowing
Naturally, our second gilt chose a wonderfully inconvenient time to start farrowing.
Right as I was heading out the door for my monthly book club meeting, she decided it was go time. By the time I returned, seven piglets were already out.
My husband filled me in on what I’d missed:
One piglet was born breech (butt first), and he had to help pull it out
By the time it emerged, it was struggling to breathe, so he rubbed it vigorously to stimulate it
Then came another challenge—the largest piglet of the litter got stuck in the sow’s pelvis. It took about an hour for that baby to finally make its way out. Once it did, the remaining piglets arrived quickly, followed by the placenta (what some people call the “afterbirth” or “cleanings”).
That hour with the stuck piglet felt much longer than sixty minutes. It was one of those situations where you’re walking a line between stepping in and letting nature work, all while trying not to panic.
Second litter, they also made a dramatic entrance
What We Didn’t Need—and What We Did
Looking back at both farrowings, a few specific tools and supplies made a big difference—and a few things we were sure we’d need stayed in the box.
One small but encouraging discovery: we didn’t end up needing the iodine we had ordered for antiseptic purposes. Both gilts instinctively chewed off their piglets’ umbilical cords on their own, just as nature designed them to.
During the second farrowing, we did use the sleeve-length veterinary gloves, which my husband used to check the second sow and see where the piglet was in the birth canal. Having those on hand gave us a safer way to assess what was happening without introducing as much risk of infection.
After each birth:
Mom would eventually lay down flat, exposing her full udder
The piglets would find their spots and latch on
The first milk, just like in humans, was rich colostrum
Later, her full milk let-down came in
The sow grunts to call her babies over and often continues to grunt the entire time she’s nursing. It’s a sound that becomes the background track to your days during those first weeks—steady, rhythmic, and weirdly comforting.
She nurses about once an hour around the clock, and in between, she rests, eats, drinks, and even teaches her babies where to defecate (in a designated corner).
Lessons We Learned from Our First Farrowing
This whole experience left us humbled, exhausted, and incredibly grateful. It also taught us some practical lessons we’ll carry into every future farrowing season.
We learned:
How much can go smoothly without our intervention when we give the sow space
How quickly things can go wrong—and how critical it is to have knowledgeable help on call
How important it is to be prepared for both cold snaps and heat waves during spring farrowing
How valuable a piglet-only safe zone and basic supplies (like gloves and towels) can be
How strong maternal instinct is, whether in pigs or humans
If you’re reading this because you’re considering raising pigs, or you’re just here for the many parallels to human childbirth, I hope this gives you a real, honest picture of what farrowing can look like.
It’s messy, beautiful, stressful, and holy all at once—and when you’re standing there in a dusty farrowing crate, watching a brand-new piglet wobble toward its first meal, it’s hard not to feel a little awe.
If you’ve been through your own version of ‘first farrowing’—with pigs, other livestock, or even human babies—I’d love to hear about it. What surprised you the most about birth and early days on your homestead?
If this story was helpful (or reassuring) as you think about raising pigs, would you share it with a fellow homesteader or save it for later? You can also join my email list for more honest, behind-the-scenes looks at our homestead wins, mistakes, and everything in between.
It was Labor Day weekend, about nine months after I started dating the man who is now my husband, in those early days of our relationship. I was on my very first camping trip, and it was our last night before going back to separate cities for school.
The evening felt perfect in a way that’s hard to recreate—a sky full of stars and that early September air that’s warm with just a hint of chill.
We walked down to the lake at the campground and found a quiet bench at the end of the pier. He sat, and I stretched out with my head in his lap, looking up at the stars. For a while, we didn’t say much. We stayed there, unhurried, taking it all in.
I remember thinking, very clearly, I wish I could stay in this moment forever.
Seventeen years later, I still remember that night—but I see it differently now.
If time had stopped there, I would have missed everything that came after. We finished school—him first, then me—and slowly built a life together. There were unforgettable trips, but also seasons of difficulty, struggle, and heartbreak. We got married, had two wonderful kids, and stepped into the messy, meaningful work of building a home and a homesteading life together.
All the things that have shaped us—the joy, the stress, the growth—were still ahead of us in that quiet moment by the lake.
And as perfect as it felt, it wasn’t the whole story.
Now, when I think about that night, I’m grateful time didn’t stand still. Because the beauty of that moment wasn’t just in what it was—it was in everything it led to.
These days, life looks a lot different. It’s louder, fuller, and often far from still. It’s raising kids, growing food, navigating challenges, and finding connection in the middle of everyday routines.
And maybe that’s the real gift—not freezing time, but living it.
Here’s what foraging stinging nettles looked like for me this spring, and how I turned them into a safe, nourishing meal for my family.
As I walk outside armed with a plant identification book, rubber gloves, and an open mind, I can’t help but feel that I’m about to violate a fundamental law of food. Among the waterlogged ground, I scan for juvenile stinging nettles—those tough, serrated leaves covered in tiny, hair‑like stingers. This spring, I’ve begun foraging stinging nettles on our property, turning a backyard “weed” into a free, nutrient‑dense green for our family. It’s especially welcome in the early months of the year, when fresh vegetables are harder to come by.
Nettles nestled among grass
Foraging Nettles Safely
From experience, I know that if I’m not careful, I’ll quickly become aware that the plant has grazed my skin: the stingers bring an immediate, sharp pain and soon after a scattering of blisters. As someone who is slowly learning to step away from the industrialized food system, I feel hesitant to collect food that can actually hurt me. Yet there’s also a quiet humility in working with a plant that demands respect—this is nothing like reaching for a plastic‑wrapped bunch of lettuce at the grocery store.
I chuckled at the thought of how hungry the first person must have been to discover how to disable the stingers and savor this tasty, nutritious wild larder hiding in plain sight. On the other hand, there’s a childlike wonder in identifying a “weed” that others avoid. That sense of discovery encourages me to continue my quest.
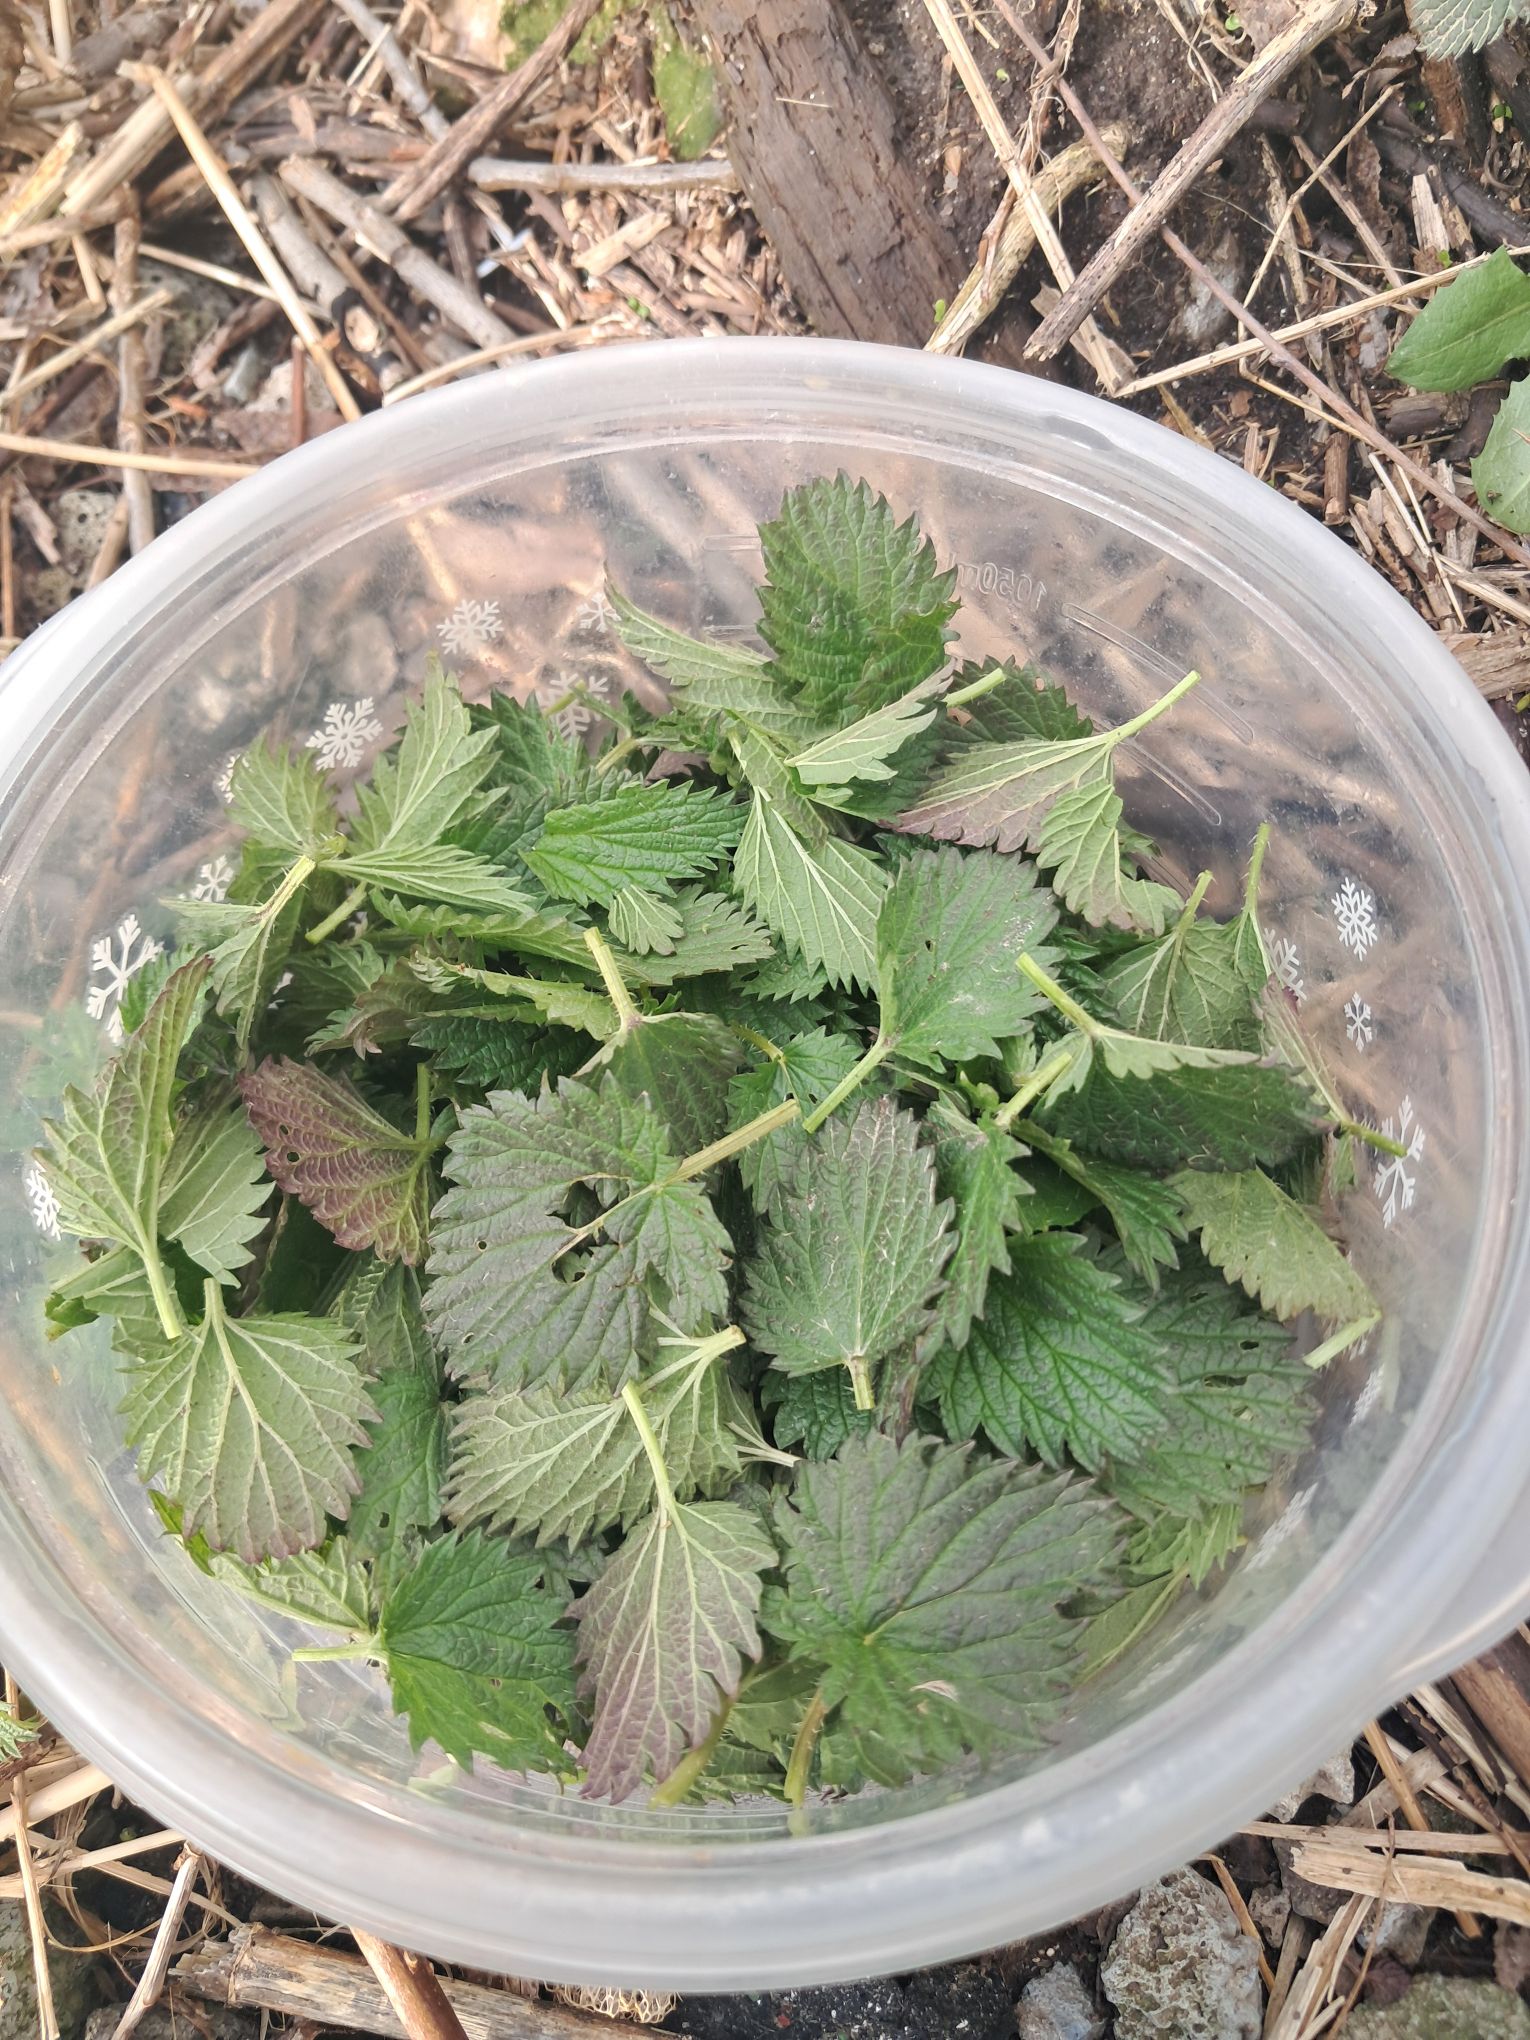
Harvesting becomes a mindful ritual. I crouch down and gently collect the plants, pinching off the leaves just above the stem. Where nettles grow most aggressively, I pull them from the ground—our property is overgrown with nettles that spread via rhizomes. The plants rustle as I work, releasing a faint, green herbal aroma into the air.
A bowl full of nettle leaves
In a moment of carelessness, my arm grazes the plant, and I receive several painful blisters in turn. The soreness is uncomfortable, yes, but it also feels like a badge of honor. The temporary sting is a small price for the nutritional bounty. As my basket fills, I marvel at the efficiency of nature, at its pure, unmediated abundance.
To keep myself and my family safe, here are the practical steps I use to handle stinging nettles while working with them:
Wear long sleeves and long pants to keep as much skin as possible covered.
Use thick rubber or leather gloves that fully cover the wrists.
Pull the gloves over the cuffs of long sleeves so stingers can’t slip in between.
Avoid touching your face or neck while harvesting.
If a sting happens, rinse the area with cool water and mild soap, then apply a soothing cream or cool compress as needed.
If you’re foraging with kids, let them wear gloves and long sleeves too, and keep them close by so you can guide their hands and steps.
These simple precautions make the experience feel less intimidating and more like a teachable moment, not a painful surprise.
Cooking Nettles Safely: How to Neutralize the Sting
By the time I’m back in the kitchen, the nettles are in a vibrant heap in the sink. Before I wash them, I remind myself: Stinging nettles must never be eaten raw. The stingers release a mildly irritating compound that can cause discomfort and a burning sensation in the mouth and throat.
To make them safe to eat, I always use one of these two methods:
Blanch in boiling water:
Bring a pot of water to a boil.
Drop the nettle leaves into the boiling water for 1–2 minutes.
Drain and rinse with cool water.
The leaves will feel soft and silky and will no longer sting.
Sauté in a hot pan:
Add the fresh nettles to a hot pan with a bit of butter or oil.
Stir constantly for 2–3 minutes until the leaves wilt and darken.
The heat neutralizes the stingers and turns the leaves into a tender, spinach‑like green.
Both methods are quick and simple. The important point is: any stinging nettle serving larger than a small nibble should be processed with heat. That’s the non‑negotiable rule if you don’t want a painful, unpleasant experience.
Once the sting is gone, the nettles are ready to shine. I usually sauté them in garlic and butter, then season with salt. The simplicity of the dish is empowering; the only extras are salt, garlic, and butter to let the flavor of the greens shine. They taste grassy and slightly nutty, with a depth that store‑bought greens rarely match.
A recent dinner, the vegetable was asparagus and nettles boiled in salted water, seasoned with butter and pepper. Delicious!
Every bite carries the satisfaction of knowing that at least some of the food on our table comes directly from the land, unmediated by plastic packaging or price tags and paid for instead with time and attention. This is the kind of meal I want to share with my children, teaching them that “weeds” can become dinner and that food is something the earth offers, not just something we buy.
Nutritional Benefits of Nettles
Stinging nettles are often called a “wild supergreen” for good reason. A small serving of cooked nettles delivers a surprising amount of important nutrients, including:
Iron (useful for supporting energy and blood health)
Calcium (beneficial for bones and teeth)
Vitamins A and C (supporting immune function and skin health)
Magnesium and other trace minerals
A moderate amount of plant‑based protein for a leafy green
Nettles have also been traditionally used for their gentle antihistamine‑like properties, especially when prepared as an herbal infusion.
In a world where we often think of “healthy food” as something expensive or packaged, nettles remind me that deep nourishment can emerge from the edges of the yard, if we’re willing to learn how to use it.
Reflections on Foraging and Community
Later, I ponder the experience, which was more rewarding than I imagined. Supplementing my diet with nettles shrinks my food miles while my pantry is enriched by the seasons. Grocery store runs feel less urgent when the yard offers a free, nutrient‑dense green harvested in spring. There’s a quiet pride in crafting meals from plants many call weeds, a small act of rebellion against the idea that all good food must be bought.
On a deeper level, I’m participating in a cycle that predates grocery stores, rekindling a bond with the earth that modern life often severs. I’m learning to see my yard—and my children’s yard—as a living pantry, not just a backdrop to our days. And when I share a pot of nettle soup or a plate of sautéed greens with a neighbor, the act of foraging becomes part of a small, quiet web of community, where knowledge and food move between people instead of only through registers.
Defiance, Devotion, and the Gift of the Land In a world built on convenience, foraging for nettles becomes an act of both defiance and devotion. It roots me in the present, reminds me that the earth provides—often lavishly, and often in plain sight—for those willing to look, learn, and gratefully receive.
Have you ever foraged stinging nettles or another wild green? Or would you ever try nettles in your family’s meals? Let me know in the comments—I’d love to hear your stories and tips!
If this post inspires you to look at your yard a little differently, I’d love it if you shared it with another parent or forager who’s curious about wild food. You can like or share it on Facebook, pin it on Pinterest, or forward it to a friend who loves seasonal, hands on food adventures.
Early spring in the hardwood forests of the Midwest brings one of the season’s first wild edibles: ramps, also called wild leeks. For many families across the region, foraging ramps in early spring is more than a pantry project—it’s a seasonal ritual. For our family, ramp season marks the beginning of a rhythm we return to each year—one that ties together growing food, raising children, and learning how to belong to a place.
The forest hums with the quiet magic of early spring. Buds swell on maple, birch, and willow, their tips blushing green and red. Sunlight filters through bare branches, thin but persistent, casting shifting patterns across the damp, leaf‑strewn ground. Moss returns in soft patches, and the stream—freed from ice—chatters over stones as it carries winter’s melt downhill.
I gather my supplies, lift my toddler onto my hip, and take my son’s hand as we step into the woods outside our small town in southeastern Wisconsin, though the rhythm of this season is the same across much of the Midwest. The ground gives softly beneath our boots, releasing the scent of damp earth and last season’s decay. Around us, birds stitch sound into the morning—robins scratching at softened soil, sparrows darting with nesting twigs, woodpeckers tapping their steady rhythm.
How to Identify Ramps
As we walk, I coach my son on what to look for: clusters of broad, smooth, lance‑shaped leaves, bright green with a reddish or burgundy base. Before long, he spots them.
The ramps rise in small patches, their leaves vivid against the brown forest floor. Nearby, trout lilies speckle the ground, their mottled leaves catching bits of sunlight. It feels, as it often does, like the forest is offering quiet clues—if you slow down enough to notice.
If you’re new to foraging, take extra care here. Once you learn how to identify ramps safely, they become a gateway plant for spring foraging in the Midwest with kids. Ramps can be confused with toxic look‑alikes like lily of the valley. The key difference is the smell—ramps have a strong onion‑garlic scent when the leaf is torn and the stem is crushed.
Foraging with Kids
I set my daughter down and kneel beside the patch. The earth is cool and soft under my hands. I pick a leaf, tear a small piece, and pass it to each child.
Their reactions are immediate—the sharp, garlicky bite softened by a fresh green sweetness. It’s a flavor that feels like spring distilled into something edible.
We dig carefully. I show them how to loosen the soil around the base of the plant, how to follow the slender white bulb without tearing it. Their small hands work with focus and excitement, uncovering each ramp like buried treasure.
Foraging with kids requires patience, but it also invites something better than efficiency:
Slowing down enough to observe
Letting curiosity lead the pace
Accepting a bit of mess and distraction along the way
At one point, my daughter tries to eat a blade of grass. We gently redirect and keep going. This is exactly the kind of moment that makes foraging ramps with kids so formative: a small, repeated lesson in paying attention and tasting the world responsibly.
Harvesting Sustainably
Before we gather too many, I pause to explain: we only take what we need. This is one of the most important rules for harvesting ramps sustainably, especially in forests that are already seeing pressure from foragers.
Ramps grow slowly and can be easily overharvested. In many parts of the Midwest, foraging pressure has already affected local patches, so we follow a simple rule—never take more than a small portion from any patch, and leave plenty behind to regenerate.
Sometimes we harvest just a single leaf instead of the whole plant. It’s a small choice, but it reinforces something bigger: we’re not just taking from the land—we’re participating in its long‑term health. Sustainable harvesting teaches kids that food is part of a cycle, not just a product on a shelf.
From Forest to Table
We leave with muddy knees, full hands, and a modest basket of green.
Back home, we rinse the ramps and prepare them simply—sautéed in butter with pasta and a bit of lemon zest. The sharpness mellows into something rich and savory, still carrying the unmistakable imprint of the woods.
After a morning outside, the meal feels earned in a way that’s hard to replicate. The kids recognize the flavor immediately. It’s no longer just food—it’s something they found, touched, and helped prepare. This is how foraging ramps with kids in the Midwest becomes more than a one‑day outing; it weaves into our seasonal food story.
Growing More Than Food
Later, reflecting on the day, I realize that foraging is doing several kinds of work at once.
It feeds us, yes—but it also teaches patience, observation, and restraint. It gives my children a direct relationship with where food comes from, outside of stores and packaging. And it connects us, quietly, to the people who have walked these woods before, gathering the same plants in the same season.
Over time, I hope these small rituals grow into something lasting. Not just knowledge of edible plants, but a sense of responsibility—to the land, to each other, and to the idea that food is something we participate in, not just consume. If you’re curious about starting foraging ramps with kids in the Midwest, begin simply. Go for a walk in early spring. Learn one plant. Bring your kids. Take a little, leave plenty, and pay attention to what’s growing around you.
That’s how it starts.
What’s the first wild food you teach your kids to recognize in spring? Let me know in the comments—I’d love to hear your family’s outdoor food traditions.
If this post resonates with your family’s spring rhythm, I’d love for you to share it with another parent who’s curious about foraging with kids.
You can like or share it on Facebook, pin it on Pinterest, or forward it to a friend who loves hiking and seasonal food.
Every time someone takes a small step toward learning about wild plants, we’re all one step closer to a more grounded, connected food culture.
Thank you so much for your patience while I took a short break to focus on my family. Stepping back was exactly what I needed—it helped me rest, reconnect with my reasons for blogging, and remember why I started writing in the first place.
Over the past year I’ve been writing this blog, something unexpected has happened: we’ve built a small but mighty community. I’m so grateful for the readers who share their own stories, ask questions, and cheer one another on in the comments and messages. This isn’t just a blog—it’s a space where families, homesteaders, and food lovers lean into the same rhythms of growing food, raising kids, and caring for the land.
Coming back now, I want to keep that focus front and center. I’ll still share my two cornerstone posts each week, released on Thursdays and Sundays, and I’ll respond to some of the daily prompts—but I’m letting go of my perfectionistic tendencies and letting the writing breathe more. I’d love to post more about real, messy family days, the little triumphs of the garden, and the ways we’re learning to live more simply and sustainably.
I think I was a little burned out from writing, but I’m coming back to it from a more grounded, renewed place. I’d love to have you join me again as I dive back into the stories that matter most to our family, our homestead, and this community.
If you’re still here reading this, what would you most like to see more of on the blog—family adventures, homesteading how‑tos, or seasonal recipes? Leave a comment and let me know. I’m so grateful for this small but mighty community and for the way we’re learning and growing together.
And if you like this content, please consider subscribing, to join our growing community of like-minded people who value family, the “village”, and slow food.
Hey friends, quick update from the homestead—I’m taking a short break from blogging to focus on family right now. Life with kids, maple syruping season in full swing, and all the usual chaos needs my full attention. I’d rather share quality stories and insights when I’m back, so I’ll be here soon.
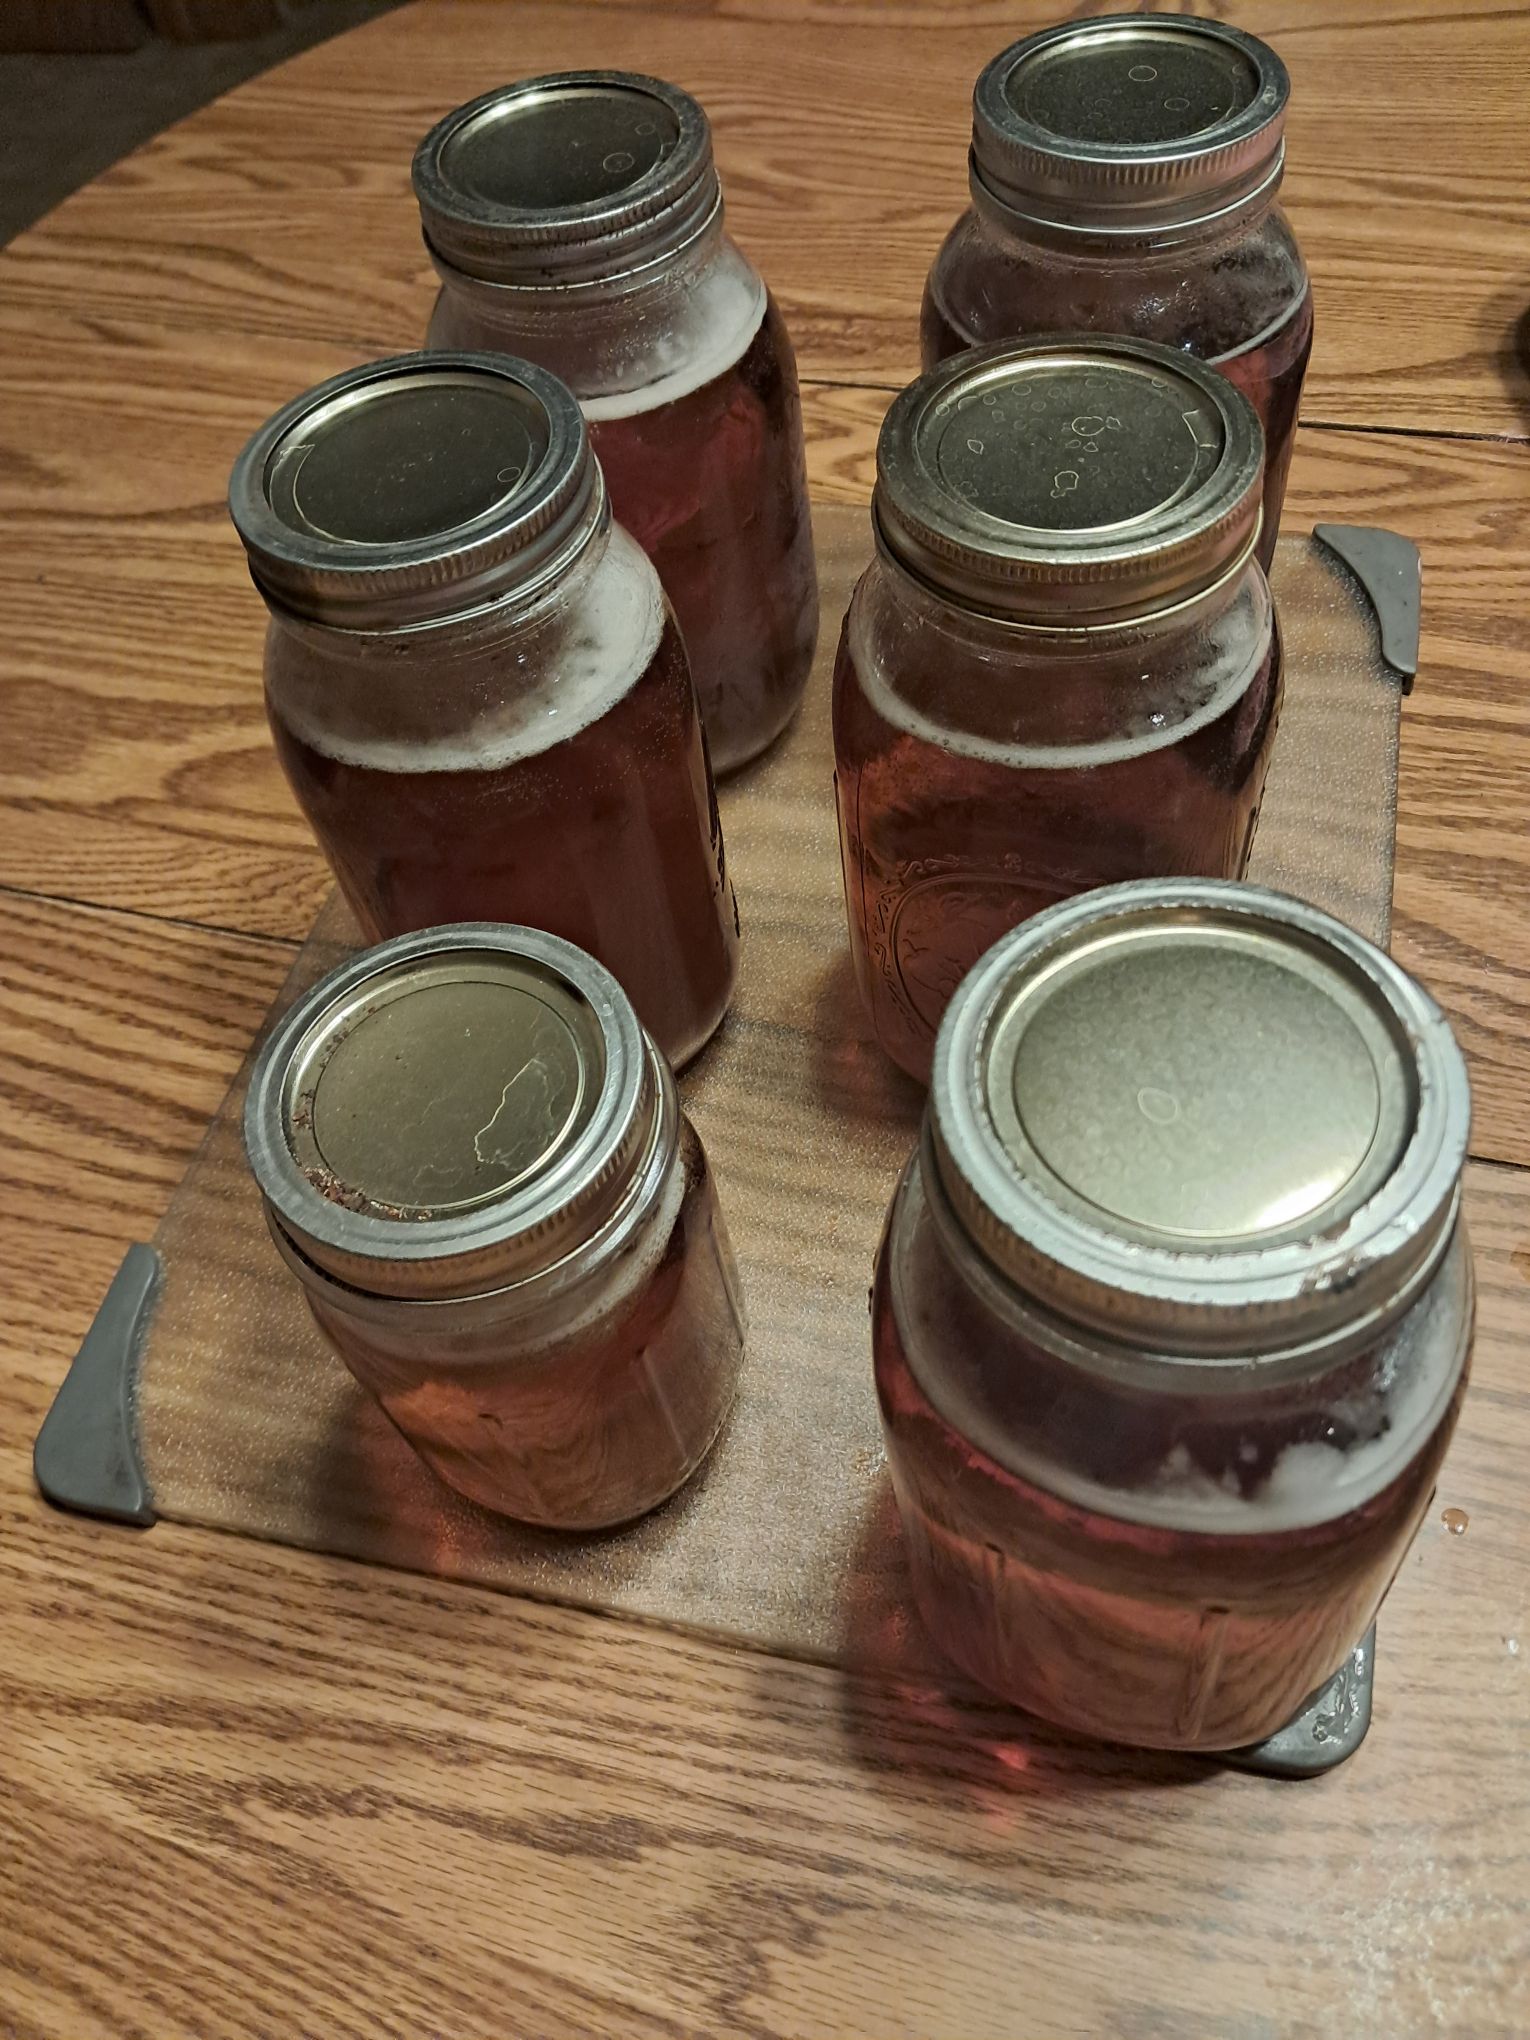
Hey friends—three weeks into sugaring season and we’ve already pulled 5 gallons of homemade maple syrup from about 200 gallons of sap boiled down slow over endless oak, ash, and maple fires.
We’re smack in the middle of the season, with more sap flowing and wood to burn. 5 gallons now, 10-15 more expected. $18/quart jars. Some of this golden 66° Brix goodness is headed for pancake-fueled weekends, some for gifting to neighbors, and some we’ll sell to the surrounding community. Comment below (or DM) if local and interested (SE Wisconsin)!
Sap Keeps Coming, Fire Keeps Burning
Our 10-year tubing setup is still humming—healthy maples dripping steadily into jugs thanks to these perfect freeze/thaw cycles we’ve been getting. My husband and I take turns tending the evaporator around the clock. Meanwhile, our 6-year-old chops firewood like a little lumberjack (he’s getting scary good with that axe). And our 2-year-old daughter is absorbing the entire process.
That ~40:1 sap-to-syrup ratio means we’ve gone through a mountain of wood already. The air stays thick with that woodsmoke-sweet steam that chases away every bit of March chill—honestly, it’s my favorite part.
Those Quiet Evenings by the Flames
These firelit nights are pure magic. We watch the flames shifting from orange to fiery red as they devour log after log. That primal mix of crackling wood and caramelizing sap beats anything from a store bottle by a mile.
And when we filter and finish the syrup in the house, our entire house smells like a diner. I’ve commented about this during virtual meetings to my colleagues, who always get a chuckle, then ask me more about our syruping setup.
Kitchen Mishaps (Learning the Hard Way)
Spigot fail: Husband cleaned it but didn’t reinstall properly—bumped the bucket and concentrated sap flooded our kitchen floor (sticky nightmare cleanup).
Double boil-over: Syrup bubbled over twice, turning the stove into a sugar tar pit (vigilance lesson learned). Here’s hoping that doesn’t happen again.
What’s Next in the Sugar Shack
We’re hoping to finish strong with another 5-10 gallons total (fingers crossed the weather holds). Soon it’ll be time to filter everything through cheesecloth, bottle it up pretty, and label jars for neighbors, future sales, and of course our own pancake feasts. Can’t wait to taste test the first batch with that homemade rye bread from our recent Reuben quest.
Maple season = sauerkraut’s woodsmoke cousin—clear sap to liquid gold through fire, time, one pot at a time.
Any of you making syrup this season? What’s your boil ratio been like? Favorite tree to tap? Tell me everything below—I love swapping sugaring stories!
Practical Homesteading: growing food, raising kids, building community.
Loved this maple magic? Like + share so sugaring families find us! 💛 Tag your syrup-making crew below.
Loved this? Subscribe for weekly homesteading tips:
My middle name is Marjorie, sharing a birthday with The Simpsons premiere (handy icebreaker, though nobody calls me Marge).
Marjorie honors my late grandmother. We lived 30 miles apart, seeing her at Christmas where I’d play their electric piano while she and her jovial second husband laughed together.
She brought knick-knacks from trips for us six granddaughters—a Florida seashell globe stands out. At their Wisconsin cabin, we shared dive-bar battered mushrooms before her health declined.
The name carries her quiet presence through those visits and our last October Christmas photo, still framed in my hall.