Category: homesteading

  • How to Dehydrate Fruits, Vegetables, and Herbs From the Garden

    How to Dehydrate Fruits, Vegetables, and Herbs From the Garden

    This is the second post in my dehydration series. In the first post, I covered How to Dehydrate Food at Home: Air Drying, Oven Drying, and Dehydrators. In this post, I’m focusing on how to prepare fruits, vegetables, and herbs before drying them.

    Once you have chosen a drying method, the next step is preparing the food. Not every fruit, vegetable, or herb needs the same treatment before it goes into the dehydrator.

    Some foods can be washed, sliced, and placed right on the tray. Others benefit from a little extra prep, such as blanching or an acidic dip to help preserve color. Once you learn a few basic preparation methods, it becomes much easier to work through whatever your garden is producing.


    IIf you would like a printer-friendly reference to keep in the kitchen, my Garden Drying Guide includes expanded preparation, drying time, temperature, and storage charts for garden produce.


    How to Prepare Fruit for Dehydrating

    Fruit is one of the simplest foods to dehydrate. Start with clean, good-quality fruit, and cut it into similarly sized pieces so it dries evenly.

    Many fruits can go directly onto dehydrator trays after washing and cutting. Arrange the pieces in a single layer without touching or overlapping.

    Most fruits dry well at about 135–140°F. Since dehydrators vary, use the closest setting on your machine and check food regularly as it gets closer to being finished.

    Berries

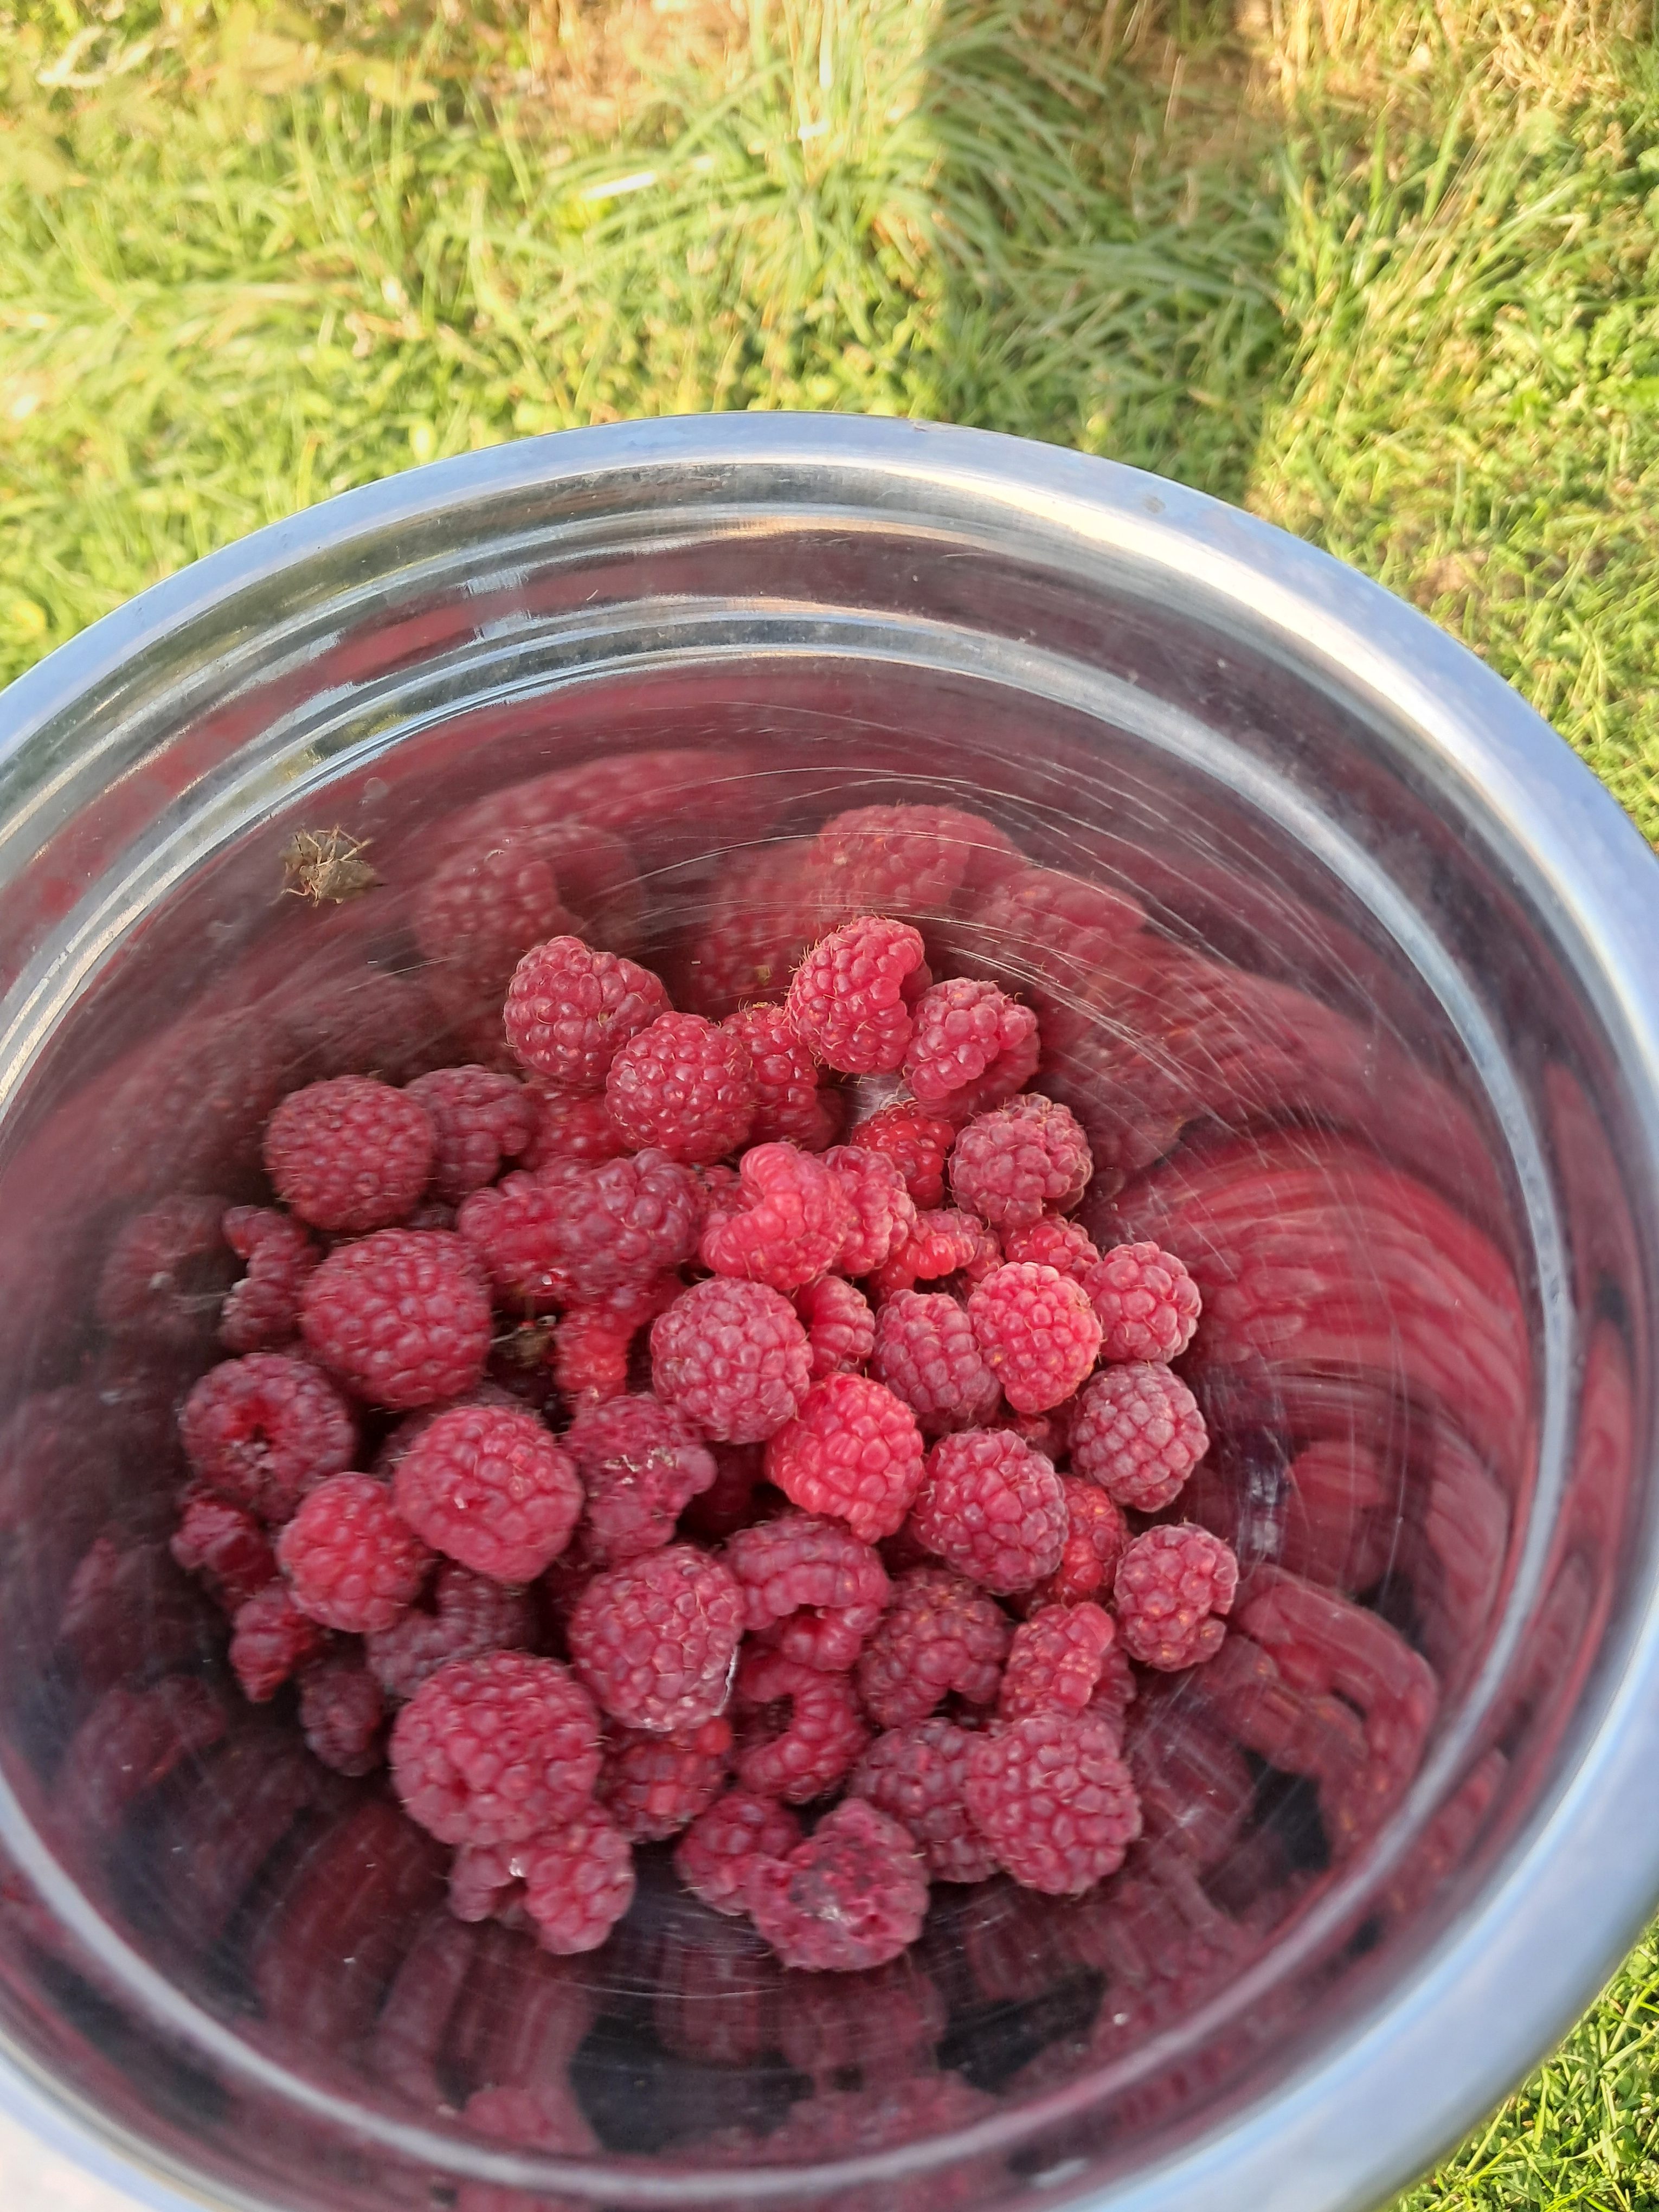
    Berries are one of my favorite foods to dehydrate because they are easy to prepare and so useful later. Make sure they are well dried after washing so you are not adding extra moisture to the dehydrator.

    Whole blueberries and cranberries have thicker skins, so they usually need to be cracked before drying. A brief dip in boiling water followed by a quick dip in cold water can split the skins and help moisture escape.

    Strawberries are also wonderful to dry. Hull them first, then slice them into even pieces so they dry more evenly. Dried strawberries are especially good in trail mix, oatmeal, muffins, and homemade granola.

    Cherries

    Cherries are one of my favorite dehydrated foods. They take a little more prep because they need to be pitted first, and they can take quite a while to dry. But the end result is worth it.

    Once pitted, place the cherries in a single layer on the tray. Dried cherries are wonderful for snacking, trail mix, oatmeal, baking, and homemade granola.

    Dehydrated cherries are a wonderful dried snack.

    Apples

    Apples are another favorite, especially during apple season. The easiest way I have found to prepare apples is with a Johnny Apple Peeler. It cores, peels, and slices apples all at once, which makes the job go much faster.

    After slicing, apples can be placed directly on the dehydrator trays. If you want to help prevent browning, dip the slices in a mixture of equal parts bottled lemon juice and water for a few minutes, then drain them well before drying. This step is optional, but it helps the apples keep a lighter color.

    Dried apples are great for snacking, baking, oatmeal, and homemade trail mix.

    I use a Johnny Apple Peeler to core, peel, and slice the apples in thin strips for the dehydrator.
    Stack the pieces neatly on a dehydrator tray. You can optionally dip them in a lemon juice/water mixture to prevent browning (I don’t).
    After 8-12 hours, you get these delicious chips that are perfect on their own or in trail mix!

    How to Prepare Vegetables for Dehydrating

    Vegetables can take a little more preparation because many benefit from blanching before drying. Blanching briefly heats the vegetables before they go into the dehydrator. It helps preserve color and quality, slows enzyme activity, and can help vegetables dry and rehydrate more evenly later.

    If you need a refresher on the basic blanching process, see my post, How to Blanch and Freeze Broccoli and Other Garden Vegetables.

    Vegetables that often benefit from blanching or cooking before drying include:

    • Green beans
    • Broccoli
    • Cauliflower
    • Carrots
    • Corn
    • Peas
    • Celery

    After blanching, plunge the vegetables into ice water to stop the cooking process. Then drain them well before arranging them in a thin, even layer on dehydrator trays. Too much moisture or overcrowding can slow down the drying process.

    Most vegetables dry well at about 135–140°F. Not every vegetable needs blanching, though. Onions, garlic, peppers, and herbs can usually be dried without that extra step.

    Peppers (including cayenne) do not need to be blanched before drying.
    While blanching is not necessary for dried celery, the process helps preserve the vibrant green color.

    Herbs Are One of the Easiest Foods to Dry

    Herbs are one of the easiest places to start if you are new to dehydrating. Basil, mint, parsley, oregano, thyme, sage, and rosemary dry much more quickly than most fruits and vegetables.

    Wash garden herbs gently if needed, then dry them very well before placing them on trays. Extra water on the leaves will make the drying process take longer.

    Herbs need a lower drying temperature than fruits and vegetables. I usually dry herbs between 95–115°F so they hold onto more of their flavor and aroma.

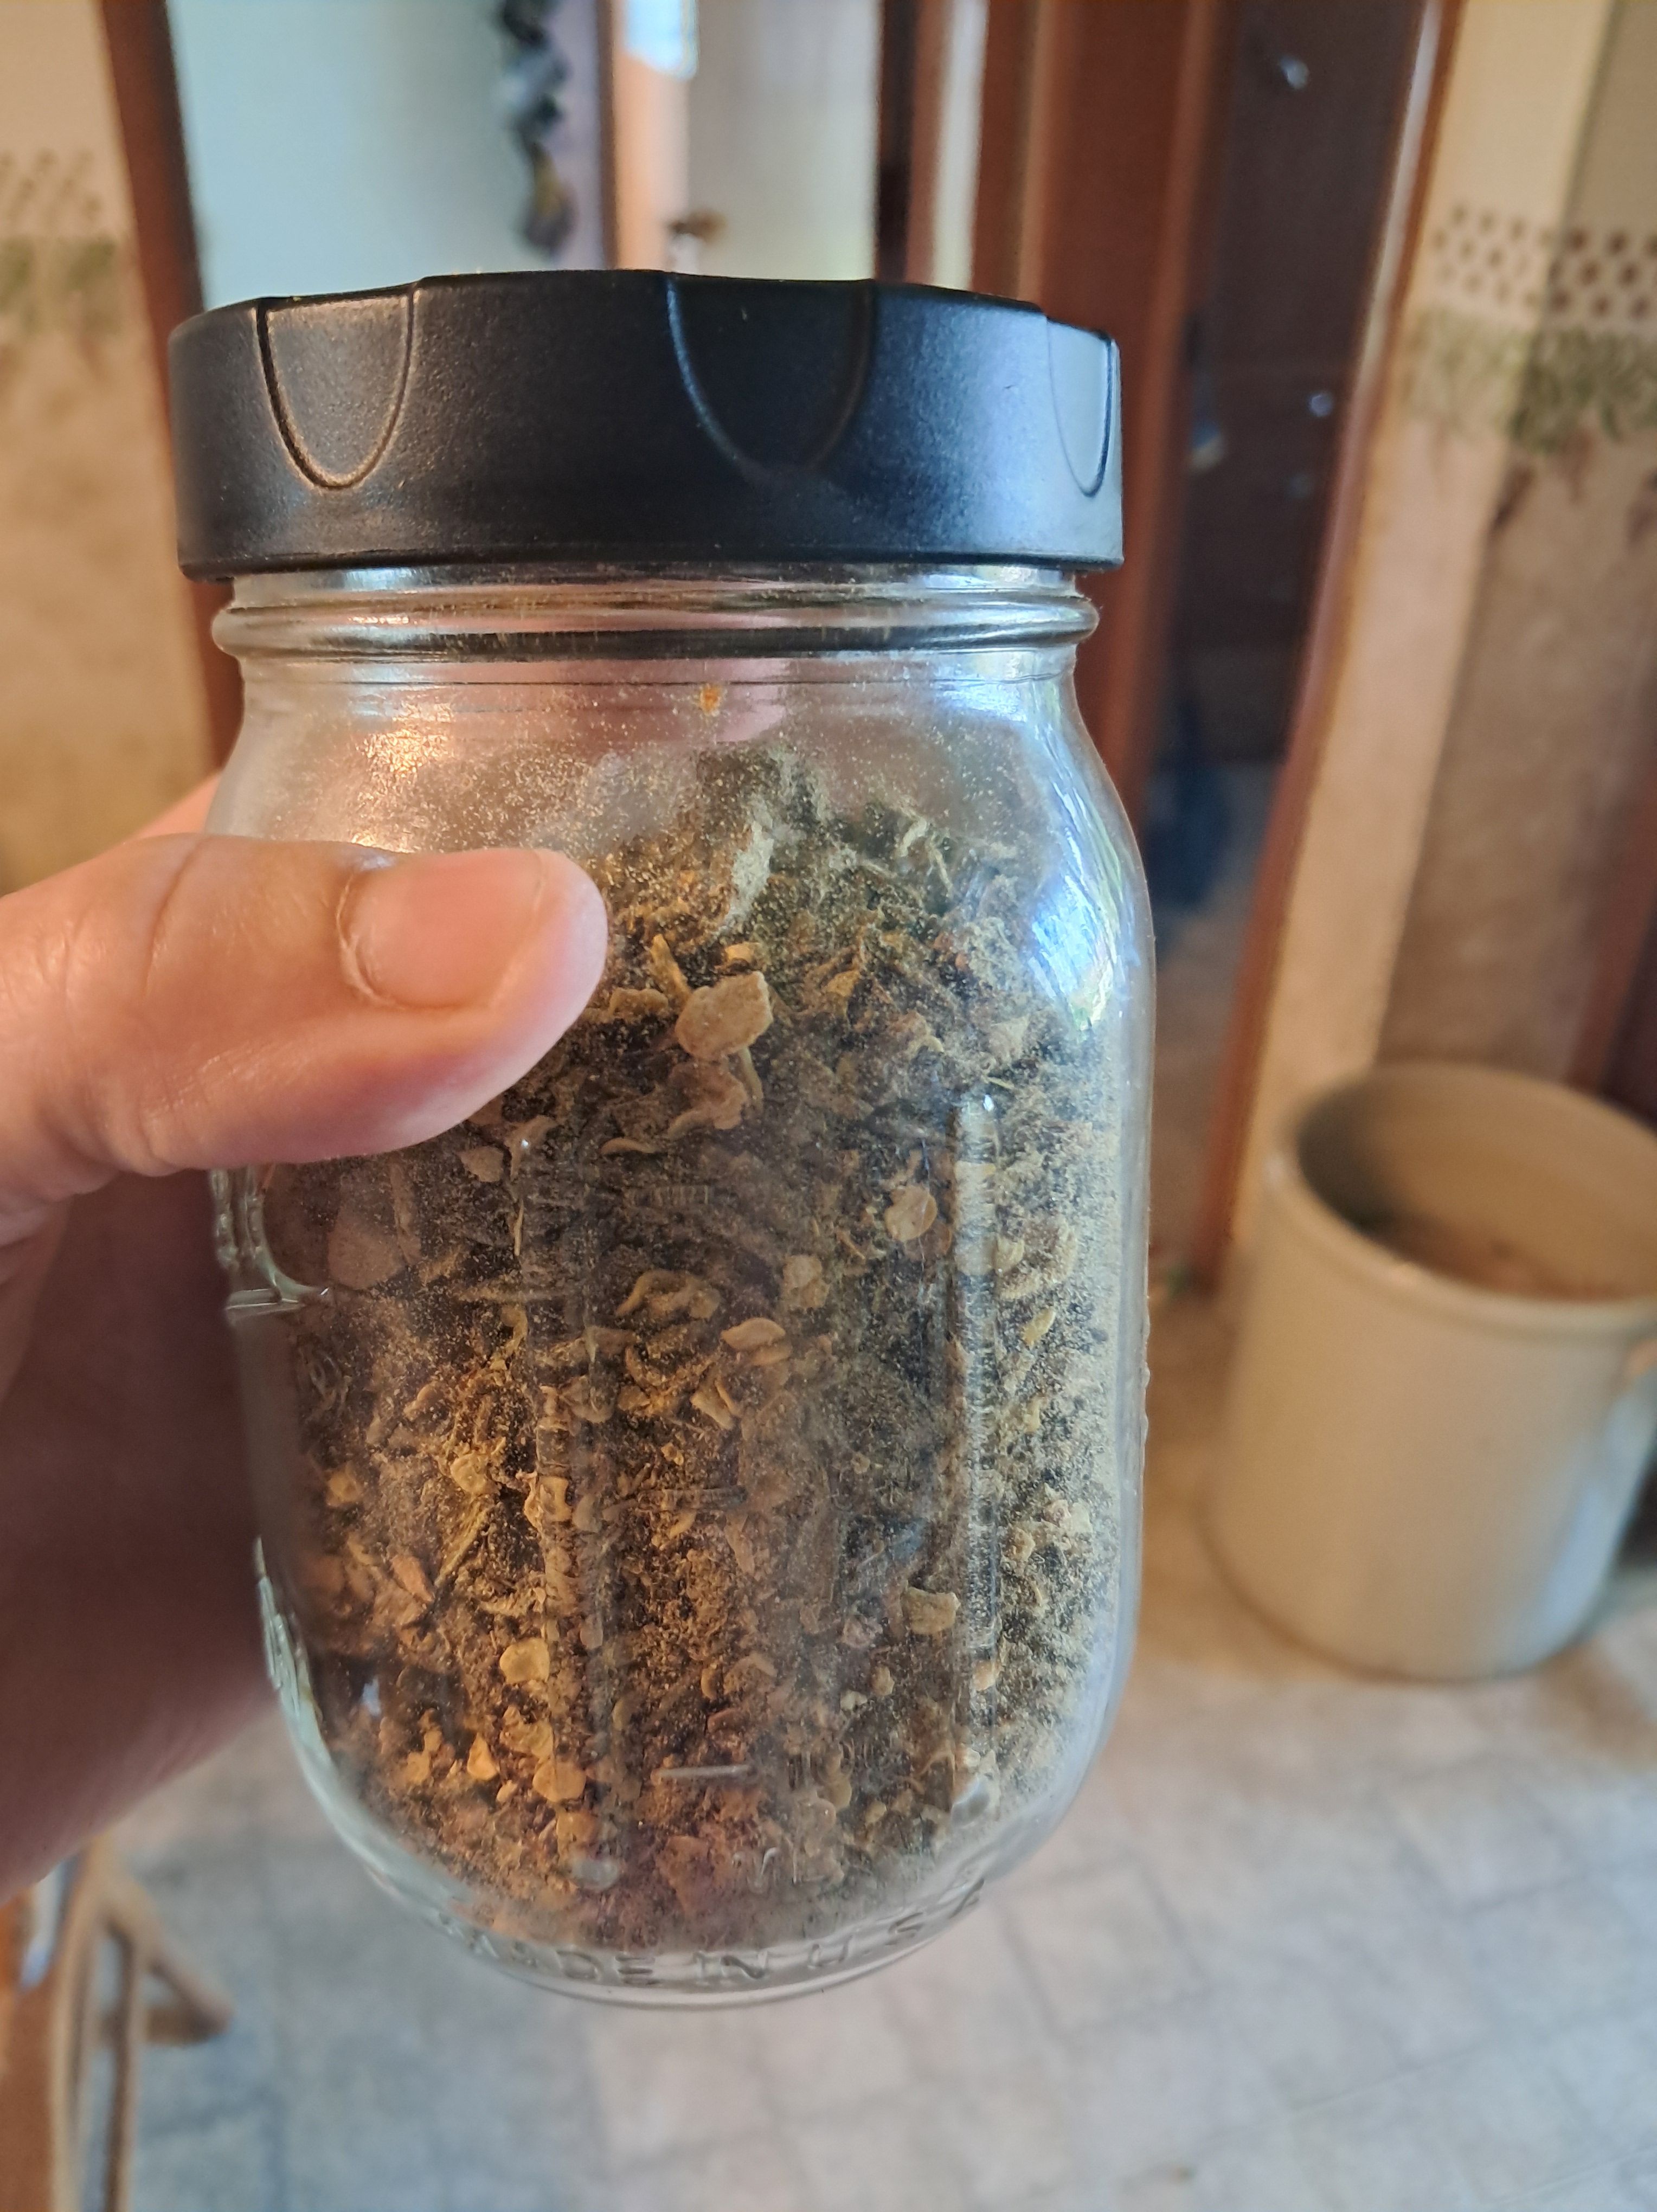
    Once the leaves are brittle and crumble easily between your fingers, they are ready to store. I like drying herbs because a little goes a long way, and it is such a satisfying way to preserve a garden harvest. It is also nice to have homegrown herbs ready to use during the winter.

    A Note About Drying Times

    Drying time can vary depending on the food, the thickness of the slices, the humidity in your home, and the type of dehydrator you use. Use any recommended drying time as a starting point, but always check the food itself before deciding it is finished.

    Thinner, evenly cut pieces usually dry more consistently. When in doubt, let the food cool before testing it, since warm food often feels softer than it will after it cools.

    Simple Dehydrating Preparation Guide

    Use this chart as a quick preparation guide. Drying temperatures and times can vary a little by dehydrator model, so always check your machine’s manual and the food itself as it dries.

    FoodHow to PrepareDrying TemperatureSpecial TipGood Uses
    BerriesWash, dry well, and place in a single layer135–140°FCrack thicker-skinned berries such as whole blueberries and cranberries before dryingSnacks, smoothies, baking, trail mix
    StrawberriesWash, hull, and slice into even pieces135–140°FKeep slices similar in thickness for more even dryingSnacks, oatmeal, muffins, granola
    CherriesWash, pit, and place in a single layer135–140°FExpect a longer drying timeSnacks, oatmeal, granola, baking
    ApplesWash, peel or leave peel on, core, and slice135–140°FDip in lemon water if you want to reduce browningSnacks, oatmeal, pies, trail mix
    Blanched vegetablesWash, cut evenly, blanch, cool, drain, and spread on trays135–140°FKeep layers thin for better airflowSoups, stews, casseroles
    Peppers and onionsWash, slice, and spread on trays135–140°FThese usually do not need blanchingSoups, chili, skillet meals
    HerbsWash if needed and dry thoroughly95–115°FDry until crisp and crumblySeasoning blends, cooking, tea

    Want a kitchen-friendly reference?

    My Garden Drying Guide includes printable preparation, temperature, drying time, storage, and rehydration charts for garden produce.


    How to Tell When Food Is Dry

    Fruit should be dry enough that no moisture can be squeezed from it. It is often leathery and pliable rather than brittle. When folded in half, dried fruit should not feel moist or sticky inside.

    Vegetables are usually finished when they are brittle, crisp, or leathery. Herbs should crumble easily when rubbed between your fingers.

    Test food after it has cooled completely, since warm food often feels softer than it will once it reaches room temperature. Once food is dry, let it cool completely before packaging it in airtight containers.

    I usually label each container with the food and date so I can keep track of what needs to be used first. Store dried food in airtight containers in a cool, dark, dry place.

    Next in This Series

    In the next post, I’ll share one of the most useful ways to use a dehydrator: making simple meal bases that can be rehydrated later for camping, pantry meals, or busy days at home.


    What are your favorite fruits, vegetables, or herbs to dehydrate from the garden? Share your go-to foods and favorite ways to use them in the comments.

    If this post was helpful, please like and share it with a friend who enjoys gardening, dehydrating food, or preserving the harvest.

    Read More Here: How to Make Homemade Venison Jerky: Smoked vs. Dehydrated

  • How to Dehydrate Food at Home: Air Drying, Oven Drying, and Dehydrators

    How to Dehydrate Food at Home: Air Drying, Oven Drying, and Dehydrators

    I love the many different ways food can be preserved at home and enjoyed throughout the year. In my last three posts, I covered different methods of freezing garden produce. Today, I’m starting a new preservation series with one of the oldest methods: dehydration.

    Dehydration removes most of the moisture from food, which changes its texture and helps it keep longer when it is dried and stored properly. Some foods become chewy, some become crisp, and some can later be rehydrated and added to soups, casseroles, or other meals.


    In this dehydration series, I’ll cover three simple topics:


    Want a kitchen-friendly reference?
    My Garden Drying Guide includes printable preparation, temperature, drying time, storage, and rehydration charts for garden produce.


    There are several ways to dry food at home. Some are simple and inexpensive, while others take a little more equipment. The important things are gentle heat, moving air, and enough time for moisture to leave the food before it has a chance to spoil or mold.


    Drying Methods at a Glance

    Before we get into each method, here is a quick look at the different ways you can dry food at home.

    Drying MethodBest ForWhat You NeedBenefitsThings to Keep in Mind
    Air dryingHerbs, stale bread for croutons or bread crumbsCookie sheet, drying rack, or hanging bundles; a dry indoor space with airflowSimple, inexpensive, and requires no special equipmentBest for herbs and dry bread rather than fresh produce; protect food from dust and moisture; do not overcrowd pans
    Sun dryingFruit in hot, dry climatesDrying racks or screens, insect protection, and consistent sunshineTraditional method with no electricity requiredDepends on hot, dry weather; bring food in at night; protect it from insects and animals; not practical in every climate
    Oven dryingSmall batches, tomato paste, and foods you want to dry without a dehydratorLow-temperature oven, racks or trays, and careful monitoringUses equipment many people already ownWorks best if the oven can hold about 140–150°F; moisture needs a way to escape; can use more energy and requires close attention
    Dedicated dehydratorRegular dehydrating, garden harvests, larger batches, and more consistent resultsElectric dehydrator and traysConsistent airflow and temperature control; useful for larger batchesCosts more upfront; round models may need tray rotation, while rectangular models often provide more even airflow

    Air Drying Food at Home

    The most basic drying method is air drying. This works especially well for herbs such as basil, mint, and parsley. You can spread clean, dry leaves in a thin layer or hang small bundles in a dry place with good airflow until they are fully dry.

    I have also used this method very effectively with old stale bread. I cut the bread into cubes for croutons or crumble it for homemade bread crumbs, then spread it on a cookie sheet in a dry spot out of the way and stir it from time to time. It is a simple way to use bread that might otherwise go to waste.

    The key with air drying is not to overcrowd the pan or pile the food too densely. Food needs plenty of room for air to move around it. Stir small pieces occasionally, and make sure everything is completely dry before putting it away.

    Dehydrating old bread for crutons or bread crumbs couldn’t be easier

    Sun Drying Food

    Sun drying is another traditional preservation method, although it is not one I have used enough to give much personal advice about it. Between my roaming chickens and other curious homestead critters, I am afraid my food would be gone before I got the chance to enjoy it myself.

    Sun drying is similar to air drying, but it depends on consistently hot, dry, sunny weather. It is most practical in climates with very low humidity, which is also not here in southeastern Wisconsin. In more humid areas, food may mold before it has a chance to dry thoroughly, so an oven or dehydrator is usually a more dependable choice.

    If you do try sun drying, protect food from insects and animals, bring it in at night, and watch the weather closely. Because sun drying depends so heavily on the weather, I see it as more of a traditional option than an everyday preservation method for my own kitchen.

    How to Use an Oven as a Dehydrator

    Before I owned a dedicated dehydrator, I used my oven often. It works, although it does take a little extra attention.

    Spread food in a single layer on oven-safe drying racks or trays. If your oven can be set as low as 140–150°F, that is ideal for many fruits and vegetables. Prop the oven door open slightly so moisture can escape, and check the food regularly.

    I still use the oven method when I make tomato paste because it works so well. Creating tomato paste from juiced tomatoes takes time, but the slow oven heat helps cook down and dry the tomatoes into something thick, rich, and caramelized.

    Oven drying can be less efficient than using a dedicated dehydrator, and not every oven holds a low temperature evenly. Check food regularly, especially toward the end, so it does not scorch or become overly brittle. Always follow your oven manufacturer’s guidance, and do not leave a propped-open oven unattended.

    If your oven’s lowest setting is 170°F, it can still be useful for certain projects. Just check food often, since the higher heat can dry the outside more quickly than the inside.

    Why I Prefer a Dedicated Dehydrator

    My favorite method is using a dedicated dehydrator. These machines are made to move heated air steadily over the food, which helps it dry more evenly. They also make it much easier to control the temperature, which is helpful when you are drying different kinds of food.

    There are two common styles of dehydrators. Round or stacked-tray dehydrators usually move air vertically through the unit. Rectangular dehydrators generally move heated air from the back across the trays.

    I have used both kinds, and I personally prefer rectangular dehydrators. For me, the results seem more even, and I find the trays easier to load. I like being able to spread food out in a single layer without trying to fit everything around a center opening. The biggest downside is that rectangular dehydrators are usually more expensive.

    Here’s the rectangular dehydrator that I use.

    Horizontal-airflow dehydrators can be especially helpful when you are drying different foods at once because the air moves evenly across the trays. Vertical-flow models can work well too, but they may require more tray rotation for even drying.

    Basic Tips for Dehydrating Food

    No matter which drying method you use, a few habits make a big difference:

    • Start with fresh, good-quality food. Drying will not improve food that is already bruised, moldy, or beginning to spoil.
    • Wash and prepare food before drying.
    • Cut pieces into similar sizes so they dry evenly.
    • Arrange food in a single layer without overlapping.
    • Stir small pieces or rotate trays when needed.
    • Let dried food cool before testing it or packaging it.
    • If you are unsure whether something is dry enough, give it a little more time. It is better to dry food thoroughly than to store it with hidden moisture.
    • Remember that warm food can feel softer than it will after cooling.

    Fruits should usually be leathery or pliable, with no moisture squeezing out when pressed. Vegetables are often dry when they are crisp, brittle, or leathery. Herbs should crumble easily between your fingers.

    Storing Dried Food

    Let dried food cool completely before putting it into airtight jars, containers, or bags. Label each container with the food and date, then store it in a cool, dark, dry place.

    If you notice moisture collecting inside a container after a day or two, return the food to the dehydrator before storing it again. I usually label each container with the food and date so I can keep track of what needs to be used first.

    Taking the time to cool, label, and store dried food properly helps protect your hard work and keeps it ready to use later.

    Properly dehydrated food typically keeps for 6 months to 1 year at peak quality when stored in a cool, dark, and dry place. While safe to eat for longer if kept completely dry, quality, flavor, and nutrients begin to fade after 12 months

    Dehydrated jalopeno peppers make a wonderful (if potent) spice addition and keep a long time in a dry dark space.

    Next in This Series

    In the next post, I’ll cover how to prepare different foods for dehydration, including fruit, vegetables, herbs, and a few of my favorite garden foods.


    Have you ever dehydrated food at home? I’d love to hear which method you use most often—an oven, a dehydrator, or something simpler like air drying herbs.

    If this post was helpful, please like and share it with a friend who enjoys gardening, preserving food, or stocking a pantry for later.

    Read More Here: Zone 4B Vegetable Garden Ideas: What We Planted in 2026

  • How to Cook Dry Beans in a Pressure Cooker

    How to Cook Dry Beans in a Pressure Cooker

    This is a follow-up to my rice post because rice and beans are one of those classic combinations that show up in so many delicious meals. From Cuban black beans to Mexican-style pinto beans, there are countless ways to turn a simple pot of beans and rice into a filling meal.

    When I was a kid, I did not know about the wonders of beans. The most exposure I had was to the cheap beef-and-bean frozen burritos my mom would sometimes get. They were delicious, but that was about as far as it went.

    I learned more when I was in college. I was broke, and I was reading listicles about how to save money on food. Eating more beans was always near the top of the list, and there was a good reason why.

    It turns out there are many different kinds of beans, and each one has a distinctly different flavor. My whole world opened up that day.

    I started with canned beans, but quickly moved on to dried beans. Back then, I cooked them in a pot on the stove. But since getting my Crock-Pot Express pressure cooker, I have started making them that way instead. I am not paid to advertise it, and I do not even think it is still being made, but it has worked well for my kitchen.

    Today, I am going to show you how I use my pressure cooker to cook dry beans. I use the Crock-Pot Express as an example, but these tips should work for many electric pressure cookers. I will also share some troubleshooting tips for the times they do not turn out perfectly.

    Why Cook Dry Beans From Scratch?

    Beans are one of my favorite ways to make meals more filling without spending much more money. They are inexpensive, shelf-stable, and soak up the flavor of whatever you cook them with.

    A ham bone that might otherwise get thrown away can turn into a rich, smoky pot of beans. Add some onion, garlic, bay leaves, or clean vegetable trimmings, such as onion ends, celery leaves, or carrot tops, and you have the beginning of another meal.

    Beans are also helpful when you want to stretch meat. Add black beans to taco meat, kidney beans to chili, or navy beans to soup, and you can make a smaller amount of meat feed more people. With the price of meat these days, that can make a noticeable difference in the grocery budget.

    They are a good source of protein, fiber, and potassium, while also being naturally low in fat. A half-cup serving of cooked beans provides roughly 7 grams of fiber, depending on the variety. Beans and rice complement each other nutritionally, and together they make a filling, satisfying meal.

    Choosing the Right Bean

    Choose the type of bean you want to make. The basic cooking process is similar, but different beans work better in different meals.

    BeanGood For
    Kidney beansChili, soups, salads
    Great Northern beansBaked beans, ham and bean soup, creamy bean dishes
    Navy beansBaked beans, soups, and bean side dishes
    Black beansCuban-style black bean soup, tacos, burrito bowls, rice dishes
    Pinto beansTacos, refried beans, burritos, chili
    Chickpeas or garbanzo beansHummus, salads, soups, roasted chickpeas

    How Much Do Dry Beans Make?

    One cup of dry beans usually makes about 2 to 3 cups of cooked beans. That is enough for about four to six half-cup side-dish servings, depending on the bean and what else you are serving.

    If beans are the main part of the meal, plan on larger portions. If you are using beans to stretch a meat-based meal, one cup of dry beans can go a long way.

    I recently cooked 1½ cups of dry beans, then added them to 1½ pounds of taco meat. It nearly doubled the taco filling, which is nothing to complain about when you have a taco-loving family like mine.

    Soaking Dry Beans

    The night before you want to cook your beans, choose the type of bean you would like to make. Look through the dry beans and remove any stray rocks, broken beans, or debris.

    Place the beans in a large bowl or container and cover them generously with cold water. Beans expand while soaking, so make sure there are several inches of water above them.

    I like to add about 1 tablespoon of salt to 3 quarts of soaking water, but plain water works well too if you prefer to keep things simple.

    Cover the container and let the beans soak in the refrigerator overnight. An overnight soak helps the beans cook more evenly and makes the next day’s cooking much easier.

    If you are in a pinch, you can soak beans for only a few hours. They may need a little extra cooking time, so check them after the first pressure-cooking cycle and add more time if they are still too firm.

    Soaking beans really helps speed up the cooking process.

    How to Cook Soaked Dry Beans in a Pressure Cooker

    Ingredients

    • 1 cup dry beans, picked over and soaked overnight
    • Fresh water
    • 1 teaspoon salt per cup of dry beans
    • 1–2 bay leaves, optional
    • Clean vegetable trimmings, such as onion ends, celery leaves, or carrot tops, optional
    • Ham bone or ham hock, optional

    Instructions

    1. Pick through the beans and remove any damaged beans, debris, or small stones.
    2. Rinse the beans, cover them generously with cold water, and soak them in the refrigerator overnight.
    3. Drain and rinse the soaked beans.
    4. Add the beans to the pressure cooker.
    5. Cover the beans with fresh water, leaving at least 2 inches of water above them. If you are adding a ham bone, make sure it fits comfortably below the maximum-fill line.
    6. Add the salt, bay leaves, clean vegetable trimmings, onion, garlic, herbs, or ham bone if using.
    7. Do not fill the pressure cooker more than halfway full. Beans expand and can foam while cooking, so they need plenty of room in the pot.
    8. Lock the lid, set the steam-release valve to the sealed position, and select the bean function or high pressure.
    9. On my Crock-Pot Express, I start soaked beans on the bean setting, which runs at high pressure for about 20 minutes.
    10. When the cooking cycle is complete, let the pressure release naturally. On my cooker, this usually takes around 20 to 30 minutes.
    11. Once the pressure indicator has dropped and the lid opens easily, carefully remove the lid.
    12. Remove bay leaves, vegetable trimmings, and bones with tongs. If you used a ham bone, pull off the meat, chop it if needed, and return it to the pot.
    13. Taste the beans. If they are still too firm, return them to high pressure for another 5 to 10 minutes, then allow the pressure to release naturally again.
    Drain the beans
    I use the “Bean/Chili” setting on my pressure cooker.
    Tender, flavorful cooked beans are wonderful to add to many meals.

    When to Add Tomatoes, Vinegar, or Other Acidic Ingredients

    I usually wait to add tomatoes, vinegar, molasses, or other acidic ingredients until the beans are tender. Acidic ingredients can slow down the softening process, especially with older beans.

    This is especially helpful to remember when you are making chili, baked beans, tomato-based soups, or any recipe that includes vinegar or molasses. Cook the beans until tender first, then add those ingredients and simmer everything together for flavor.

    What to Do With Cooked Beans

    Once the beans are tender, you have a simple base for all kinds of meals.

    Use kidney beans in chili, black beans to stretch ground beef tacos or make Cuban-style black bean soup, pinto beans for refried beans and rice dishes, navy beans in baked beans, or chickpeas in hummus.

    Of course, one of my favorite ways to use a pot of cooked beans is alongside a simple bowl of rice. Add a little cooking liquid, chopped onion, hot sauce, salsa, or whatever seasoning fits the meal, and you have an inexpensive, filling dinner.

    Add cooked beans to taco meat to stretch your food dollar.

    How Long Do Cooked Beans Last?

    If I make a large batch, I keep some in the refrigerator for the week and freeze the rest in meal-size portions for later. Store refrigerated beans in an airtight container and use them within 3 to 4 days.

    For longer storage, freeze beans in meal-size portions with a little cooking liquid so they do not dry out. Properly stored cooked beans can keep in the freezer for up to 6 months. When you are ready to use them, thaw them in the refrigerator, then add them to soups, chili, tacos, casseroles, or rice dishes just as you would canned or freshly cooked beans.

    Dry Bean Troubleshooting Guide

    ProblemLikely CauseWhat to Try Next Time
    Beans are still firm after cookingBeans were not soaked long enough, are older, or need more cooking timeReturn them to high pressure for another 5 to 10 minutes
    Beans are mushyBeans cooked too long or were very soft before pressure cookingReduce cooking time slightly next time
    Beans are blandNot enough seasoning or flavorful ingredientsAdd salt, onion, garlic, bay leaves, broth, herbs, or a ham bone
    Beans are too saltyToo much salt, bouillon, ham, or salty brothUse less salt or choose low-sodium broth next time
    Beans are dry after cookingNot enough cooking liquidAdd more water or broth before storing or serving
    Beans stick to the bottomNot enough liquid or food was left on warm too longUse enough water, and remove or store beans once they are finished

    Cooking dry beans from scratch is one of those simple kitchen skills that saves money, makes meals more filling, and gives you a lot of options throughout the week.


    Do you cook dry beans from scratch? What is your favorite kind of bean to keep in the pantry?

    If this guide was helpful, please like and share it with a friend who enjoys cooking from scratch, saving money on groceries, or making simple pantry meals.

    Subscribe for weekly homesteading tips:

    Read Next: Buying Meat from a Farmer: A Complete Guide to Bulk Meat, Freezers, and Butchers

  • How to Cook Perfect Rice in a Pressure Cooker

    How to Cook Perfect Rice in a Pressure Cooker

    In my humble opinion, the ability to make rice is one of the most underrated skills an aspiring cook can have. You need rice for so many dishes, from stir-fries and stuffed peppers to a simple side dish served with gravy.

    When I first started making rice, it either burned to the bottom of the pot or was so watery that it turned into gelatin. Neither is particularly appetizing when you are trying to impress your new beau that you hope will become your husband someday.

    Joke’s on me, though—I later learned he does not like rice at all. Oh well.

    I still like rice, and sometimes, as I tell my kids all the time, you need to make foods that some people enjoy even if others do not. It all balances out over time. He usually does not complain when I make rice anymore.

    That’s because since those early cooking days, I have learned how to make rice much more reliably. It now comes out tender, flavorful, and not mushy. Today, I am going to share the method that works best for me.

    A Note on Rice Type

    I am not going to get into a huge amount of detail about long-grain versus short-grain rice because, if I am being honest, I do not pay much attention to that myself.

    I usually buy rice from a local Amish scratch-and-dent store. Most of the time, I find a long-grain variety in a five-pound bag for a discount. The bag I currently have works great, and the best part is that I paid two dollars for it.

    My current 5 pound bag of rice that cost me $2 at the local Amish scratch-and-dent store.

    Why I Cook Rice in a Pressure Cooker

    My secret is using a pressure cooker. A few years ago, the Instant Pot was all the rage, but I use a Crock-Pot Express pressure cooker, and it works well for the rice I make. I do not think the Crock-Pot Express is still produced, but the general method should work with many electric pressure cookers that have a rice setting.

    These machines are truly useful. Yes, they can cook a pot roast until tender in less than an hour, but they can do much more than that. They can cook dry beans after soaking, make soups and stews, and some models can even make homemade yogurt.

    Pressure cookers work by trapping steam inside the pot, which raises the temperature above the normal boiling point of water and allows food to cook quickly. Before starting, always make sure the sealing ring is fitted correctly, the lid is locked, and the steam-release valve is set to the sealed position.

    For rice, I use the rice setting on my Crock-Pot Express, which cooks it at low pressure.

    Here’s the pressure cooker I use, the Crock-Pot Express

    Do You Need to Rinse Rice Before Cooking?

    There is always a debate about whether dry rice should be rinsed before cooking. I have tried it both ways, and personally, I usually do not rinse mine.

    I am a busy mom, and I have not noticed a meaningful difference in the stickiness of my finished rice when I rinse it first. I have found that the more important factor is how much liquid I add to the pot.

    If you prefer to rinse your rice, or if the package directions recommend it, go ahead and rinse it first. Just make sure to drain it well before adding it to the pressure cooker.

    How Much Rice Does One Cup of Dry Rice Make?

    One cup of dry long-grain rice usually makes about three cups of cooked rice. That is enough for a side dish for several people, depending on what else you are serving.

    My Pressure Cooker Rice Recipe

    This recipe makes about three cups of cooked rice.

    Ingredients

    • 1 cup dry long-grain white rice
    • 1½ to 2 cups water or broth, depending on your rice package directions
    • 1 teaspoon chicken bouillon
    • 1 teaspoon beef bouillon

    The chicken-and-beef-bouillon combination is something I learned while working as a chef’s assistant in a college dorm dining hall. It gives plain rice a lot more flavor.

    If I use water, I add the chicken and beef bouillon for flavor. If I use a salty broth, I reduce or skip the bouillon.

    Bouillon brands vary quite a bit in saltiness, so start with a smaller amount if you are using a new brand. You can always add more seasoning next time. If you are making a sweet dish like rice pudding, skip the savory bouillon altogether.

    Optional Step: Toast the Rice

    If you want to take your rice up a notch, use the sauté function on your pressure cooker to lightly toast the dry rice before adding the liquid.

    You can toast the rice dry or add a small amount of oil or butter first if it fits the dish you are making. Stir it constantly and watch it closely. Rice can go from lightly toasted to burnt very quickly.

    Toasting is optional, but it can add a little more flavor to savory rice dishes.

    How Much Liquid to Add to Rice

    The amount of liquid is the most important part of making good rice.

    Start with the amount listed on your rice package and follow your pressure cooker’s instructions. For the long-grain rice I usually buy, I use between 1½ and 2 cups of water or broth for every cup of dry rice.

    If you add too much liquid, the rice can turn mushy. If you add too little, the rice may be dry, undercooked, or stick to the bottom of the pot.

    I use the word liquid because you need to account for wet ingredients. Tomatoes, broth, sauces, and other ingredients can add liquid to the pot.

    I made this mistake just the other day when I added a whole tomato to my jambalaya. I reduced the water in the pot, but not by enough. The rice was edible, but softer than I wanted it to be.

    I still occasionally get mushy rice when I open a new bag and decide that I know better than the instructions on the back of the package.

    Usually, I do not.

    How to Cook Rice in a Pressure Cooker

    1. Optional: If you choose to rinse your rice, rinse it under cool water until the water runs mostly clear, then drain it well.
    2. Add the rice, water or broth, chicken bouillon, and beef bouillon to the pressure cooker. If you are using broth, reduce or skip the bouillon as needed.
    3. If you are toasting the rice first, toast it before this step, then add the water or broth and bouillon after toasting.
    4. Stir everything together.
    5. Do not fill the pressure cooker beyond the maximum-fill line. Rice expands as it cooks, so leave plenty of room in the pot.
    6. Check that the sealing ring is in place and the lid is locked.
    7. Set the steam-release valve to the sealed position.
    8. Select the rice function and press start.
    9. Let the pressure cooker do the work.

    On my Crock-Pot Express, the cooker takes a few minutes to build pressure, then cooks the rice for about 12 minutes on low pressure.

    The finished rice, with the perfect texture and seasoning.

    How to Release Pressure After Cooking Rice

    When the rice cycle is complete, let the pressure release naturally before opening the lid.

    Rice is delicate, and natural release gives it time to finish cooking without forcing starchy liquid through the steam valve. Once the pressure indicator has dropped and the lid opens easily, carefully remove the lid, fluff the rice with a fork, and serve.

    My cooker automatically switches to keep-warm mode after the cooking cycle. I usually fluff the rice once the pressure has released, then serve it or leave it on warm until the rest of dinner is ready.

    Rice Troubleshooting Guide

    ProblemLikely CauseWhat to Try Next Time
    Rice is mushyToo much liquid or extra liquid from other ingredientsReduce the liquid slightly and account for tomatoes, broth, or sauces
    Rice is dry or undercookedNot enough liquidAdd a little more liquid next time
    Rice sticks to the bottomToo little liquid or rice was left on warm too longFollow the package liquid amount and fluff rice after natural release
    Rice is blandNot enough seasoningUse bouillon, broth, butter, salt, herbs, or seasonings
    Rice is too saltyToo much or high-sodium bouillonUse less bouillon or choose a low-sodium variety

    Rice is one of those simple foods that becomes much easier once you find a method that works for your kitchen. For me, using a pressure cooker takes away much of the guesswork and gives me a dependable side dish for all kinds of meals.


    Do you cook rice in a pressure cooker? What is your favorite way to season it?

    If this pressure cooker rice method was helpful, please like and share it with a friend who wants an easier way to make rice at home.

    Read More Here: Amish Bakery Visit for Bulk Groceries: A Homesteading Family Tradition

  • How to Freeze Cooked Garden Vegetables Like Beets, Corn, and Winter Squash

    How to Freeze Cooked Garden Vegetables Like Beets, Corn, and Winter Squash

    This post is the last in my garden freezing series, where I’m sharing three simple ways to preserve the harvest:

    • easy no-blanch freezer foods,
    • blanch-and-freeze vegetables, and
    • cooked vegetables for the freezer.

    In this post, I’m covering the final step — freezing cooked garden vegetables.


    Want all three freezer methods in one printable guide?


    Why Freeze Cooked Vegetables?

    Some garden vegetables freeze best after they’ve been fully cooked first. It adds a little extra prep, but for certain vegetables it helps preserve texture and makes them easier to use later.

    How to Freeze Beets

    Beets are one of the best examples. I cook them until tender, let them cool, then peel and slice or cube them before freezing. Sometimes I freeze them plain, and other times I season them lightly depending on how I think I’ll use them later. Frozen cooked beets are great for salads, side dishes, or reheating with a little butter and salt.

    How to Freeze Corn

    Corn is another vegetable that freezes beautifully after cooking. First I husk the corn.

    Then I cook the corn on the cob, let it cool, then cut the kernels off the cob before freezing them in portion-sized bags. I squeeze out the air, seal the bags, and place them in the freezer. I usually don’t freeze whole cobs, mostly because the kernels take up less space and are easier to use later in soups, casseroles, chowders, skillet meals, and homemade dinner bowls.

    How to Freeze Winter Squash

    Winter squash also works well with this method, especially varieties like acorn squash, pumpkin, and spaghetti squash. I like to cook them until tender, let them cool, and then freeze the flesh in portions that are easy to thaw later. The texture softens a bit after freezing, but these squash varieties are still wonderful for purees, soups, casseroles, baked dishes, and other recipes where the squash will be mixed in or mashed.
    Best Vegetables to Freeze Cooked

    This method also works well for other vegetables that are usually cooked before serving or that don’t hold up quite as well when frozen raw. The key is to think ahead about how you’ll want to use them later. If the goal is to save time during the winter, freezing them after cooking can be a great option and only adds a little more work when you’re already cooking a larger batch.

    Like the other freezer methods, this one helps us make the most of summer’s harvest. Instead of watching good food go to waste, I can tuck it away for a colder day when a quick homemade meal is exactly what we need.

    Cooking and Freezing Guide

    If you want a quick reference, here’s a simple guide for freezing cooked vegetables after they’ve been prepared and cooled.

    VegetableHow to CookHow Long It Lasts in the FreezerHow to Use After Thawing
    BeetsBoil or roast until tender, then peel and slice or cube8–12 monthsSalads, side dishes, reheating with butter, soups
    CornCook on the cob, then cut kernels off after cooling8–12 monthsSoups, casseroles, chowders, skillet meals, homemade dinner bowls
    Acorn squashBake or roast until tender, then scoop out the flesh8–12 monthsPurees, soups, casseroles, baked dishes
    PumpkinRoast or steam until tender, then puree or mash8–12 monthsPies, muffins, breads, soups, sauces
    Spaghetti squashBake or roast until tender, then scrape out the strands6–8 monthsCasseroles, skillet dishes, vegetable sides, mixed vegetable bowls

    I usually label each bag with the date so I know what to use first. I’ll cover canning methods in future posts.


    Do you freeze any vegetables after cooking them first? I’d love to hear what works best for you in the comments.

    If this post was helpful, please like and share it with a friend who loves preserving garden produce.

    Read More Here: Biggest Garden Yet: Lessons, Laughs, and Pig-Approved Produce

  • How to Blanch and Freeze Broccoli and Other Garden Vegetables

    How to Blanch and Freeze Broccoli and Other Garden Vegetables

    This post is the second in my garden freezing series, where I’m sharing three simple ways to preserve the harvest:

    In this post, I’m covering the next step — the simple process of blanching and freezing garden produce.


    Want all three freezer methods in one printable guide?


    Why I Freeze Broccoli

    I love harvesting vegetables from the garden and putting them up for later. There’s something satisfying about knowing summer’s work will carry us through the colder months. One of my favorite ways to preserve vegetables is by blanching and freezing them, and broccoli is one of the easiest places to start.

    I usually plant far more broccoli than our family can eat during the summer, which makes it a perfect candidate for the freezer. The same method also works well for other garden vegetables like green beans, cauliflower, and carrots, depending on the vegetable and how it holds up to blanching.

    How to Blanch Broccoli

    I start by harvesting broccoli heads when they are ready, then cut them into bite-size pieces with some stem attached and soak them in cold water. While the broccoli is soaking, I bring a large kettle of water to a boil.

    Select good heads of broccoli that have not flowered and are full

    Once the water is boiling, I add the broccoli and blanch it for 2.5 minutes. Then I remove it immediately and plunge it into icy water to stop the cooking process. This helps preserve the broccoli’s color, flavor, and texture for long-term storage by slowing the enzymes that can cause spoilage and off-flavors.

    Before blanching
    After blanching

    How to Freeze Broccoli

    After the broccoli has cooled completely, I spread it out on a cookie sheet and place it in the freezer overnight. This step keeps the pieces from freezing into one big clump, so I can easily grab just what I need later. Once frozen, I transfer the broccoli into quart- or gallon-size freezer bags and store it in the freezer until I’m ready to use it.

    I spread the broccoli onto a cookie sheet and place it in the freezer overnight so I can pull out as much as I need.
    Don’t forget to properly label the bags! Here, I kept it simple: food, and month/year of harvest.

    Frozen broccoli is one of my favorite vegetables to pull out in the middle of winter. I use it in dressed-up ramen, soups, stir-fries, and as a simple side dish with dinner. It never seems to last until the next harvest season. Even with my best efforts, we usually run out by February, right around the time I’m planting broccoli again from seed.

    Other Vegetables to Blanch and Freeze

    The same basic blanch-and-freeze method works well for other vegetables from the garden too. Green beans are a freezer favorite, and I also like to preserve cauliflower and carrots when we have extra. If you grow a garden, freezing vegetables this way is one of the easiest ways to avoid waste and enjoy your harvest later in the year.

    Blanching Guide for Garden Vegetables

    If you like having a quick reference, here’s a simple blanching guide for a few common garden vegetables, along with the kinds of dishes they work best in after freezing.

    VegetableBlanch TimeFreezer LifeBest For
    Broccoli2.5 minutes8–12 monthsRoasting, soups, stir-fries, side dishes
    Green beans3 minutes8–12 monthsSide dishes, casseroles, sautés
    Cauliflower3 minutes8–12 monthsRoasting, soups, mash, casseroles
    Carrots2–3 minutes10–12 monthsSoups, stews, roasting, glazing
    Brussels sprouts3–5 minutes8–12 monthsRoasting, skillet dishes, side dishes

    Blanch times can vary a little depending on the size and freshness of the vegetable, so use this as a starting point. When I freeze vegetables, I usually label the bag with the date so I can keep track of what needs to be used first.

    More Garden Freezer Ideas

    In my next post, I’ll cover how to freeze garden vegetables that you fully cook first, such as sweet corn, beets, and squash.


    Do you preserve vegetables from your garden? What are your favorites to freeze? Share your favorites in the comments.

    If this post was helpful, please like and share it with a friend who loves preserving garden produce.

    Read More Here: Zone 4B July Garden Tour: Our 2026 Garden Updates

  • How to Freeze Peppers, Tomatoes, Zucchini, and Berries for Later

    How to Freeze Peppers, Tomatoes, Zucchini, and Berries for Later

    This post is part of my garden freezing series, where I’m sharing three simple ways to preserve the harvest:

    In this post, I’m covering the easy stuff — the garden produce you can prep and freeze without blanching.


    Want all three freezer methods in one printable guide?


    I love putting up garden produce for later in the year, especially when the freezer starts to feel like a quiet little backup pantry. Some vegetables need to be blanched before freezing, but a few summer favorites are even easier: just prep them, freeze them, and stash them away for winter.

    Peppers

    Peppers are one of the easiest things to freeze. I wash them, remove the stems and seeds, and slice or chop them depending on how I plan to use them later. Sometimes I leave them whole for stuffed peppers. Then I spread the pieces on a tray or place them directly into freezer bags. Frozen peppers are great for soups, omelets, stir-fries, casseroles, and stuffed peppers.

    Tomatoes

    Tomatoes are another simple freezer food. I usually core them, then place them whole into a gallon freezer bag. This is especially helpful in August when I’m overwhelmed with produce and don’t have time to process everything right away. In winter, when I have more time, I take them out of the freezer. Once they thaw, the skins slip off easily, which makes them especially handy for sauces, soups, and stews.

    If I have a bumper crop, freezing tomatoes is one of the fastest ways to deal with them before they start to soften on the counter.

    Zucchini

    Zucchini is a little more flexible. I usually shred it before freezing, since that works well for muffins, breads, and casseroles. If I want to use it in soups or skillet dishes, I may slice it instead. Zucchini has a high water content, so it won’t always hold its texture perfectly after thawing, but it is still worth freezing when the garden is overflowing. I’ve found that it helps to prep the veggie the way I expect to use it later, because that makes it much more likely I’ll actually use it.

    Berries

    Berries are one of my favorite easy freezer foods. After washing and drying them well, I spread them on a tray and freeze them before bagging. This keeps them from clumping together so I can grab just what I need for smoothies, muffins, pancakes, or cobblers. Frozen berries are one of those things that make winter breakfasts feel a little brighter.

    If you like having a quick reference, here’s a simple guide for these easy freezer foods:

    FoodGeneral MethodHow Long It Keeps in the FreezerBest Use After Thawing
    PeppersWash, remove stems and seeds, slice or chop, then freeze on a tray or in bags8–12 monthsSoups, omelets, stir-fries, casseroles, stuffed peppers
    TomatoesCore and freeze whole in freezer bags6–12 monthsSauces, soups, stews
    ZucchiniShred or slice, then freeze in portions8–12 monthsMuffins, breads, casseroles, soups
    BerriesWash, dry well, tray-freeze, then bag8–12 monthsSmoothies, muffins, pancakes, cobblers

    The nice thing about these foods is that they don’t require a lot of extra steps. If you’re short on time, they’re a great way to preserve a harvest quickly and keep food from going to waste.


    What easy freezer foods do you like to put away from the garden? Share your favorites in the comments.


    If this post was helpful, please like and share it with a friend who loves preserving garden produce.

    Read More Here: Zone 4B Vegetable Garden Ideas: What We Planted in 2026

  • Our Simple, Budget‑Friendly Camping Setup for Family Road Trips

    Our Simple, Budget‑Friendly Camping Setup for Family Road Trips

    Camping was a big part of how we kept our 5‑day family road trip under $1,000, but we also wanted everyone to be comfortable enough to sleep. If you’re looking for a simple, budget‑friendly family camping gear list for road trips, here’s the camping setup and gear that worked for us—as well as what we’d change next time.


    This post is part of our 5‑Day Family Road Trip Series.
    We took our family of four (kids ages 2.5 and 6) on an 800‑mile road trip from southeastern Wisconsin to Michigan’s Upper Peninsula, camping most nights and keeping our total cost under $1,000. If you’d like to see the whole picture, check out the other posts in this series:

    You’re currently reading: Our Simple Camping Setup for Family Road Trips (On a Budget).


    Our Tent and Sleeping Setup

    We used a 4‑person tent with a tarp underneath to protect the floor. Inside, our layering strategy looked like this:

    Here’s our setup!
    • A puzzle‑piece mat covering the floor (36 pieces, each 1′×1′). Our kids loved assembling and disassembling it each day; it became part of the bedtime routine.
    • Four foldable sleeping mats on top of the puzzle mat to cushion and insulate.
    • A base blanket, then our main comforter on top.

    Temperatures at night were around 55°F. The kids were comfortable temperature‑wise, and we stayed warm, though my husband and I did wake up a bit stiff in the morning. This setup worked well for summer nights; for colder trips, we’d add more insulation.

    We also had headlamps for when it got dark, plenty of bug spray, and sunscreen, which made bedtime routines and late‑night bathroom trips much easier.

    Cooking at Camp

    We kept dinners simple and hearty:

    • Rotisserie chicken and potato wedges one night (easy grocery‑store meal).
    • Chorizo, black beans, and rice tacos with all the fixings.
    • Potato hash with chorizo, onions, and peppers from our garden.
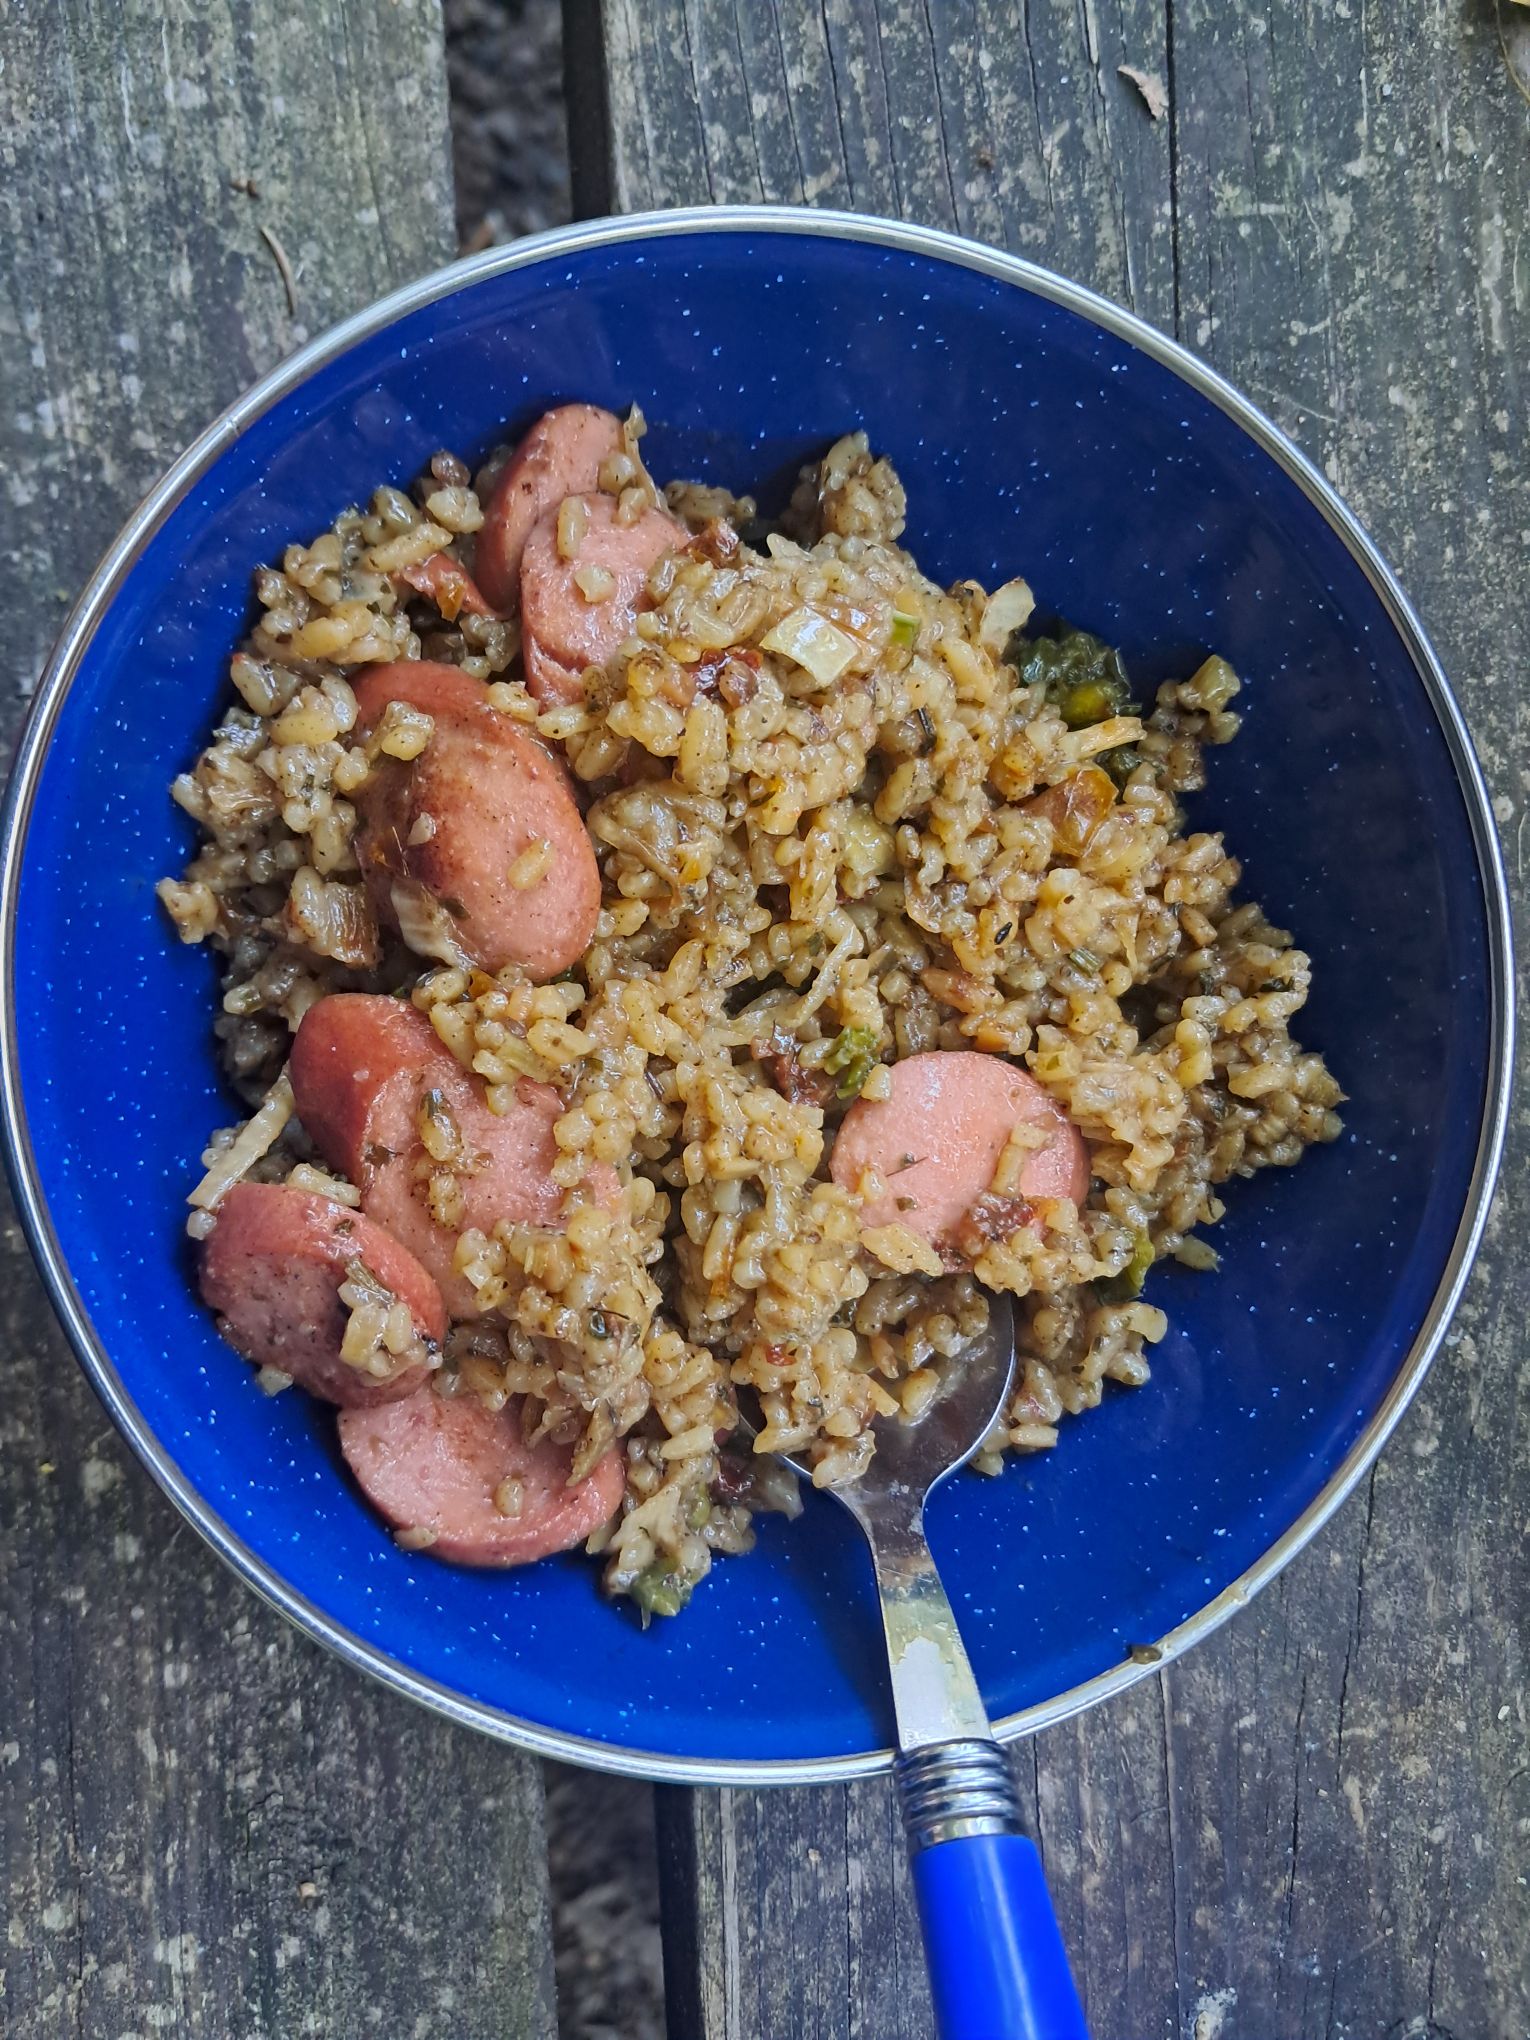
    • A dehydrated jambalaya mix “boosted” with hot dogs.
    Jambalaya, I prepared the rice mixture earlier and dehydrated it, then we sliced and fried the hot dogs before we rehydrated the rice in a Dutch oven.

    Pre‑Dehydrated Meals

    For two of those dinners—the black beans and rice tacos and the jambalaya—I did most of the work ahead of time. I cooked the dishes in my Instant Pot at home, then used my dehydrator to dry them. At camp, we simply rehydrated them in our Dutch oven. The food was delicious, and I’d recommend this approach to anyone looking for easier camping cooking with limited gear. It also helped reduce what we needed to keep cold in the cooler.

    Breakfasts included:

    • One failed experiment with overnight oats (we ate a few bites and tossed the rest).
    • Leftover tacos repurposed as breakfast tacos (a win).
    • Classic bacon and eggs on the other mornings.

    S’mores were a nightly ritual, and the kids were happily sticky by the end of each evening.

    We didn’t rely on elaborate gear—just basic cooking equipment suitable for a campfire or simple stove. We had a Dutch oven, a coffee percolator, tongs, a spoon and spatula, a camping set of metal plates, bowls, and cups, plus a cutting board and a knife.

    We stored our coolers on the back rack of the car, which freed up interior space and made food access easier at camp. For water, we hauled it in a repurposed 1‑gallon plastic jug (not from milk) and refilled as needed from campground spigots.

    The “Oh No” Box

    My husband prepared an “oh no” box to cover basic car troubles:

    • Essential tools like wrenches, pliers, a hammer, and screwdrivers.
    • Tow straps.
    • A basic code reader.

    To make it less tempting for theft, he tucked the toolbox inside an old cooler and strapped it shut in the car. We didn’t end up needing it, but knowing it was there made us more comfortable camping and driving in unfamiliar areas.

    Our “Oh No” box, which we hid in a cooler on the back rack of the car to deter potential marauders.

    Managing Limited Space

    We were tight on space in our 2018 Subaru Crosstrek. Every morning, my husband essentially played car Tetris to fit everything:

    • Camping gear
    • Food and cooking supplies
    • Clothes and personal items

    We used a back rack for coolers and realized that a roof “bubble” would have made packing easier; that’s on our list for future trips. If you’re in a small SUV or crossover, this kind of packing puzzle will probably feel familiar.

    What We’d Keep and What We’d Change

    We’d keep:

    • The puzzle mat, which doubled as a comfort upgrade and a kid activity.
    • Simple, filling meals that didn’t require fancy equipment, especially the pre‑dehydrated Instant Pot meals we could easily rehydrate at camp and that saved cooler space.
    • The “oh no” box for peace of mind.

    We might change:

    • Add a few more comfort touches for adult sleep—slightly thicker mats or compact pillows.
    • Invest in that roof carrier to ease packing and unloading.

    If you’re assembling your own camping setup for a family road trip, you don’t need to buy everything new or go ultra‑technical. Focus on warmth, cushioning, and simplicity—and on what will make your particular family feel safe and at ease.


    Want help pulling all the trip details together?

    My printable Family Road Trip Planner & Budget Pack includes a camping-friendly packing checklist, budget tracker, itinerary planner, and meal planner.


    What’s one piece of camping gear or one meal that’s become a must have for your family on the road? Share your favorites—or what you’d add to this setup—in the comments, and send this post to a friend planning a camping road trip.

    Read More Here: Mixtapes, Meltdowns, and Magic: A Family Road Trip to Remember

  • How Our Family of Four Took a 5‑Day Road Trip for Under $1,000

    How Our Family of Four Took a 5‑Day Road Trip for Under $1,000

    My family of four recently took a 5‑day, 800‑mile budget road trip from southeastern Wisconsin to Michigan’s Upper Peninsula—and spent under $1,000. Here’s our exact budget and the choices that made it possible.


    This post is part of our 5‑Day Family Road Trip Series.

    We took our family of four (kids ages 2.5 and 6) on an 800‑mile road trip from southeastern Wisconsin to Michigan’s Upper Peninsula, camping most nights and keeping our total cost under $1,000. If you’d like to see the whole picture, check out the other posts in this series:

    You’re currently reading: How Our Family of Four Took a 5‑Day Road Trip for Under $1,000.


    Trip Overview

    We traveled with our 2.5‑year‑old daughter and 6‑year‑old son, camping most nights and staying with friends for one night. Our route took us through Green Bay, Marquette, the Keweenaw Peninsula, the Porcupine Mountains, and back home via central Wisconsin.

    I didn’t set out with a specific budget target in mind; I simply tracked expenses along the way. Looking back at the numbers showed us what really helped keep costs down.

    Our Budget Breakdown

    Here’s how our costs shook out for 5 days:

    • Lodging (4 nights camping in state and local parks, 1 night with friends): $156
    • Food (mostly groceries: sandwich supplies, snacks, beer, campfire dinners): $404
    • Gas (2018 Subaru Crosstrek, about 32 miles per gallon): $101
    • Entertainment and souvenirs (mine tours, a brewery flight, small treats): $195

    Total for 5 days, family of four: $856.

    Under $1,000 is still a significant amount of money, but for us, it felt like a good balance between keeping costs reasonable and enjoying meaningful experiences.


    Want a printable version of this planning process?

    I made a simple 5-Day Family Road Trip Planner & Budget Pack with a budget tracker, itinerary planner, packing checklist, and meal planner. It’s designed to help families plan a road trip without starting from scratch.


    Tips That Helped Us Keep Our Family Road Trip Under $1,000

    Each of these decisions ties directly to one of our main expense categories—lodging, food, gas, and entertainment.

    Camp instead of hotels for most nights.
    Four nights in state and local parks kept lodging costs low and gave the kids built‑in playgrounds, nature time, and playmates.

    Our camping setup

    Cook most dinners at camp.
    Rotisserie chicken, tacos, potato hash, and a simple jambalaya made from a dehydrated mix and hot dogs were all easy to cook over a camp stove or fire. Groceries cost less than restaurant meals, especially for a family of four.

    Jambalaya, one of the camping dehydrator meals we made ahead of time and rehydrated at the campsite.

    Pack an “oh no” box.
    My husband, an auto mechanic by training, packed a box with basic tools, tow straps, and a simple code reader. We never needed it, but knowing we could handle minor roadside issues kept us from feeling pressured into extra services “just in case.”

    Our “Oh No” box, with simple tools that would help us if we had trouble on the road.

    Choose a route with low‑cost, high‑value stops.
    State parks, playgrounds, scenic ore docks, mines, waterfalls, and lake views gave us plenty to do without pricey attraction tickets every day.

    Overlooked Falls in Porcupine Mountains State Park

    Let kids help with camp setup and fun.
    Our puzzle‑piece floor mat became a nightly “game,” and s’mores and playgrounds turned simple evenings into memorable ones.

    Have a contingency plan for bad weather.
    We agreed that if it poured, we’d grab a hotel instead of pushing through miserable camping. We didn’t end up needing that backup, but it helped us relax while still budgeting primarily for camping.

    A Quick Look at Our Route

    Here’s a short overview of where we went each day:

    • Night 1: Drive to Green Bay, stay with friends.
    • Day 2: Palms Book State Park and Kitch‑iti‑kipi; camp in Marquette.
    • Day 3: Ore dock in Marquette, Cliffs Mine in Ishpeming, camp near Lake Linden.
    • Day 4: Hancock and old industrial sites, Quincy Mine tour, camp and sunset at Porcupine Mountains State Park.
    • Day 5: Porcupine Mountains waterfalls, pasties in Wakefield, camp at Council Grounds State Park.
    • Day 6: Slow morning, picnic in Stevens Point, then home.

    If you’d like a detailed day‑by‑day itinerary, I’ve written that up separately and will share it here when it’s posted.

    What It Was Like with Young Kids

    We definitely had moments where the kids had too much car time—every parent knows that special brand of restlessness. Spotify playlists (mostly ’60s–’80s music), “I spy,” conversations about the sights outside, and lots of science, history, and mining talk helped turn those stretches into shared experiences instead of just “Are we there yet?” loops.

    I’ll cover our car‑time strategies in more detail in another post, but the short version is: simple games, engaging conversation, and familiar music go a long way.

    A Few Caveats and Small Joys

    We were lucky with weather: it didn’t rain, which made camping much more pleasant. We also met kind people along the way—camp neighbors who shared s’mores, a ship’s chief engineer and his son who took a moment to explain the ore dock, and a stranger who offered to take a sunset photo of all four of us at the Porcupine Mountains.

    Those moments reminded us that budget travel isn’t just about saving money; it’s also about being open to the small connections you find on the road.

    Want a printable version of this planning process?


    If you’ve taken a budget minded family road trip, I’d love to hear one choice you made that helped keep costs down without cutting out the fun. Share your story in the comments—and if you know someone planning a family trip, send this their way!

    If this breakdown was helpful, please like this post and share it with a friend who’s dreaming about a family road trip on a budget.

    Read More: Simple Summer Fun that Doesn’t Break the Budget

  • Lessons from Raising Our First 20 Piglets on the Homestead

    Lessons from Raising Our First 20 Piglets on the Homestead

    If you’ve been following along, you know our family welcomed 20 new homestead inhabitants around mid-May. Both of our gilts farrowed 10 healthy piglets each within eight days of one another. You can read more about that in my earlier posts on our first farrowing and the early piglet days, here and here. Today, I want to share what we learned from caring for these first big batches of piglets—from those tiny first days all the way to selling them as feeders.

    Such cute little babies!

    From “Box of Butter” to 20 Pounds in a Month

    When they were born, the piglets were tiny—about the size of a box of butter. It’s hard to describe just how quickly they grew. Within about a month, many of them were already around 20 pounds.

    That first month felt like a blur of:

    • Watching them figure out how to nurse and pile under heat lamps.
    • Checking on them multiple times a day.
    • Being amazed at how much weight they could put on from just milk and a small amount of supplemental feed.

    Within about three weeks, they had expressed their own interest in ground feed, and we let them have as much as they wanted alongside nursing from mom. By the time they were a month old, it was clear we needed to start doing some of the bigger “piglet jobs.”


    Castrating, Deworming, and Marking Each Piglet

    Around that one‑month mark, we:

    • Dewormed all the piglets with an ivermectin shot to help protect them from internal parasites as their appetites—and exposure to the outside world—increased.
    • Castrated the male piglets, using a sharp, clean razor blade. We made small incisions, removed the testicles, and kept everything as quick and clean as possible to minimize stress and reduce the risk of infection. It wasn’t a pleasant job, but it’s part of raising feeder pigs, and it went smoothly overall.
    • Marked their ears so we could tell them apart. With 20 piglets that were all vaguely pink with black spots on their backs, there was no way to keep track of individuals by sight alone. Simple ear marks (the litter number on the first ear, the pig number on the second) let us track treatments, weights, and any piglet that needed extra attention.

    Those tasks were a big emotional hurdle the first time, but we were grateful to have guidance from my brother‑in‑law and to see the piglets bounce back quickly after a short recovery period.

    Their ears are cut to show their litter number and pig number.

    Moving Outside: Life Beyond the Farrowing Area

    After their first month, the piglets began spending time outside. That transition felt huge:

    • They went from the controlled environment of the farrowing area to pens with fresh air, sunshine, and more room to run.
    • They started exploring, rooting around, and acting much more like “real” pigs instead of tiny, sleepy babies.

    They loved it. Watching them tear around outside, pile up in the shade, and investigate every corner of their new space was one of the joys of this whole experience.


    A Hard Lesson: Losing a Piglet to Tetanus

    About a week and a half after castrating and deworming, we noticed that one of the piglets wasn’t acting like the others. It was shaking and losing motor control—stiff, jerky, and clearly in distress.

    By the time we recognized what was happening, it was too late. The piglet had contracted tetanus, and despite our efforts and concern, it died about six hours after we first noticed symptoms.

    It was a hard, heartbreaking lesson:

    • How quickly something can go wrong.
    • How important cleanliness and aftercare are, even when you think you’re being careful.
    • How fragile piglets can be in that window between early procedures and full, robust health.

    We were grateful the other piglets remained healthy, but losing that one still sits heavy with us. We’re considering adding a tetanus shot to our next litter of piglets.


    Growing Appetites and a Brief Underfeeding Mistake

    Once the piglets were settled outside, their appetites climbed faster than we expected. We vastly underestimated how quickly the remaining 19 growing piglets could increase their feed needs.

    For a couple of days, we were accidentally underfeeding them:

    • They cleaned up every scrap of food almost immediately.
    • They started acting more frantic at feeding time, crowding and jostling in a way that told us they were still hungry.

    It didn’t take long to realize our mistake, and we increased their ration quickly. It was another lesson in how fast growth and feed demands can shift—especially when you’re dealing with a large group instead of just a few pigs.

    Our main feed for them was a combination of ground corn and cheese, and once we got the amounts right, they did very well on it.


    Weaning: Piglets Fine, Moms Not So Much

    By the time we fully weaned the piglets at about two months, their independence was obvious:

    • The piglets were more interested in their feed and in exploring than in nursing.
    • When we separated them from their moms, they were not bothered at all. They carried on as usual, focused on food and play.

    The sows, however, had a very different experience:

    • Their udders were engorged, and they were clearly uncomfortable.
    • They were distressed for a couple of days— sometimes boisterous, pacing, and unsettled while their milk dried up.

    It was hard to watch, even knowing it was part of the process. If anything, it reinforced how strong the bond is from the mother’s side and how important it is to give the sows time and care as they transition out of nursing.


    Selling Piglets as Feeders

    By the time the piglets approached about 40 pounds, they were:

    • Eating a ton of feed (that corn and cheese mix vanished quickly).
    • Growing steadily and looking robust, active, and healthy.

    That was our window to sell them as feeder pigs. Letting them go was bittersweet—we’d grown attached—but it was also satisfying to know they were going to other farms and families who would continue the work we’d started.

    2 month old pigs! They grow so fast!

    What This First Batch of Piglets Taught Us

    Raising these 20 piglets taught us a lot about:

    • How quickly newborn piglets grow—from “box of butter” size to 20 pounds in a month.
    • The importance of timing and cleanliness around castration and deworming.
    • How fast feed demands can change as pigs move outside and start growing in earnest.
    • The emotional side of weaning—for both pigs and people.
    • How joy and loss can sit side by side in animal husbandry.

    If you’re considering raising pigs, or you’re in your first season with piglets, I hope these pieces of our story help you feel a little less alone in both the hard and the good parts.


    Your Turn

    If you’ve raised pigs before, I’d love to hear: what’s one lesson your first batch of piglets taught you that you still carry with you today?

    If this story was helpful, encouraging, or simply gave you a clearer picture of what raising piglets can look like, would you share it with another homesteader or small scale pig farmer? Your shares and comments help these lessons reach more folks who are learning right alongside us.


    Read Next: June Dairy Month Recap: Stories from the Farmyard