Tag: homesteading

  • From Driveway Weeds to Tea: How to Forage Chamomile at Home

    From Driveway Weeds to Tea: How to Forage Chamomile at Home

    I always knew about chamomile tea. I’d heard people talk about winding down with a mug before bed and mention the health benefits—things like calming the nervous system, easing digestion, and supporting better sleep.

    What I didn’t know was that you could forage your own chamomile blossoms…until I watched my husband’s grandmother do it.

    She walked right out into the driveway and started picking what I had always thought were just little white-and-yellow weeds. It was like a lightbulb went off in my head. These “weeds” I’d seen growing all over the driveway actually produce a delicious tea? Mind officially blown.

    If you’re not familiar with foraging your own chamomile, this is a simple guide to help you:

    • Recognize chamomile in the wild
    • Harvest it (bonus points if you involve kids)
    • Dry and store it
    • Brew your own homemade chamomile tea whenever you want—without the grocery store bill

    As always, I’m sharing our experience for informational purposes; it’s not medical advice.

    Where Chamomile Likes to Grow

    One of the most surprising things about chamomile is where it chooses to grow. It doesn’t always show up in neat garden rows or carefully tended herb beds.

    You’ll often find it in:

    • Gravel driveways and along the edges of paths
    • Road ditches and disturbed soil
    • Around barnyards, fence lines, and well-traveled areas
    • Sometimes in garden beds if it’s self-seeded or naturalized

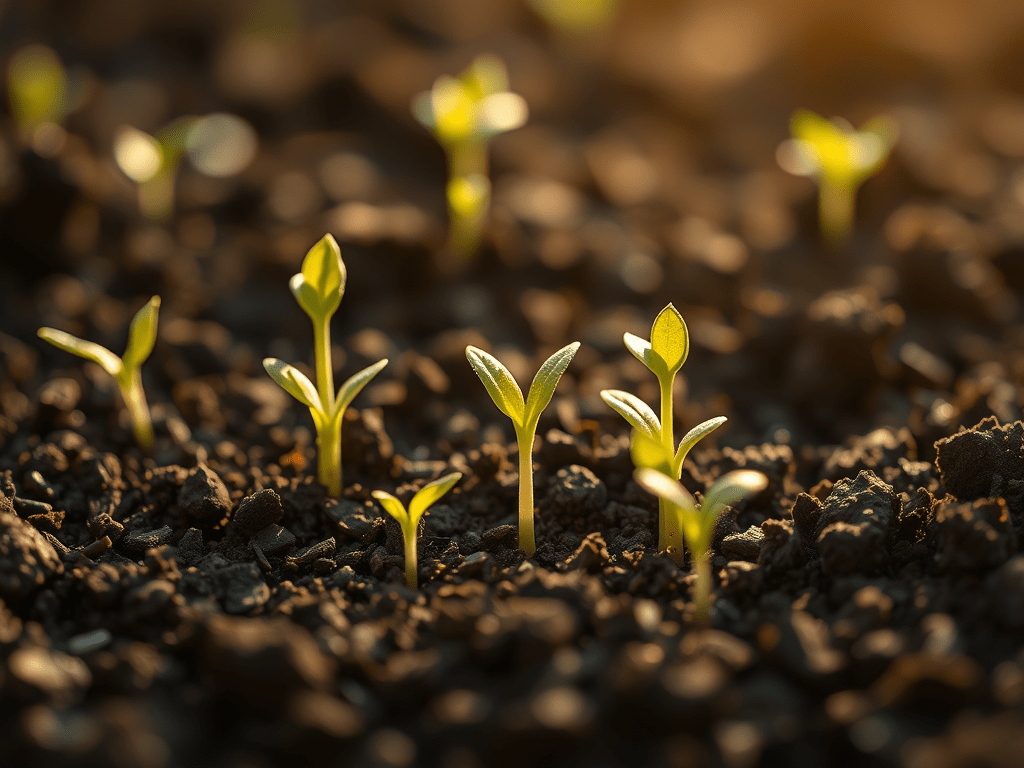
    It seems to have a soft spot for tough, compacted, “nobody wants to grow here” spots—which is part of its charm. Once you know what you’re looking for, you may start seeing it everywhere.

    Chamomile typically blooms through much of the warmer season, often late spring into summer depending on your climate. That’s the time of year you’ll want to start scanning those driveways and ditches for blossoms.

    If you’re foraging near roads, be mindful of:

    • Spraying (avoid areas that may have been treated with herbicides)
    • Pet or livestock traffic (look for cleaner patches)
    • Traffic dust and grime (driveways and paths on your own property are usually a safer bet)

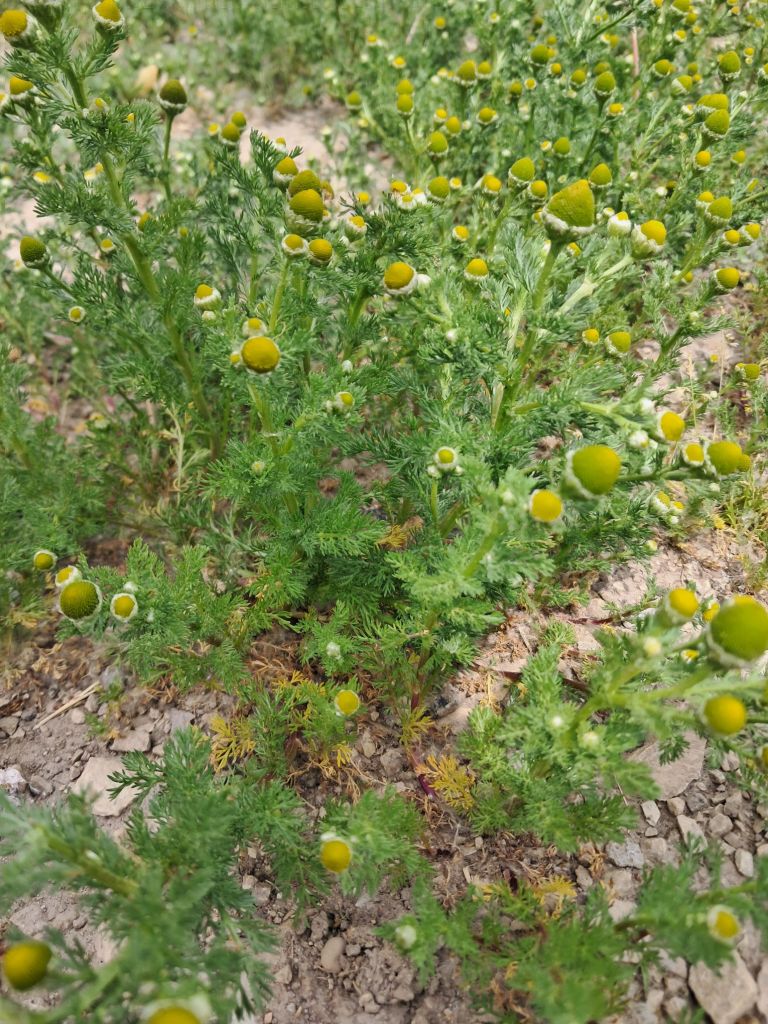
    What Chamomile Looks Like (and Smells Like)

    Before you start picking anything, it’s important to be confident in what you’re harvesting.

    Chamomile generally has:

    • Small daisy-like flowers
      • White petals
      • Yellow, dome-shaped center
    • Fine, feathery leaves
      • Light, airy, almost carrot-top-like foliage
    • A sweet, apple-like scent when you crush the flower heads between your fingers

    A few simple tips:

    • Look for patches of low-growing plants with lots of little white-and-yellow flowers rather than single, tall stems here and there.
    • Rub a flower gently between your fingers and smell it. That sweet, apple-y scent is a good sign you’re in the right place.

    There are a few different chamomile and chamomile-lookalike species out there, and some “daisy” weeds can be mistaken for chamomile at first glance. If you’re unsure, start in a spot where you know chamomile has already been identified correctly (a family member’s patch, a friend’s garden, or your own yard from purchased seed), and cross-check with a field guide or trusted resource before branching out into roadside foraging.

    How to Harvest Chamomile Blossoms

    When you’re ready to harvest, focus on the flower heads rather than the stems and leaves.

    Basic harvesting steps:

    • Choose a dry day.
      Harvest when the flowers are dry (late morning or afternoon is usually best, after the dew has evaporated).
    • Look for open flowers.
      Pick blossoms that are fully open and cheerful-looking—not browned or fading.
    • Pinch or snip.
      Gently pinch the flower head between your fingers and thumb and pop it off the stem, or use small scissors if you prefer.

    You don’t need the whole stem for tea—just the flower heads. Stems and leaves can be a bit more bitter and aren’t necessary for a nice cup of chamomile.

    In a short picking session, you can easily gather enough blossoms to fill a small bowl or two, which will translate into several jars’ worth of tea once they’re dried.

    Make It a Family Foraging Activity

    Chamomile harvesting is a perfect kid job.

    Why it works so well with children:

    • The flowers are low to the ground and easy to reach.
    • The “popping” motion of picking the flower heads is actually fun.
    • There’s a clear, satisfying end product: “We’re picking these to make tea we’ll drink later.”

    Give each child:

    • A small basket, bowl, or container
    • A simple instruction: “We’re picking the little white flowers with yellow centers—no leaves, no grass.”

    It’s a gentle way to:

    • Teach plant identification
    • Talk about where our food and herbs come from
    • Connect everyday “weeds” to real, useful things in your kitchen

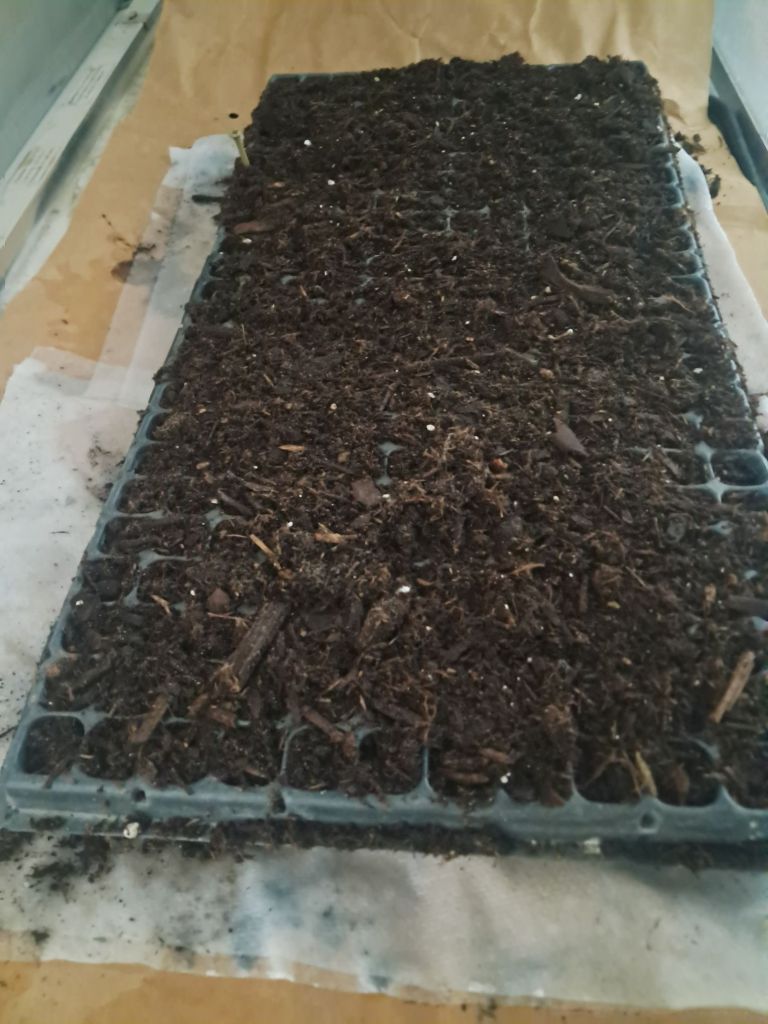
    How to Dry Chamomile for Tea

    After you’ve picked a bowl of blossoms, it’s time to dry them so they don’t mold and will keep well through the year.

    Option 1: Using a Dehydrator

    Ready to steep and drink!

    If you have a dehydrator, this is the most controlled method.

    • Spread the blossoms in a single layer on your dehydrator trays.
    • Set the temperature to around 95°F (a low, gentle setting to preserve flavor and color).
    • Dry for about 24 hours, or until the flowers are completely dry and papery to the touch.
    • Test a few by crushing them between your fingers—there should be no softness, just a dry crumble.

    Option 2: Air-Drying or Sun-Drying

    If you don’t have a dehydrator, you can still dry chamomile.

    • Spread the blossoms in a single layer on a clean screen, rack, or baking sheet.
    • Place them in a warm, dry place out of direct rain and heavy dew.
    • Make sure there is good airflow—near a sunny window or in a protected, breezy spot outside works well.
    • Gently stir or turn them once a day so they dry evenly.

    Depending on humidity, it may take several days. Again, you want the blossoms fully dry and crisp before storing.

    How to Store Dried Chamomile

    Once your flowers are fully dry, you can store them for months.

    Simple storage options:

    • Glass jars with lids (mason jars work great)
    • Clean, food-safe containers with tight-fitting lids
    • Or, going old-school: something like a washed and dried Cool Whip container, just like my husband’s grandmother used

    Whichever container you choose, keep it:

    • In a cool, dry place
    • Out of direct sunlight
    • Labeled with the contents and date

    Properly dried and stored, your chamomile should keep its flavor and gentle fragrance for a year or more.

    Brewing Your Own Foraged Chamomile Tea

    Now for the best part: turning those foraged blossoms into a cozy mug of tea.

    I have chamomile tea, the kids are drinking other tea tonight!

    On a cool winter night (or whenever you need a moment to relax), you can:

    • Take a tea ball, reusable tea bag, or small infuser.
    • Add about 1 tablespoon of dried chamomile flowers per cup of water.
    • Pour boiling water over the tea.
    • Let it steep for about 5 minutes (longer if you like a stronger flavor).
    • Remove the infuser, let the tea cool slightly, and enjoy.

    You can drink it:

    • Plain
    • With a drizzle of honey
    • With a splash of milk or cream, if you like it a little softer

    For us, it’s become a go-to when someone needs to unwind or has a slightly unsettled stomach, and there’s something extra special about knowing you picked those flowers yourself.

    A Few Gentle Reminders

    As with any foraged herb:

    • Make sure you’ve correctly identified the plant before consuming.
    • Avoid areas that may have been sprayed or heavily contaminated.
    • If you’re pregnant, nursing, or on medications, it’s always wise to double-check with a trusted healthcare provider before adding new herbal teas regularly.

    From “Weed” to Teacup

    Watching my husband’s grandmother bend down in the driveway and start picking “weeds” for tea completely changed how I look at what grows around us.

    Chamomile went from being a box on a grocery shelf to a living, growing plant that shows up in the unlikeliest places—and now, to something our family can gather, dry, and sip together.

    If you’ve ever wondered whether you could forage your own tea, chamomile is a gentle, beginner-friendly place to start.


    Have you ever foraged something you used to buy at the store?


    If this chamomile guide gave you some ideas (or a little confidence to try foraging), would you share it with a friend or save it for later?

    You can also join my email list for more simple, from-scratch homestead projects—from wild teas to what we’re growing in the garden.

    Read Next: Foraging Stinging Nettles – A Wild, Nutritious Spring Green

  • Zone 4B Vegetable Garden Ideas: What We Planted in 2026

    Zone 4B Vegetable Garden Ideas: What We Planted in 2026

    Our Late-May Garden Tour: What We Planted and Why

    Somehow, May is already almost over. If you plant a garden, have you gotten yours in yet?

    We’re in Zone 4B, and by late May our garden is finally in full swing. If you’re looking for ideas for your own Zone 4B vegetable garden, here’s exactly what we planted this year and why. In this post, I’m sharing what we planted in our garden this year and the order we planted it in (spoiler: it definitely did not all happen in one day). Think of this as a walk-through of our garden rows, plus a few notes on what’s working, what isn’t, and what we’re excited to try.

    Strawberries: The Semi-Permanent Front Row

    We started about a month ago by dedicating the first two rows of our garden to strawberries. This will be a semi-permanent location for them.

    Here’s our basic setup:

    • Transplanted strawberry plants into two full rows.
    • Plan to layer straw on top to help suppress weeds and hold moisture in during the warm months.
    • I’m pinching the blossoms off all the plants for the first two months.

    The blossom-pinching feels a little cruel in the moment, but it lets the plants focus on strong root and leaf growth. If all goes well, we should be enjoying delicious berries by July or August from the everbearing varieties.

    Strawberries plants are hidden amongst the straw (for now)

    Root Vegetables: Fresh Salads Now, Storage Roots Later

    Next, we planted our root vegetables and salad greens. This is one of my favorite parts of the garden because it gives both quick wins and long-term rewards. (You’ll notice I have a lot of “favorite” parts—my garden just brings me that much joy.)

    In this section we planted:

    • Parsnips – for fresh roots next March and April.
    • Radishes – for quick crunch and color in early salads.
    • Lettuce and spinach – fast growers, so we can enjoy fresh greens in just a couple weeks.
    • Carrots – for fresh eating in the next couple months and for later winter storage.
    • Beets – for roasting, pickling, and everything in between.

    I plan to share in a future post how we keep garden-fresh carrots through the Wisconsin winter, and also how we turn all of these roots and greens into actual meals (rather than just “good intentions” in the crisper drawer).

    Radishes, we just harvested our first bunch last night!

    Onions: The Powerhouse Vegetable (and a Confession)

    After the root bed came two full rows of onions—both red and yellow.

    I prefer transplanting onion plants rather than using onion sets. That was the plan this year too…in theory.

    Confession time:

    • I did start onion seeds this year.
    • Between poor starting soil, my “casual” watering habits, and not trimming the tops, my onion starts never made it to the garden.

    Instead, my dad kindly shared some surplus onion plants he purchased from the Amish, and they became our onion rows.

    Don’t judge me too harshly for the crooked row. I was planting with a toddler in tow…

    Why we love onions:

    • They’re a true powerhouse vegetable in the kitchen.
    • They store well when kept under the right conditions.
    • Even in our less-than-perfect storage setup, I pulled my last onion from last year’s harvest about a month and a half ago.

    We plant:

    • Red onions for fresh eating and pickling (they’re fantastic pickled).
    • Yellow onions for long-term storage and everyday cooking.

    Peas: Kid-Favorite Garden Candy

    Next up: peas.

    Peas are one of our family’s favorite vegetables to eat right in the garden. The kids love:

    • Picking them straight off the vine.
    • Popping the pods open.
    • Eating the peas fresh, still warm from the sun.

    They disappear almost as soon as they ripen.

    We installed a trellis right away, but “trellis” might be a generous term. In true homestead fashion, we used:

    • An old corn crib side as the main panel.
    • Old fence posts to hold it in place.

    We love recycling old farm implements wherever possible—it saves money, reduces waste, and gives these materials a second life.

    Somewhere in the sky, an old farmer is smiling down on our resourcefulness (I hope)

    Cucumbers in the Middle (On Purpose) + Tomatoes and Peppers

    Next came cucumbers.

    Some gardeners might be clutching their pearls at this, but yes: we plant our cucumber patch in the middle of the garden.

    The reason we can get away with this is our trellis. Instead of letting the vines sprawl everywhere, we:

    • Use an old cattle panel as a trellis.
    • Hold it in place with old fence posts.

    This keeps the vines mostly vertical and contained, which makes it easier to walk around the garden and keeps the cucumbers cleaner and easier to harvest. It might not be traditional, but it works for us.

    Once the cucumbers were in, we filled the rest of that row with transplanted veggies:

    • Peppers (both bell and hot).
    • Tomatoes – a mix of early-ripening varieties, Romas (for sauce), and Mortgage Lifters (for big slicing tomatoes).
    Peppers galore!

    Cruciferous Row: Cauliflower, Kale, Broccoli, and Brussels Sprouts

    The next row is devoted to some of my favorite vegetables: cauliflower, kale, broccoli, and Brussels sprouts.

    I love cruciferous veggies for a few reasons:

    • They’re incredibly versatile in the kitchen.
    • They freeze beautifully, which makes them a big part of how we keep eating vegetables all winter without visiting the grocery aisle.
    • They’re hardy and forgiving once established.

    In a future post, I hope to share exactly how we prep and freeze these so they stay tasty and usable.

    Quick kale note: I may be late to the party, but I also love kale soup. I’m still not sold on kale chips—mine tend to swing between soggy and burnt—but I’m open to conversion if someone can show me the magic method. Shoutout to my friend who shared her Zuppa Toscana (and the recipe!) and officially turned me into a kale-soup person.

    Cabbage, More Cauliflower, Bok Choy, and Kohlrabi

    The next row is a mix of:

    • Cabbage – destined for sauerkraut.
    • More cauliflower – because we’re not sure how well the older seed in the other row will germinate.
    • Bok choy – for stir-fries and Chinese dumplings.
    • Kohlrabi – one of my underrated favorites.

    A quick note about kohlrabi: the name literally translates from German as “turnip cabbage,” describing its shape. I grew up with it, but I don’t know how many people outside German ancestry know what it is.

    Why I love kohlrabi:

    • It grows above the ground and matures in about two months.
    • Around the 4th of July, it’s usually ready, and it’s one of my favorite veggies to snack on then.
    • It’s delicious raw—peeled and sliced.
    • The flavor is like a cross between a mild radish and broccoli.

    I’ve experimented with cooking it, but honestly, we usually eat it raw before I get a chance to cook or roast it. I’ve also pickled it with great success.

    If you’ve never tried kohlrabi and you love cruciferous veggies, I’d highly recommend grabbing some seed and giving it a spot in your garden.

    Summer Squash and Rutabagas

    In the back corner of the garden, we planted summer squash—three hills of it.

    In my unsolicited opinion, three hills is about two hills too many. If you’ve ever been buried in zucchini or summer squash, you know exactly what I mean.

    The rest of that row holds garlic and rutabagas.

    • The garlic was planted way too late last October, and it shows; it didn’t come up well.
    • To make better use of the space, we interplanted rutabagas.

    Rutabagas are another veggie I’ve only recently fallen for. They make a great “potato” replacement in mid-summer and are wonderful:

    • Sautéed.
    • Roasted.
    • In pot pies.

    Sweet Corn and Cantaloupe at the Front

    The front of the garden holds our sweet corn patch.

    Full honesty: I have not had the best luck with sweet corn in recent years. The local raccoons and possums seem to love it even more than we do. We’ll see how it goes this year.

    On the other side, we planted cantaloupe. In my experience (Zone 4B), you don’t need to transplant cantaloupe:

    • When you plant seed directly into soil that’s warm enough (late May here), it catches up quickly.
    • Direct-seeding saves time and space in the seed-starting area.

    If you’re curious about how we store carrots, freeze broccoli and cauliflower, or use bok choy in dumplings, those posts are coming (or, in the case of Chinese dumplings, are already here).

    Potatoes, Pumpkins, and Future Plans

    Beyond the main garden rows, we have two additional patches:

    • My husband planted a patch of potatoes using a restored potato planter, which was a fun bit of old-meets-new on the homestead.
    • Behind our barn, we plan to establish a pumpkin patch.

    I’m already dreaming of fall pumpkins, roasted seeds, and maybe even some homegrown pumpkin purée for baking.

    That’s our lineup for this year’s Zone 4B garden, from strawberries in front to pumpkins out back.


    What’s growing in your garden this year, and which veggie are you most excited to harvest first?


    If this little garden tour gave you some ideas (or just made you feel less behind on planting), would you share it with a fellow gardener or save it for later?

    You can also join my email list for more honest, Zone 4B garden updates, planting ideas, and what’s actually working for us from season to season.

    Subscribe for weekly homesteading tips:

    Read Next: Biggest Garden Yet: Lessons, Laughs, and Pig-Approved Produce

  • First-Time Farrowing on Our Homestead: How Our Gilts Welcomed 20 Piglets

    First-Time Farrowing on Our Homestead: How Our Gilts Welcomed 20 Piglets

    If you’ve been following along, you know our family just welcomed 20 new homestead inhabitants. Both of our gilts farrowed 10 healthy piglets each, within eight days of one another. In this post, I’m sharing the good, the bad, and the “ugly” (if you consider birth in all its rawness “ugly”) from our first farrowing season.

    If you’re a human parent, you may find yourself nodding along—there are a lot of parallels between farrowing and real childbirth.

    Planning for Piglet Due Dates and Farrowing

    Our first gilt was due on Mother’s Day, which felt poetic and slightly nerve‑wracking.

    We estimated her due date by:

    Mr.Eligible boar (pink)

    Just like with human pregnancies, a “due date” for pigs is more like a due window. There’s a grace period on either side, and you quickly learn that the animals don’t read calendars.

    About four days before the due date, we moved our soon-to-be mama into her farrowing quarters—a fixed-up building on our property. Her udder had been noticeably full for about three weeks, but it really expanded in the three days leading up to the due date.

    On the calendar due date itself, she turned…feisty. And by feisty, I mean she was ready to bite anything that got within range of her snout. But she did not actually farrow that day.

    My husband and I were both on high alert. He checked on her several times from Sunday into Monday, but nothing happened. Then, midday Monday, he checked on her again, saw no progress, ran a quick errand, and came back to a surprise: three piglets, mostly dried off and already attempting to nurse.

    Watching the First Piglets Arrive

    He came to pull me away from my home office, and we stood there, just watching.

    It’s incredible how quickly piglets transition from birth to motion:

    • They got up on shaky legs
    • They walked toward mom’s teats
    • They instinctively nuzzled and attempted to latch

    When they wandered too close to her head or drifted off too far, she would grunt, and they would back off. You could see the communication happening instantly between mother and babies.

    Based on how quickly those first three arrived, we expected more piglets to appear almost immediately. But an hour went by with no action.

    We knew there were more piglets in there. A typical first-time gilt can have between 6 and 12 piglets, and we could see our girl straining. But nothing was moving.

    When Birth Doesn’t Go Smoothly

    At this point, we knew we were out of our depth and that simply “waiting” might not be enough. My husband called my brother-in-law, who came over quickly (we still cannot thank him enough) with oxytocin to help speed up the process if needed.

    Oxytocin for pigs is similar to Pitocin for humans. It’s also a hormone our bodies naturally produce to help labor progress and to promote bonding with our young.

    Before he arrived, though, the next piglet finally emerged—and it was stillborn.

    Based on its size, we could tell it hadn’t fully developed in the womb, which is fairly common in pig litters. What I didn’t know beforehand was how much a stillborn piglet can slow down the farrowing process.

    In a normal birth:

    • The sow pushes
    • The piglet wriggles and helps move itself along the birth canal

    When the piglet is stillborn, there’s no wriggling, which reduces the sow’s natural urge to push and makes things much slower and harder.

    The Rest of the Litter and Piglet Safety

    Once the stillborn piglet was out, everything sped up. The next seven piglets arrived within about half an hour. Some came out in groups of three, one right after another.

    We:

    • Caught each piglet
    • Used towels to dry them off
    • Placed them under a heat lamp in a designated corner of the farrowing crate

    We had intentionally designed a piglet-only corner in the crate—an area where the babies could go but the sow could not. This gives them a protected space if mom’s hormones are running high or she’s moving around clumsily during or after farrowing.

    My brother-in-law arrived during this time, showed us how to administer oxytocin, and—equally important—gave us some perspective.

    He reminded us that sometimes you need to “sit on your hands.” The sow often knows what to do, and constant interference can create more problems than it solves.

    Mere minutes before this, we had to sit on our hands as we were nervous the new mom would lay flat on her babies. Imagine 10 little ones walking underneath you, going in front of you as you try not to walk into them, and you can understand our apprehension.

    Instincts, Bonding, and the Early Days

    It was awe-inspiring to watch a first-time mom become a mother in an instant.

    When we picked up a piglet, it squealed, and she would leap up, immediately on guard, ready to defend her baby. That bond is powerful and very, very real.

    In the first week, we watched the piglets:

    • Double, then nearly triple in size
    • Learn to find the warmest spot under the heat lamp
    • Figure out (and fight over) the best spots on the udder

    Because the weather was initially cold, we added a second heat lamp in the piglet-only section to keep them warm enough. Those first days felt like a delicate balancing act between warmth, safety, and giving the sow enough space to relax and recover.

    Just as the first litter was settling into a rhythm, we realized we were about to do it all over again with our second gilt.

    Preparing for Our Second Gilt’s Farrowing

    Five days later, we moved our second gilt into her farrowing crate. In classic Wisconsin fashion, the weather changed dramatically—now it was suddenly warm.

    That temperature swing added a whole different layer of worry.

    Several times, we thought she was laying down to start farrowing. My husband lost more than a few nights of sleep, watching her, waiting for contractions that never came. Instead, she was simply overheated and panting, trying to cool herself down.

    A few things to remember about pigs:

    • They don’t have sweat glands
    • They carry a good layer of insulating fat
    • Dumping excess heat is genuinely hard for them

    We ended up spraying her gently with a hose during the worst of the heat, and it made a noticeable difference. She relaxed, her breathing slowed, and it was a good reminder that not every “change” in position or breathing is labor.

    Sometimes, it’s just a hot pig.

    A Dramatic Second Farrowing

    Naturally, our second gilt chose a wonderfully inconvenient time to start farrowing.

    Right as I was heading out the door for my monthly book club meeting, she decided it was go time. By the time I returned, seven piglets were already out.

    My husband filled me in on what I’d missed:

    • One piglet was born breech (butt first), and he had to help pull it out
    • By the time it emerged, it was struggling to breathe, so he rubbed it vigorously to stimulate it

    Then came another challenge—the largest piglet of the litter got stuck in the sow’s pelvis. It took about an hour for that baby to finally make its way out. Once it did, the remaining piglets arrived quickly, followed by the placenta (what some people call the “afterbirth” or “cleanings”).

    That hour with the stuck piglet felt much longer than sixty minutes. It was one of those situations where you’re walking a line between stepping in and letting nature work, all while trying not to panic.

    Second litter, they also made a dramatic entrance

    What We Didn’t Need—and What We Did

    Looking back at both farrowings, a few specific tools and supplies made a big difference—and a few things we were sure we’d need stayed in the box.

    One small but encouraging discovery: we didn’t end up needing the iodine we had ordered for antiseptic purposes. Both gilts instinctively chewed off their piglets’ umbilical cords on their own, just as nature designed them to.

    During the second farrowing, we did use the sleeve-length veterinary gloves, which my husband used to check the second sow and see where the piglet was in the birth canal. Having those on hand gave us a safer way to assess what was happening without introducing as much risk of infection.

    After each birth:

    • Mom would eventually lay down flat, exposing her full udder
    • The piglets would find their spots and latch on
    • The first milk, just like in humans, was rich colostrum
    • Later, her full milk let-down came in

    The sow grunts to call her babies over and often continues to grunt the entire time she’s nursing. It’s a sound that becomes the background track to your days during those first weeks—steady, rhythmic, and weirdly comforting.

    She nurses about once an hour around the clock, and in between, she rests, eats, drinks, and even teaches her babies where to defecate (in a designated corner).

    Lessons We Learned from Our First Farrowing

    This whole experience left us humbled, exhausted, and incredibly grateful. It also taught us some practical lessons we’ll carry into every future farrowing season.

    We learned:

    • How much can go smoothly without our intervention when we give the sow space
    • How quickly things can go wrong—and how critical it is to have knowledgeable help on call
    • How important it is to be prepared for both cold snaps and heat waves during spring farrowing
    • How valuable a piglet-only safe zone and basic supplies (like gloves and towels) can be
    • How strong maternal instinct is, whether in pigs or humans

    If you’re reading this because you’re considering raising pigs, or you’re just here for the many parallels to human childbirth, I hope this gives you a real, honest picture of what farrowing can look like.

    It’s messy, beautiful, stressful, and holy all at once—and when you’re standing there in a dusty farrowing crate, watching a brand-new piglet wobble toward its first meal, it’s hard not to feel a little awe.


    If you’ve been through your own version of ‘first farrowing’—with pigs, other livestock, or even human babies—I’d love to hear about it. What surprised you the most about birth and early days on your homestead?


    If this story was helpful (or reassuring) as you think about raising pigs, would you share it with a fellow homesteader or save it for later? You can also join my email list for more honest, behind-the-scenes looks at our homestead wins, mistakes, and everything in between.

    Subscribe for weekly homesteading tips:

    Read Next: Buying Meat from a Farmer: A Complete Guide to Bulk Meat, Freezers, and Butchers

  • Spring Homestead Projects: Fruit Trees, Piglets, and Property Improvements

    Spring Homestead Projects: Fruit Trees, Piglets, and Property Improvements

    This spring on our homestead has been both chaotic and full of life. Between new animals, fresh plantings, and long-awaited property upgrades, it feels like everything is waking up at once. If you’re curious what real-life spring homestead projects look like for us—or looking for ideas for your own place—here’s what we’ve been up to.

    Spring Planting: Fruit Trees, Strawberries, and Garden Beds

    This spring, we’ve focused heavily on long-term food production. We planted new fruit trees, added strawberries, and finally started planting the garden.

    Fruit Trees

    We put in three apple trees to start planning ahead for the day when our older orchard slows down. Our established apple trees are slowly starting to die off, so these new trees are our way of making sure future us still has apples to harvest. In addition, we’ve planted two pear trees (because my 6-year-old son absolutely loves pears, and we love them too). All the fruit trees should start producing a small amount of fruit in about three years, with bigger harvests in the years after that. The kids are already talking about how they “can’t wait” to pick our own apples and pears someday.

    Strawberries

    We also planted 75 strawberry plants in three different varieties. About two-thirds are everbearing strawberries, which produce fruit throughout the growing season. The remaining third are June-bearing strawberries, the kind that give you that big flush of berries in June—what most people know from U-pick strawberry farms.

    Hard to see, but the strawberries are there!

    We’ll pinch the blossoms off the everbearing strawberries for the first couple of months while their root systems establish, then we’ll start letting them fruit. For the June-bearing strawberries, we’ll pinch all the blossoms this year so they can focus on roots, and we should start seeing fruit next summer. The kids are already excited, asking when they’ll get to pick strawberries and dreaming aloud about “strawberry snacks” straight from the garden.

    Field and Garden

    Out in the field, my husband planted our two-acre plot of oats, then tilled up a 120-foot by 30-foot field behind our barn (I know, cute) where we planted high population corn (planted more closely than typical field corn). These crops are intended to become feed for our pigs, chickens, and turkeys, which feels like a big step toward growing more of our own animal feed.

    Once the April flooding finally receded, we started planting the main garden. So far we’ve gotten radishes (the perfect cool-weather crop), rutabagas, parsnips, and transplanted onions in the ground. There’s still plenty more to do, but it feels good to see those first rows planted.

    Don’t judge my not-too-straight row of onions too harshly please!

    Spring Animal Projects: Piglets, Chicks, and Turkeys

    Anyone with animals knows that adding more livestock takes planning, patience, and a little bit of risk.

    Piglets

    Last year, we added two gilts to our pig herd and decided—almost on a whim—that we wanted to try farrowing piglets. Of course, biology says you can’t have piglets without a boar, so my brother-in-law graciously lent us his boar for two weeks in mid-January. In return, we helped him by cutting down a tree. Homestead barter at its finest.

    Mr. Eligible Bachelor (pink) as he wooed his lady.

    Next, we needed a safe space for piglets to be born and grow for the first several weeks. My husband converted an old dilapidated shed into functional farrowing quarters. He shored up rotten sections, set used silo staves in cement to make a makeshift floor, and built a farrowing crate from reclaimed wood. He even added lights, knowing we’d be checking on her at all hours until she finally gave birth.

    All ready for some babies!

    So far, one gilt has farrowed 10 piglets, and the second is due any day. We love having little babies around the homestead—it’s noisy, busy, and pretty wonderful.

    Our plan is to either sell some of the piglets as feeder pigs or raise them for pork that’s grown outside on pasture. If you’re local (SE WI) and interested in either, feel free to reach out.

    Chicks

    About a month ago, we also added to our poultry flock. We purchased 15 straight-run Wyandotte chicks and set them up in our basement. At the same time, I set up my incubator with 22 eggs.

    My first attempt at incubating eggs was a complete failure—I didn’t hatch a single chick from 47 eggs. Lesson learned: the orientation of the eggs in the incubator matters. They can’t be placed upright in egg cartons; they need to lie horizontally or they simply won’t develop.

    This time, with the eggs properly positioned, 10 chicks hatched and 9 survived. That gives us 24 new chicks total. In theory, about half will be roosters and half hens. We plan to keep one rooster as our new stud, and the rest of the roosters will eventually head to “freezer camp” and become shredded chicken for soups, broth, and casseroles (yes, I’m from Wisconsin, and we call it casserole). The kids love checking on the chicks in the brooder, counting them, and reporting back on who’s sleeping, who’s eating, and which one is “their” favorite.

    Turkeys

    Our turkeys have their own spring plans. Both turkey hens found separate hidden spots around the property to sit on nests—despite the small detail that there are no toms currently on the homestead. My husband decided to do a little switcheroo and swapped one turkey’s eggs for fertile chicken eggs. We’ll see if any of those end up hatching. There’s never a dull moment with birds.

    Property Improvements: Upstairs Progress and Cleanup

    Spring hasn’t been all about plants and animals; we’ve made progress on the house and property, too.

    Upstairs Progress

    For those who don’t know, we bought our house in 2023 with an unfinished upstairs. Earlier this month, carpet was finally installed in most of that space, and now we’re down to finishing touches like closet doors and furniture. The last third of the upstairs still needs to be completed, and we’re planning to add a bathroom upstairs so we don’t have to navigate steep stairs in the middle of the night.

    Outside Cleanup

    Outside, my husband has been on a mission to clean up the property again, hauling away loads of scrap metal. The plan for this summer is to shore up one of the existing buildings so we can use it as temporary cover for our equipment while we demolish old structures and replace them with something more functional.


    It’s a lot—but it’s the good kind of work.

    Spring on a homestead is always busy, but seeing these projects come together—fruit trees in the ground, piglets in the barn, chicks in the brooder, and an upstairs that finally feels like it’s becoming livable—makes all the mud, mess, and chaos feel worth it.

    It’s one more season of growing food, raising kids alongside all this work, and slowly building the kind of place we want to call home.


    What spring projects are you working on around your home or homestead right now—plants, animals, or house upgrades?


    If this gave you ideas—or just made you feel less alone in the spring chaos—tap like and share it with a friend who’s also growing, raising, or rebuilding something this season.

    Subscribe for weekly homesteading tips:

    Read Next: Mid-Season Maple Syrup: 5 Gallons from 200 Gallons Sap

  • Our First Gilt Farrowed: 10 Piglets on a Monday Afternoon

    This is a shorter post this week, but it feels like a big one.

    We have piglets.

    On Monday afternoon, our first gilt farrowed 10 piglets (and one stillborn), and it was our first time experiencing pig farrowing firsthand. One minute we were checking on her like we had so many times before, and the next we were in the middle of something real and messy and alive. There’s no easing into it when it starts—you go from waiting to catching babies in what feels like a breath.

    At one point, the farrowing process stalled, which raised our anxiety pretty quickly. From what we’ve learned, pauses can happen during farrowing, but in the moment it’s hard to know when to wait and when to step in. We hovered, second-guessed ourselves, and tried to stay calm. In the end, she worked through it on her own, which was both a relief and a reminder that animals often know exactly what to do if we give them space.

    Once the piglets were here, things shifted into action mode. We cleaned them off, making sure each one was breathing well and able to stay warm. My brother-in-law walked us through administering oxytocin so she could relax and start nursing. Watching those piglets root and latch felt like a turning point—less “are we going to be okay?” and more “okay, this is working.”

    Momma and babies as they attached for the first time.

    We stayed with her for the first couple of hours, keeping a close eye out so no piglets were accidentally crushed. One thing we learned quickly is how important it is to watch the sow’s movements closely, especially when she shifts or lays down. It’s a strange balance of awe and vigilance. Every small movement feels important. Every squeal makes you look twice—and resist the urge to intervene to prevent piglet crushing.

    This is the part of raising animals, and growing food, that doesn’t always make it into the highlight reel. It’s messy, a little nerve-wracking, and very real. But it’s also where the learning happens: in the doing, in the watching, and in showing up before you feel fully ready.

    And maybe that’s the overlap I keep noticing lately—between raising animals and raising kids. You prepare as much as you can, gather advice, set things up the “right” way… and then you step back and let life unfold, staying close enough to help but far enough away to let growth happen.

    Right now, the piglets are tucked in close to momma, and we’re checking on them more often than we probably need to. It feels a little like bringing home a newborn again—equal parts wonder, worry, and watching something new take its first steps in the world.

    Growing food, raising kids, building community… sometimes all three show up at once, in a farrowing pen on a Monday afternoon.


    Have you ever been present for an animal birth on your farm? What surprised you most?


    If this little farrowing story made you smile (or taught you something), please like and share with fellow homesteaders!

    Subscribe for weekly homesteading tips:

    Read Next: First-Time Pig Farrowing Prep: What We’re Doing Before Our Mother’s Day Litter

  • A Gentle Return to the Blog

    Thank you so much for your patience while I took a short break to focus on my family. Stepping back was exactly what I needed—it helped me rest, reconnect with my reasons for blogging, and remember why I started writing in the first place.

    Over the past year I’ve been writing this blog, something unexpected has happened: we’ve built a small but mighty community. I’m so grateful for the readers who share their own stories, ask questions, and cheer one another on in the comments and messages. This isn’t just a blog—it’s a space where families, homesteaders, and food lovers lean into the same rhythms of growing food, raising kids, and caring for the land.

    Coming back now, I want to keep that focus front and center. I’ll still share my two cornerstone posts each week, released on Thursdays and Sundays, and I’ll respond to some of the daily prompts—but I’m letting go of my perfectionistic tendencies and letting the writing breathe more. I’d love to post more about real, messy family days, the little triumphs of the garden, and the ways we’re learning to live more simply and sustainably.

    I think I was a little burned out from writing, but I’m coming back to it from a more grounded, renewed place. I’d love to have you join me again as I dive back into the stories that matter most to our family, our homestead, and this community.


    If you’re still here reading this, what would you most like to see more of on the blog—family adventures, homesteading how‑tos, or seasonal recipes? Leave a comment and let me know. I’m so grateful for this small but mighty community and for the way we’re learning and growing together.

    And if you like this content, please consider subscribing, to join our growing community of like-minded people who value family, the “village”, and slow food.

    Read Next: Why I Hate “What Do You Do?” – Homesteader’s Answer

  • The Smartphone That Keeps My Homestead and Working Mom Life Together

    The Smartphone That Keeps My Homestead and Working Mom Life Together

    The most important invention in your lifetime is…

    The most important invention of my lifetime? The smartphone—my love-hate lifeline that keeps my homestead, work, and kids from spinning apart.

    Some mornings, I gather eggs between work calls just to catch my breath. By bedtime, the glow of a screen competes with story time and the sound of rain outside our farmhouse window. Some days, the constant ping of notifications makes me want to toss the thing straight into the compost pile.

    But here’s the truth: that little screen helps me grow food, raise kids, and build community in ways younger me couldn’t have imagined. That connection keeps the loneliness of rural life at bay.

    I hunt for fresh ways to use up garden produce, share turkey videos with faraway friends, and text neighbors to swap garden tips or photos of the first spring seedlings. After sharing my post on how to plant onion seeds, it’s been fun seeing those early sprouts push through the soil. It’s the perfect reminder that growth takes time. When our chicks struggled to hatch last year, a quick YouTube search saved both the day—and the chicks.

    Digital tools blur the line between work and home—but that overlap keeps me grounded. In this modern era of homesteading and family life, connection is survival—it’s how we share ideas, find support, and remind each other that the mess and magic of everyday life are worth it.

    Feature Photo by Adrien on Unsplash


    What invention helps you juggle the chaos of working motherhood and homesteading life? Share your must-have tool or favorite homestead app in the comments below!

    If this resonated with your own mix of work calls, garden chores, and bedtime stories, please like this post. Share it with another mom trying to balance homesteading and real life.

    Loved this? Subscribe for weekly homesteading tips:

    Next Read: How Teams + Chickens Power My Work-from-Home Mom Life

  • Life Lessons from Hard Seasons: Motherhood, Drought, and Growing Community

    Life Lessons from Hard Seasons: Motherhood, Drought, and Growing Community

    Daily writing prompt
    How do significant life events or the passage of time influence your perspective on life?

    Life Lessons from Seasons of Change

    Life’s big shifts and slow seasons have humbled me more than I ever expected. These hard seasons have become some of my deepest life lessons.

    When I was younger, I believed effort alone could fix anything. If plans fell apart, I figured someone just wasn’t trying hard enough—or doing things the right way—maybe even me. There was real arrogance in that. I thought sheer willpower could bend the world to my plans.

    What a Drought Taught Me About Letting Go

    Then came the hard stops: moments no amount of grit could move. A garden lost to drought after I had my first child taught me that lesson faster than any sermon.

    No extra watering, no wishing, no late-night worrying brought back the harvest. That loss showed me surrender—not as giving up, but as meeting reality honestly and carrying only what’s mine. I still remember the cracked soil under my hands and the quiet ache of knowing this hard season of motherhood wasn’t mine to fix with effort alone.

    Finding Balance in Parenting and Daily Chaos

    These days, when chaos and noise fill the house or the coop, I pause instead of pushing harder. “What’s mine to carry?” has become a quiet mantra in these hard seasons of parenting.

    Boundaries, deep breaths, even tears—they build me back stronger. And honestly, I need those reminders often. These everyday moments are teaching me life lessons from the garden and the home, one small surrender at a time.

    Building Community Through Grace and Compassion

    Love feels different now, too. Gentler. I see the hidden weight in others—a neighbor worn thin, another parent stretching through a long week—and grace comes quicker.

    Community grows in those moments when compassion replaces judgment. Some days that looks like sharing a meal. Other days, it’s just listening without trying to fix. In their own way, these conversations are building community in hard times, one honest story at a time.

    Growing Through Time, Trust, and Faith

    Time weaves it all together—naivety to trust, effort to faith. The seasons remind me that everything sprouts, fades, and returns in its own time, even in our hard seasons of life.

    My job is to show up faithfully—to tend what I can, raise my kids with patience, and keep building a life that roots deeply in love and community. These are the life lessons from hard seasons that shape how I move through the world now.

    Feature Photo by Natalia Gasiorowska on Unsplash


    How have your hard seasons changed you? I’d love to hear how time has softened or strengthened your own soil—share in the comments below.

    If this resonated with you, please like and share this post so it can reach another tired parent or neighbor who needs a gentler story today.

    Loved this? Subscribe for weekly homesteading tips:

    Next Read: “The chore that never gets done (and Why that’s ok)” → https://homesteadsustainably.com/the-chore-that-never-gets-done

  • How to Start Onion Seeds Indoors: Easy Winter Gardening for a Strong Spring Harvest

    How to Start Onion Seeds Indoors: Easy Winter Gardening for a Strong Spring Harvest

    Disclosure: This post contains Amazon affiliate links. If you purchase through these links, I may receive a small commission at no additional cost to you. I only recommend products our family actually uses and finds helpful in the garden or kitchen. Thank you for supporting Practical Homesteading—it helps me keep sharing our stories of growing food, raising kids, and building community.


    In my last post, I wrote about planting onions with my son—the quiet winter ritual that reminds me how growth begins long before it’s visible. Today, I’m sharing our simple process so you can start your own onion seeds, too. It’s an easy, rewarding way to bring some green life into the cold months.

    1. Start early.
      Begin about 10–12 weeks before your last expected frost. Here in the Midwest, that usually means late January or early February.
    2. Choose the right varieties.
      Long‑day onions, such as ‘Yellow Ebenezer’ or ‘Red Wing’, do best in northern climates where summer days are long. Southern gardeners should look for short‑day types like ‘Texas Early Grano’.
    3. Prepare containers and soil.
      Reuse shallow berry cartons or seed trays (Amazon affiliate link)—just make sure they have drainage holes. Fill them with a light, fine seed‑starting mix about two inches deep. Place the tray on a cookie sheet or shallow pan to catch water.

      Lay a paper towel underneath the tray and moisten it. The towel helps distribute water evenly so moisture wicks up through the soil. Repeat until the mix feels uniformly damp but not soggy.
    4. Sow the seeds.
      Sprinkle seeds evenly across the surface. If you prefer precise spacing—and an easier time separating seedlings later—use tweezers to place them individually.
    5. Provide warmth and cover.
      Cover the tray with cling wrap or a clear plastic bag to retain moisture. Keep the setup warm, around 65–70°F, until you see seedlings poking through. A seed‑starting heat mat (Amazon affiliate link) helps maintain steady warmth.

      Once germination begins (after 7–10 days), remove the cover and move the tray beneath a grow light (Amazon affiliate link) or into a sunny south‑facing window for 12–14 hours per day.
    6. Water and trim.
      Continue watering from below using the same paper‑towel technique. When the soil surface begins to dry, add a bit of water to the tray. Trim tops to about three inches once a week—this strengthens the stems and encourages root growth. Bonus: the cuttings are delicious! My son loves snacking on them fresh.
    7. Harden off and transplant.
      When seedlings reach 6–8 inches tall and the soil outdoors can be worked, begin hardening them off. Gradually expose them to outdoor conditions for about a week, then plant them four inches apart in rows.

    The seeds are small. I used a tweezers to carefully place each one.
    Planted, with the paper towel trick underneath to wick the excess water evenly throughout the bottom.
    I used a plastic garbage bag as a moisture trap until the sprouts started poking through.
    You can use old strawberry containers to plant in too, I have a layer of fabric on the bottom so the soil didn’t fall through.

    By late spring, those tiny green shoots will have grown into sturdy plants ready to feed your family—and perhaps your neighbors, too. Sharing a meal of homemade French onion soup with loved ones is one of my favorite ways to grow community as well as food.

    Here’s to green shoots, patience, and the small beginnings that nourish far more than we expect.


    🌱 Enjoyed this guide? Let me know how your onion seedlings are coming along in the comments below!
    💬 Share this post with a friend who’s dreaming of spring gardening.
    ❤️ Subscribe to get my newest posts on growing food, raising kids, and building community—straight to your inbox every Thursday and Sunday.

    Related Posts

  • The Scariest Button I Click as a Homesteading Mom Blogger

    The Scariest Button I Click as a Homesteading Mom Blogger

    What’s the thing you’re most scared to do? What would it take to get you to do it?

    I’ve been writing online for nine months, and you’d think the fear would have faded. But every time I hover over “Publish,” my heart still skips. It’s funny — no matter how many posts I write, that little flash of fear never really goes away.

    The Scariest Button I Click

    “Publish” on my most vulnerable stories.

    I can talk all day about raising kids, growing food, and finding our rhythm in community. I’ve shared about my postpartum struggles and other tender seasons because I want other moms to know they’re not alone. That kind of openness feels easier now—but there are deeper stories I haven’t shared yet. The ones that changed me, stretched me, and still make my stomach knot when I think about putting them out there.

    The Drafts That Wait

    Some of those stories sit in my drafts folder, half‑finished, holding the hardest moments—the times that tested my faith, my patience, and my sense of self. I know sharing them might help someone else, but I still hesitate. I worry about being misunderstood, about saying too much, about people turning away. But I also know that the most meaningful connections grow when we show up honestly, even when it scares us.

    What It Would Take

    • A clear why: Remembering that if one person feels seen, the fear is worth it.
    • Gentle accountability: Friends who nudge me to keep showing up.
    • Boundaries: Knowing which parts of my story I can hold close.
    • Small practice: One honest sentence at a time, letting courage build slowly.

    Growing Braver

    The fear never really leaves. But each time I hit “publish,” I feel a little steadier, a little stronger. I see that courage isn’t a single leap—it’s the quiet, everyday choosing to keep growing, even when it’s uncomfortable. Maybe that’s what real community is built on: showing up with our full selves, mess and all, and finding we’re not alone after all.

    Feature Photo by yousef samuil on Unsplash


    If you’re comfortable, tell me one area where you’re trying to be braver this year.

    If this story made you feel a little less alone, share it with a friend who might need it too. Better yet, invite them over for coffee and a real conversation. Subscribe for more reflections on growing food, raising kids, and building community—new posts every Sunday and Thursday.

    Related Posts

    The Courage to Belong

    For as long as I can remember, I wore independence like a suit of armor: polished, impenetrable, and heavy. I believed that refusing help was a sign of strength; until, one winter night, my newborn son cracked that armor wide open. I was sitting on the cold living room floor, cradling him against my chest,…

    Keep reading